

Your railway layout should be a personal signature, yet most off-the-shelf locomotives make it look like every other display in the country. It's frustrating when you've spent months on scenery only to have a mass-produced engine break the immersion. You likely feel that the mainstream market ignores the unique charm of narrow gauge prototypes, or perhaps you're worried that kitbashing model locomotives might end in an expensive mistake. We understand that the leap from ready-to-run models to bespoke builds feels daunting. While we don't manufacture the internal motors, we offer a professional solution through high-quality 3D-printed resin kits designed for simple assembly on proven commercial chassis.
In this guide, you'll discover how to move beyond identical models and create a locomotive that reflects your own craftsmanship. We'll show you how to pair our OO9, GN15, and O-16.5 kits with reliable power units from brands like Kato or Graham Farish. By the end of this article, you'll have a clear roadmap for building a professional-looking engine that stands out on any layout. It's time to take pride in a fleet that no one else can buy off a shelf.
Key Takeaways
- Understand the distinction between standard Ready-to-Run models and the creative freedom offered by bespoke, kit-built narrow gauge locomotives.
- Discover why scales such as OO9 and GN15 provide the ideal canvas for freelance designs and unique industrial prototypes.
- While we do not supply motors, this guide explains how to successfully pair 3D-printed body kits with reliable commercial chassis when kitbashing model locomotives.
- Learn professional techniques for preparing resin components and applying custom liveries to achieve a high-quality, workshop finish.
- Explore how Narrow Minded Railworks kits for OO9, GN15, and O-16.5 scales bridge the gap between complex scratch-building and mass-produced models.
Defining Custom Model Railway Locomotives: Beyond the Box
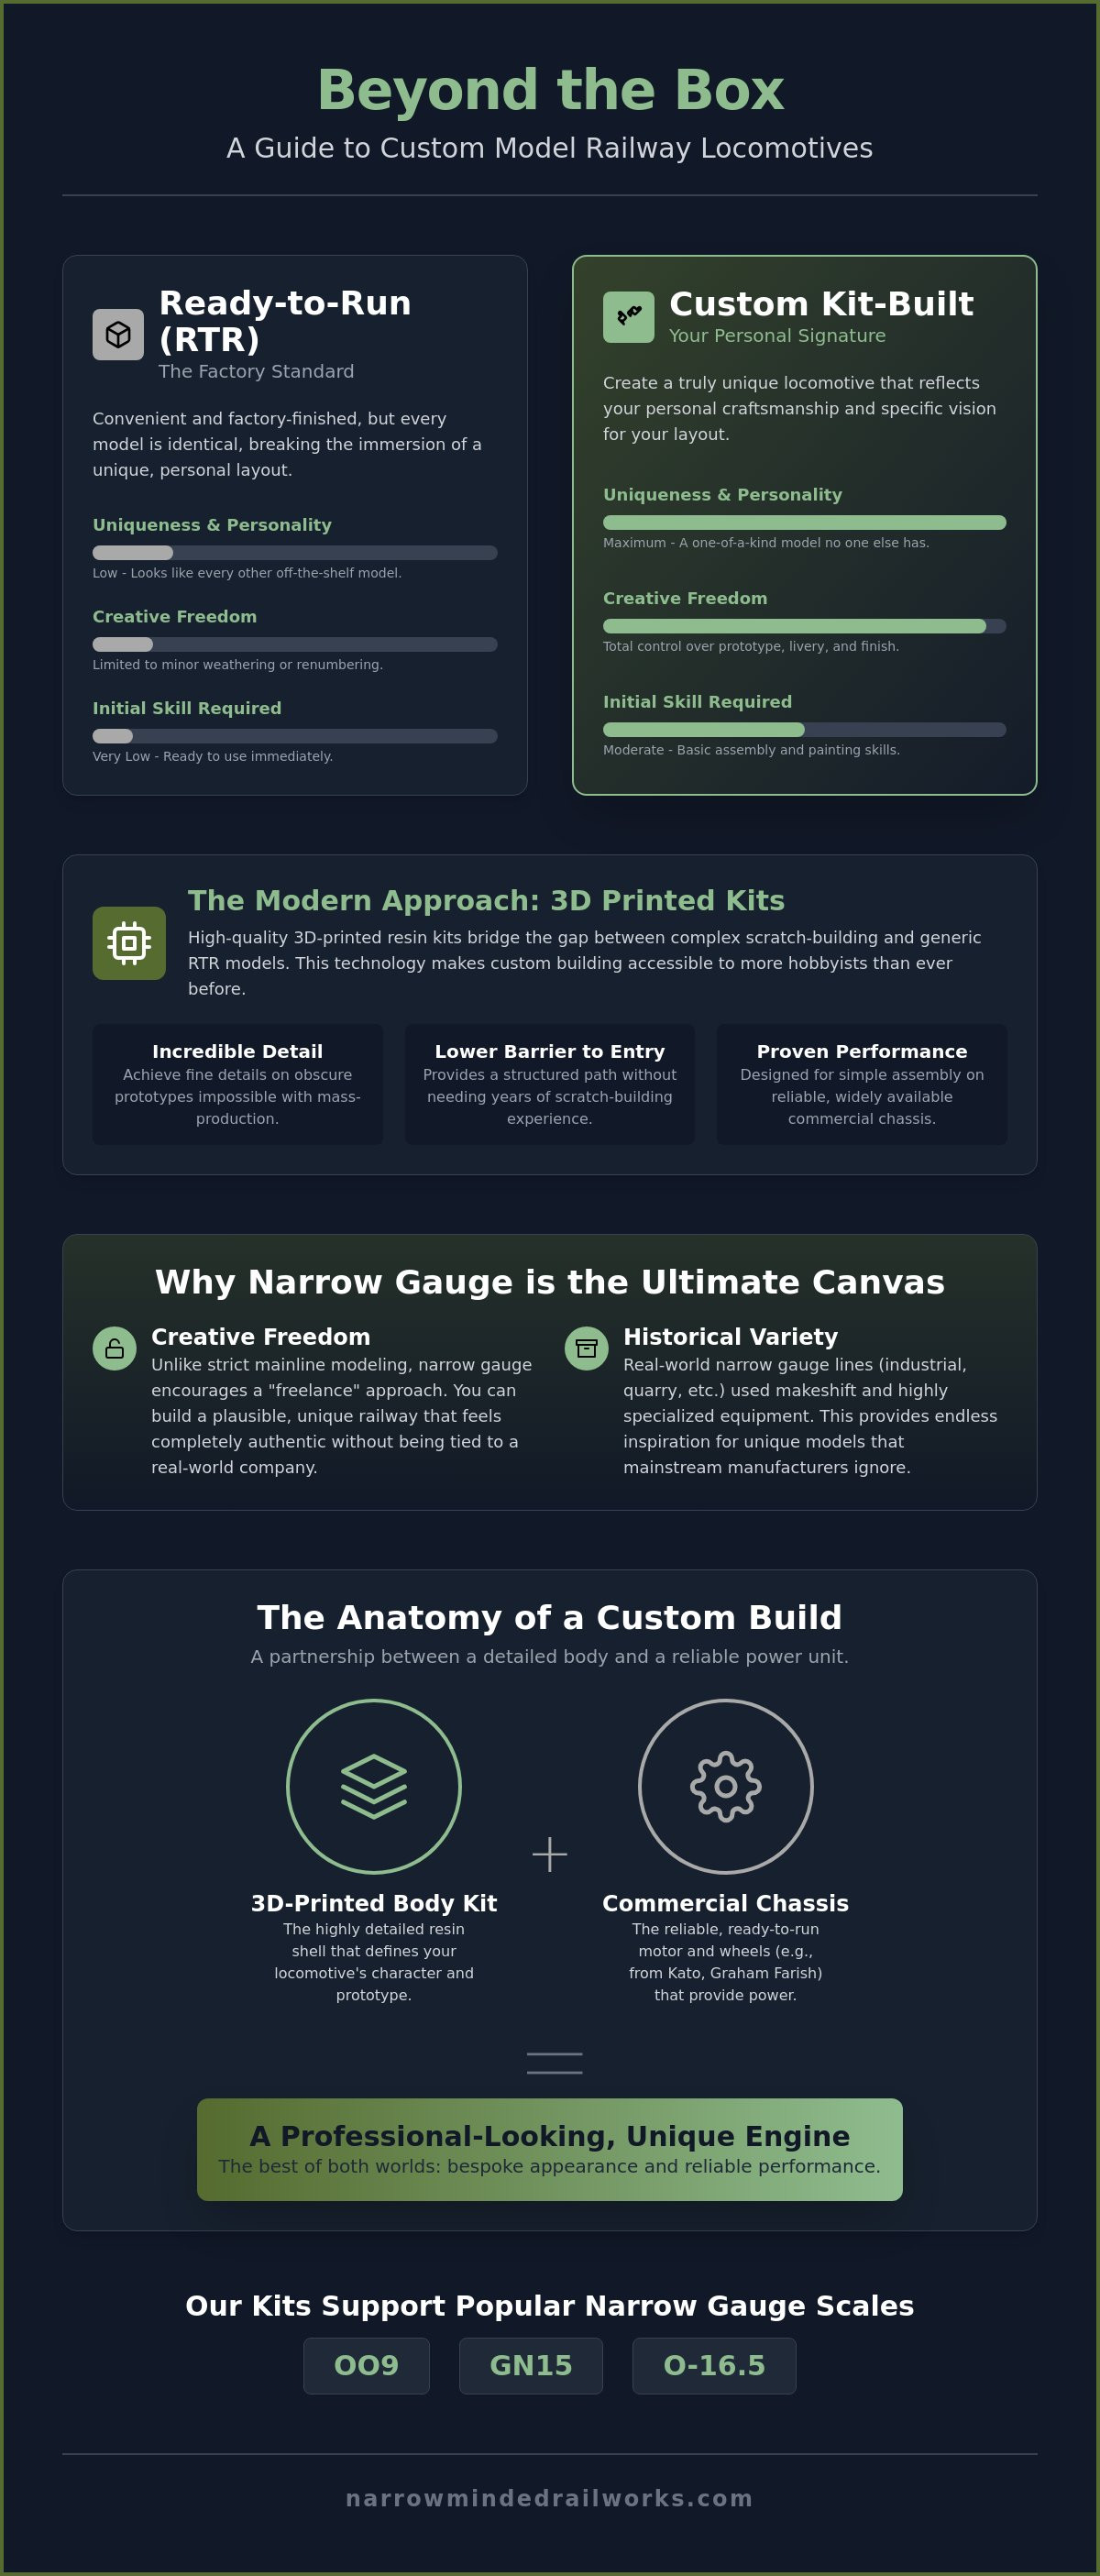
A standard model railway layout often begins with a "Ready-to-Run" (RTR) locomotive. These factory-finished models are convenient, but they often lack the distinct personality found on real-world narrow gauge lines. True customisation moves beyond the constraints of mass production. It allows you to represent specific industrial history or your own freelance vision. For many in the hobby, What is Kitbashing? refers to the creative process of adapting parts to build something unique. Kitbashing model locomotives allows you to combine various components to create an engine that isn't available in a shop. While it's true that modifying an expensive factory engine can feel risky, starting with a dedicated body kit provides a safer, more structured path to a professional result.
Custom building sits at the very heart of the narrow gauge community. Because narrow gauge lines were often improvised and used whatever equipment was available, their locomotives rarely followed a single standard. This historical variety makes kitbashing model locomotives a rewarding pursuit for those who value accuracy. You aren't just buying a toy; you're engaging in a tradition of personal craftsmanship. By choosing a kit, you gain access to obscure prototypes that mainstream manufacturers wouldn't find profitable to produce. It's a cost-effective way to build a fleet that carries a level of detail and character that factory models simply cannot match.
To better understand this concept, watch this helpful video showing the process in action:
Customised RTR vs. Custom Kit-Building
It's helpful to understand the different levels of customisation. RTR customisation usually involves detailing an existing engine. You might add weathering, change the number, or swap out small fittings. It's a great starting point, but the underlying shape remains identical to everyone else's model. Kit-building is different. You start with a raw body shell and pair it with an independent motor unit. This approach gives you total control over the locomotive's identity. If your layout requires a specific industrial diesel or a narrow gauge steam engine that never saw a mass-market release, kit-building is the most effective solution.
The Rise of 3D Printed Custom Kits
Modern technology has changed the hobby. Traditional plastic injection moulding is expensive and requires high sales volumes to be viable. In contrast, professional 3D-printed resin components allow for incredible detail on even the most obscure prototypes. Resin printing provides a smoother finish and finer parts than older techniques. While we don't supply the internal motors, our kits are designed to fit widely available chassis from brands like Kato or Graham Farish. This 3D printing revolution has lowered the entry barriers for custom locos by providing high-fidelity parts that once required years of scratch-building experience to create.
Why Narrow Gauge is the Ultimate Canvas for Customisation
Narrow gauge modelling provides a unique level of creative freedom that standard gauge often lacks. While mainline modelling usually requires strict adherence to specific railway companies and timetables, narrow gauge allows for a "freelance" approach. You can build a plausible, working railway that never existed in reality but feels entirely authentic. To understand the foundations of these systems, you might find our guide on What is a Narrow Gauge Railway? useful. This flexibility is a primary reason why many modellers are moving toward bespoke builds in 2026.
The quirky nature of industrial and quarry prototypes in the UK is a major draw for the hobbyist. From North Wales slate quarries to Lincolnshire potato railways, these lines often used makeshift or highly specialised equipment. This historical variety is exactly why kitbashing model locomotives is so prevalent in this niche. You aren't limited by what a major manufacturer decides to produce for the mass market. Organizations like the National Model Railroad Association help preserve this rich history, but the physical models on your layout often rely on your own individual craftsmanship. If you're looking to start your own project, our OO9 and GN15 kits offer a professional starting point for your custom fleet.
OO9 Scale: Big Detail in Small Spaces
OO9 is currently the most popular narrow gauge scale for custom builders in the UK. It represents narrow gauge prototypes running on 9mm track, which is the same gauge as N scale. This creates a practical solution for the modeller: you can use reliable, mass-produced N gauge chassis to power highly detailed 4mm scale bodies. It's a perfect entry point for kitbashing model locomotives because it combines the reliability of modern mechanisms with the character of larger-scale detailing. For those ready to begin, we've outlined how to select Your First OO9 Loco Kit.
GN15 and Large Scale Customisation
If you prefer a larger scale but have limited room, GN15 is an excellent choice. This scale models 15-inch gauge railways in 1:24 scale, running on standard 16.5mm (OO/HO) track. It allows for incredible detail and "minimum space" layouts that still feel substantial. The advantage here is the ability to use robust OO gauge chassis as the power plant for your custom builds. It's an accessible way to experience large-scale modelling without needing a garden-sized space. You can learn more about this fascinating niche in our guide to Getting Started in GN15 Scale.
The Anatomy of a Custom Build: Body and Chassis Partnership
Building a custom locomotive is a collaborative effort between a high-detail shell and a reliable motor. While we provide the professional 3D-printed body kits, we don't manufacture the internal mechanisms. This separation allows you to select a power unit that matches your specific performance needs and budget. When kitbashing model locomotives, the first step is always identifying the era and style of your railway. Whether you're modelling a 1920s quarry line or a modern industrial site, the body must match the historical context of your layout. It ensures the final result feels like a cohesive part of your miniature world.
Once you've chosen a prototype, the next stage involves selecting a compatible commercial chassis. We design our kits to fit specific, widely available mechanisms to ensure your finished model runs as well as it looks. Before you start assembly, it's vital to prepare the resin body by checking for any internal support marks that might obstruct the motor. Ensuring smooth running requires careful attention to moving parts, such as rods or wheels, to prevent friction against the custom shell. Taking the time to verify these clearances now prevents mechanical failures once the model is painted and finished.
Sourcing the Right Chassis
We don't sell motors directly, but we recommend specific commercial units because they offer proven reliability. For OO9 projects, mechanisms from Kato or Graham Farish are often the industry standard. You can find these donor units at most UK model shops or through specialist online retailers. It's a sensible practice to test your chassis on a piece of track before fitting the kit. If the mechanism has a stutter or electrical fault, it's far easier to fix or return before you've permanently modified it for your project. This approach guarantees that your bespoke locomotive has a dependable heart.
Fitting and Securing the Body
Securing a resin body to a plastic or metal chassis requires a careful approach. While some modellers prefer a friction fit for easy removal, others use small amounts of adhesive or bespoke mounting brackets. You must maintain access for routine maintenance and lubrication; a permanently glued body makes simple repairs impossible. If you plan to use Digital Command Control (DCC), check the internal clearances of the body kit early in the build. While we don't sell DCC systems, we understand that many modellers in 2026 require space for decoders and wiring within their custom builds. This proactive planning ensures that kitbashing model locomotives results in a reliable, working engine rather than a static display piece.
Achieving a Professional Finish on Your Custom Loco
The final identity of your locomotive depends entirely on the quality of its finish. A common challenge when kitbashing model locomotives is transitioning from a raw resin shell to a model that looks like it's made of heavy iron and steel. While 3D printing allows for complex shapes that traditional kits cannot match, the process can leave tiny support marks or subtle layer lines. You can resolve these issues through a structured approach to surface preparation. By treating the resin with the same care as a brass or plastic model, you ensure that your custom engine looks like a professional product rather than a home-made experiment.
Once your body is cleaned and prepped, you can move on to applying your chosen livery. For a deep dive into the specifics of brush and spray techniques, we recommend reading our guide on Painting 3D Printed Models. A well-executed paint job is the bridge between a collection of parts and a convincing miniature machine. Whether you're aiming for a pristine "out of the works" look or a battered industrial workhorse, the foundation you lay during the priming stage will dictate the final result.
Surface Preparation for 3D Prints
Resin components are exceptionally detailed, but they require specific handling before paint can be applied. You might notice small nibs where printing supports were attached; these can be removed with a sharp hobby knife and a fine-grit sanding stick. If you find visible layer lines on large, flat areas, a light application of a high-build automotive primer can help fill them. While standard model paints are excellent, they don't always adhere well to raw resin. You should always use a dedicated plastic or resin primer first to create a "key" for your topcoat. This proactive step prevents the paint from chipping during later stages of kitbashing model locomotives.
Weathering and Detailing
Narrow gauge locomotives rarely stayed clean for long, especially in industrial or quarry settings. To move beyond a "toy-like" appearance, you can use weathering washes and powders to simulate years of accumulated grime and rust. Focus your efforts on areas where dirt naturally collects, such as the chassis, around the fuel filler, and across the roof. Adding small details like handrails, cab crew figures, and realistic couplers will further enhance the scale effect. After you're satisfied with the look, apply a coat of matt or satin varnish. This seals the weathering layers and protects your hard work from fingerprints during operation on your layout. If you're ready to put these techniques into practice, you can browse our full range of locomotive kits to find your next project.
Starting Your Custom Fleet with Narrow Minded Railworks
Starting a custom fleet is a significant step for any narrow gauge enthusiast. We recognize that while you want a unique layout, you might not have the time or tools to scratch-build every component from raw materials. Our 3D-printed body kits offer a professional solution, providing the high-fidelity detail of a bespoke model with a design that simplifies the assembly process. We focus on OO9, GN15, and O-16.5 scales, ensuring that modellers across different interests can find a prototype that fits their specific era. By kitbashing model locomotives using our resin shells, you bridge the gap between mass-produced engines and one-of-a-kind masterpieces.
Our design philosophy is built on transparency and helpfulness. We don't sell the internal motors or chassis, but we do provide clear compatibility lists for popular units like Kato or Graham Farish. This ensures you aren't left guessing which mechanism will fit your new body shell. For our 2026 releases, we've refined our printing processes to offer even crisper detail, making the finishing and painting stages more efficient for the builder. Whether you're a seasoned veteran or new to the hobby, we're committed to providing the technical support you need to complete your project with confidence.
Explore Our Range of Kits
A cohesive layout requires more than just a single locomotive. To help you build a complete scene, we offer a range of wagon kits and scenery items that match the scale and aesthetic of our engines. If you're looking for something specific, such as a street-running industrial engine, you might find our A Modeller’s Guide to Tram Locos particularly helpful. These niche prototypes are the perfect candidates for kitbashing model locomotives, as they allow you to hide a variety of chassis under a distinctive tramway skirt. By matching your locomotive with period-correct rolling stock, you create a believable miniature world that stands out from the crowd.
Join the Custom Building Community
The joy of custom building is often found in sharing the results with others who appreciate the craft. We encourage all our customers to showcase their finished builds on social media and dedicated modelling forums. Seeing how different modellers apply their own liveries and weathering techniques provides invaluable inspiration for the entire community. It's rewarding to see a kit transformed by personal touches and individual craftsmanship. If you ever hit a snag during your build, we're here to offer advice on everything from resin preparation to chassis fitting. It's time to move beyond the box and start your bespoke journey today. You can browse our full range of custom locomotive kits here.
Elevating Your Layout with Bespoke Craftsmanship
Transitioning from standard ready-to-run models to bespoke builds requires a shift in mindset, but the creative results are unmatched. You've explored how narrow gauge prototypes provide the perfect canvas for unique industrial designs and how the partnership between a 3D-printed shell and a commercial chassis creates a reliable, high-performance engine. While we don't sell the internal motors, we provide the professional-grade components that make the building process accessible and rewarding. It's about moving beyond the constraints of mass production to create something truly individual, much like how a bespoke kitchen design Northwich transforms a standard living space into a tailored reflection of the owner's taste.
Master the art of kitbashing model locomotives to build a fleet that reflects your specific interests and skills. Our kits are designed by modellers, for modellers, focusing on the specialist OO9 and GN15 scales that define the narrow gauge community. With worldwide shipping available, you can access these detailed resin prints regardless of where your workshop is located. These components ensure that your custom locomotives carry a level of fine detail that factory models simply cannot replicate.
Shop our range of custom narrow gauge locomotive kits and start creating a layout that stands apart from the rest. We look forward to seeing the unique engines you bring to life on your tracks.
Frequently Asked Questions
What is the difference between a custom locomotive kit and a ready-to-run model?
A ready-to-run (RTR) model is factory-finished and identical to thousands of other units. A custom locomotive kit provides a raw 3D-printed body shell that requires you to assemble, paint, and fit it to a mechanism. While RTR models offer convenience, kits allow for unique prototypes and personal craftsmanship that mass-produced models can't match.
Do your custom locomotive kits include the motor and chassis?
We don't sell motors or chassis as part of our kits. Our focus is on providing high-detail 3D-printed resin bodies that serve as a professional starting point for your project. We design these shells to fit specific, widely available commercial mechanisms, which ensures your finished engine has a reliable and proven power plant.
Which chassis do I need for a Narrow Minded Railworks OO9 kit?
Compatibility depends on the specific body shell you choose for your layout. Many of our OO9 designs are optimized for Kato 11-103 or 11-109 chassis, while others may require Graham Farish N gauge mechanisms. We provide a clear compatibility list for every kit we produce to help you source the correct donor unit from your preferred UK model shop.
Is it difficult to paint 3D-printed resin locomotive bodies?
Painting resin isn't difficult if you follow a structured preparation process. Raw resin can be resistant to some paints, so you should always apply a high-quality primer designed for plastic or resin first. Once the primer has cured, you can use standard model acrylics or enamels to achieve a streak-free finish that brings out the fine 3D-printed details.
Can I fit DCC sound to a custom narrow gauge locomotive?
We don't supply Digital Command Control (DCC) systems, but many of our kits are designed with enough internal clearance for small decoders. When kitbashing model locomotives in smaller scales like OO9, space is always at a premium. You should check the internal dimensions of the body and the size of your chosen speaker before you begin the assembly process.
How do I remove support marks from my 3D-printed loco kit?
You can remove any remaining support nibs using a sharp hobby knife and fine-grit sanding sticks, typically between 400 and 600 grit. While we take care to clean our prints before shipping, a final light sand ensures a perfectly smooth surface. This proactive step is essential for kitbashing model locomotives if you want to avoid imperfections showing through your final paint coat.
Do you offer a custom painting or weathering service for your kits?
We don't provide custom painting or weathering services for the kits we sell. Our goal is to empower you to develop your own modelling skills and take pride in your personal craftsmanship. We offer various online guides and technical advice to help you achieve a professional-looking industrial finish in your own workshop.
Where can I find instructions for assembling my custom locomotive?
Digital assembly guides are available through our website for our current range of OO9, GN15, and O-16.5 kits. These instructions focus on how to prepare the resin body and secure it to the recommended commercial chassis. We prioritize clear, transparent guidance to help you move from a collection of parts to a working locomotive with confidence.