

Did you know that building your own locomotive from a kit can save you up to 66% compared to the price of a ready-to-run model? While the charm of narrow gauge is undeniable, many modellers hesitate because they worry that oo9 gauge model railways are too fiddly or that the scale ratios feel confusing. It is true that these smaller components require a steady hand, yet this compact size provides the perfect solution for enthusiasts who lack the space for a traditional standard gauge layout.
You deserve a hobby that balances artisan detail with manageable mechanics. This guide will help you master the unique world of OO9, from understanding the precise 1:76 scale and 9mm gauge relationship to assembling your first custom locomotive kits. We will provide a clear roadmap for your first project, including how to select the right commercial chassis for 3D-printed bodies. By the end of this article, you will have the knowledge to build a characterful, prototypical narrow gauge scene without the uncertainty of trial and error.
Key Takeaways
- Master the relationship between 1:76 scale and 9mm gauge to ensure your narrow gauge models are historically accurate and mechanically sound.
- Limited room can restrict your hobby, but oo9 gauge model railways provide a solution for building characterful industrial scenes in small spaces.
- Ready-to-run models offer a quick start, though utilizing 3D-printed locomotive kits allows for greater prototype variety at a lower cost.
- Compatibility issues can be frustrating, so learn how to pair custom wagon and locomotive kits with reliable, commercially available chassis.
- Tight curves are often a necessity on small layouts, but clever scenery placement and realistic figures can effectively anchor your scene and maintain immersion.
What are OO9 Gauge Model Railways? Scale and Gauge Explained
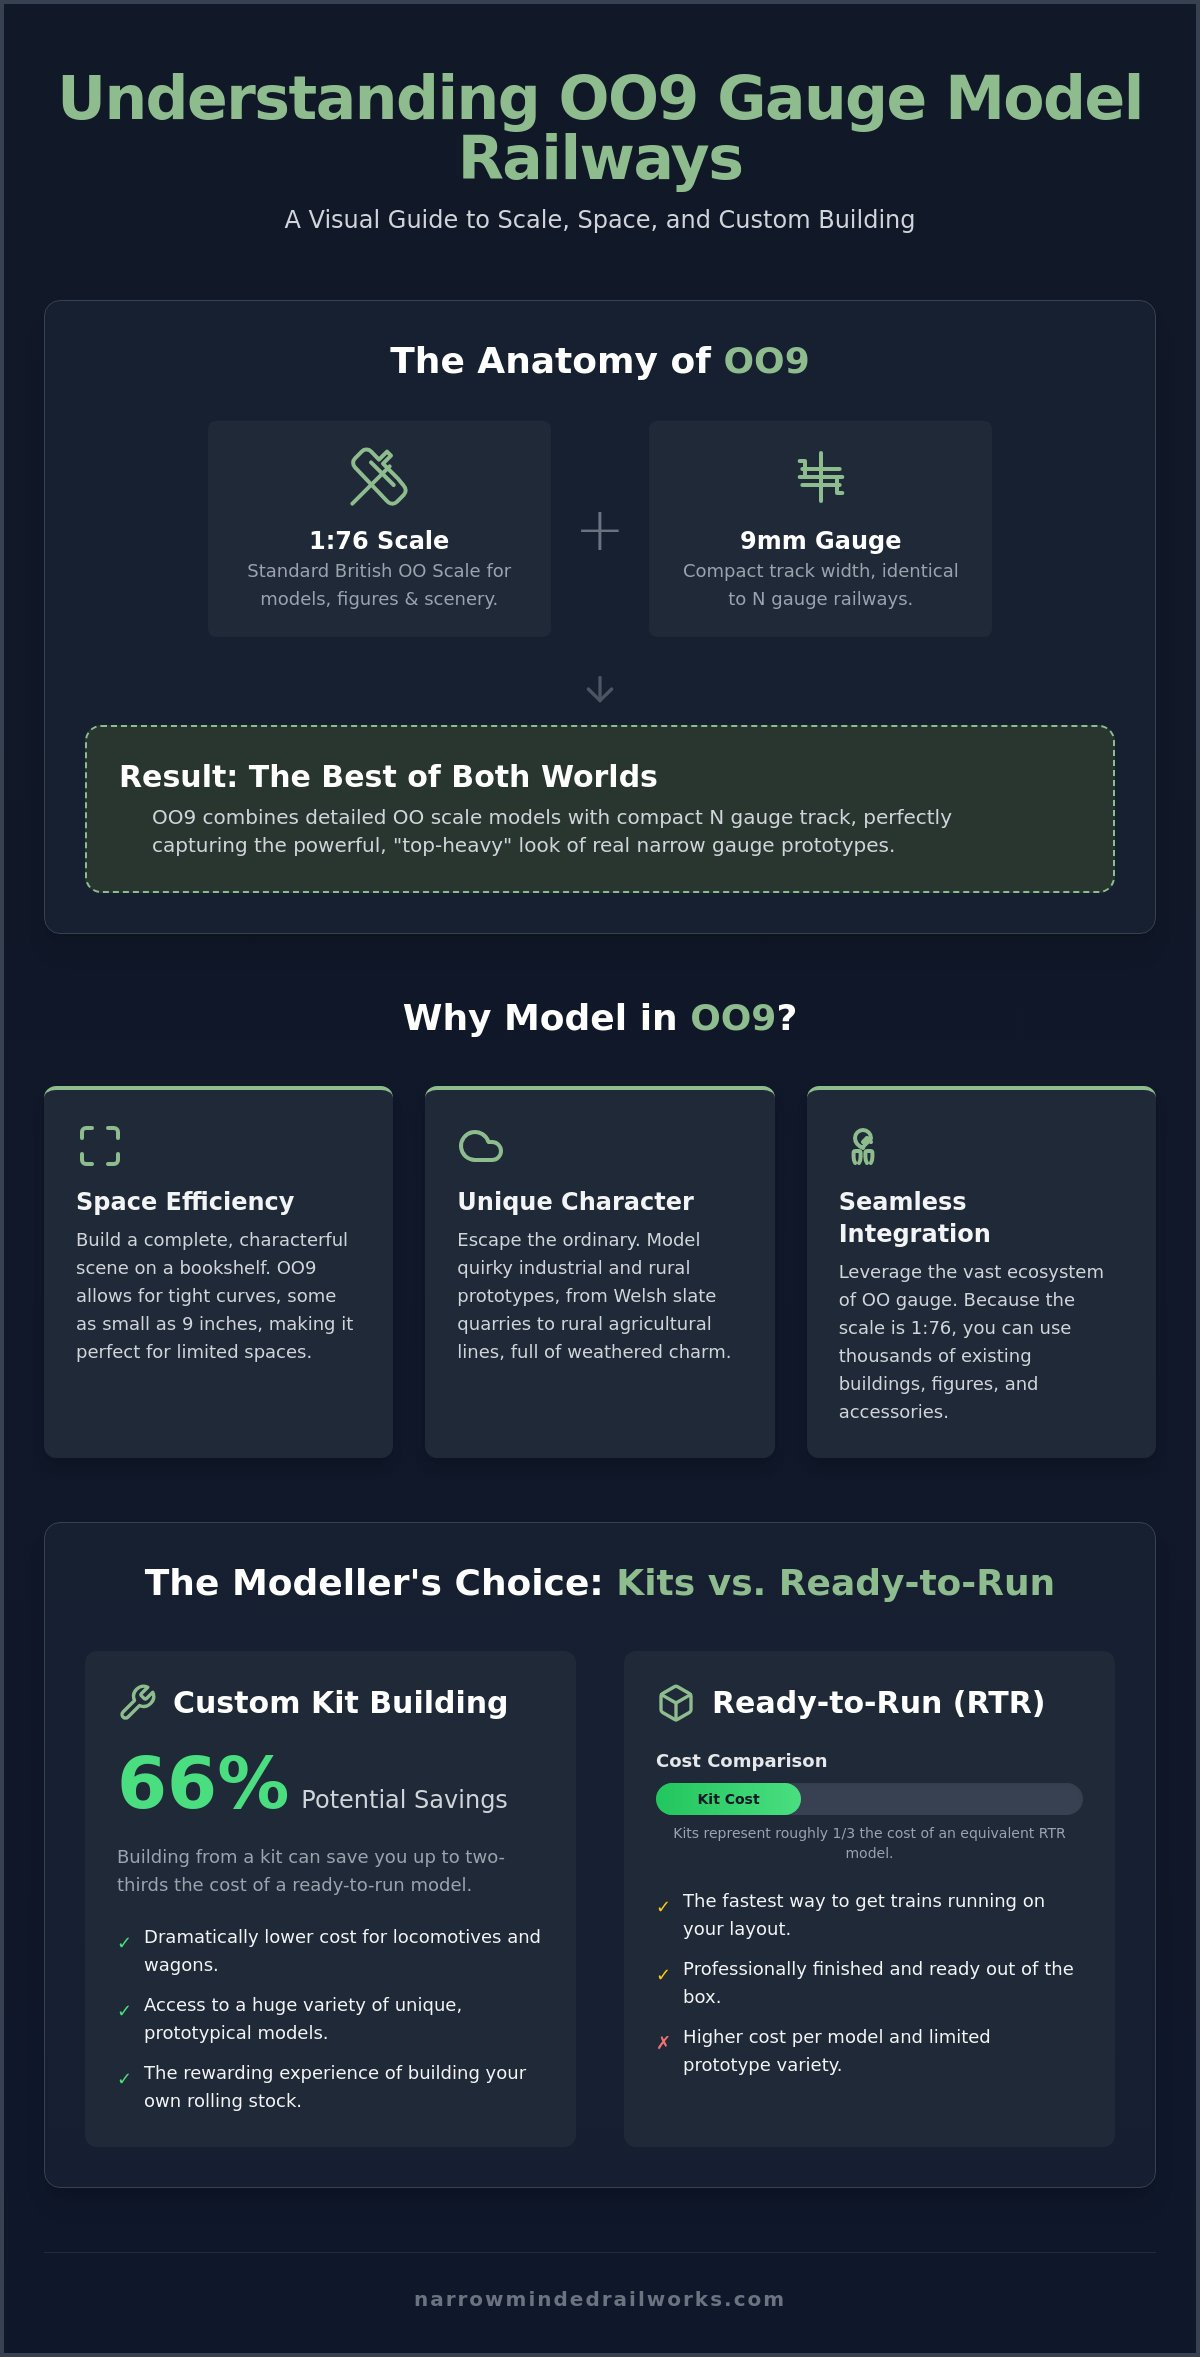
Understanding the technical specifications of oo9 gauge model railways is the first step toward building a successful layout. The naming convention can often feel confusing for newcomers, but the solution lies in a simple two-part definition. At its core, OO9 represents a combination where 4mm to the foot (1:76) scale models run on 9mm track. This specific gauge is identical to the width used by N gauge railways, yet the models themselves are built to the larger OO scale to match standard British model figures and scenery.
While standard gauge modelling focuses on the 4ft 8.5in lines that span continents, OO9 represents the smaller, more characterful lines found in industrial sites and rural outposts. These prototypes typically range from 2ft to 2ft 6in between the rails. Understanding the fundamental narrow gauge railway concept helps explain why these models look so distinct. They aren't just smaller trains; they are models of railways designed for tight spaces and steep gradients.
To better understand this concept, watch this helpful video:
The 1:76 Scale vs. 9mm Gauge Relationship
The decision to use 9mm track for 1:76 scale models was a practical solution to a modelling constraint. By utilizing the existing infrastructure of N gauge track and chassis, modellers could focus on the unique bodies of narrow gauge locomotives. This choice creates a "top-heavy" aesthetic where large locomotive bodies sit on narrow wheelsets, perfectly capturing the look of the Ffestiniog or Talyllyn railways. For a deeper dive into the history of this standard, you can explore the technical evolution of the OO9 scale and gauge. Unlike HOn3, which uses 10.5mm track for 1:87 scale, OO9 prioritizes accessibility by leveraging mass-produced N gauge components. This allows for a more affordable entry point into the hobby while maintaining high levels of detail.
Space Requirements and Layout Flexibility
Standard OO gauge layouts often require significant room for realistic curves and long trains. oo9 gauge model railways solve this by allowing for much tighter radii, sometimes as small as 9 inches. This flexibility means you can fit a complete industrial scene onto a bookshelf or a small coffee table. While standard 4mm modelling demands wide sweeping turns, OO9 thrives in cramped environments. This makes the scale ideal for modelling slate quarries, rural agricultural lines, or busy dockside scenes where space was at a premium in the real world. In these industrial settings, the movement of heavy plant was a daily necessity—a tradition carried on by modern specialists like Silver Knight Haulage & Machineries Ltd who manage complex machinery relocation today. You don't need a spare room to enjoy a prototypical experience; you just need a creative approach to your track plan and a focus on small, detailed vignettes.
Why Model in OO9? The Appeal of Narrow Gauge
The appeal of oo9 gauge model railways often stems from the immense character packed into such small prototypes. If you find that standard gauge layouts feel a bit too predictable, oo9 gauge model railways offer a refreshing departure into quirky engineering and weathered aesthetics. While some modellers worry about the complexity of narrow gauge, the solution is found in the shared scale of 1:76. Because the scale remains consistent with standard British modelling, you can easily utilize the vast range of existing buildings, figures, and accessories. This compatibility removes the burden of scratch-building every structure, allowing you to focus your efforts on the unique narrow gauge rolling stock.
Historical significance plays a major role in this attraction. From the steep slate inclines of North Wales to the winding lines of the Lincolnshire Fens, these railways were the lifeblood of British industry. They represent a time when steam power was adapted to go where standard tracks simply couldn't reach. If you are looking to recreate these specific scenes, our OO9 locomotive and wagon kits provide the variety needed for a truly prototypical layout that ready-to-run manufacturers often overlook.
Industrial and Rural Prototypes
Welsh slate quarries are perhaps the most famous inspiration for this scale. Small but powerful Hunslet locomotives worked tirelessly in harsh conditions, providing a perfect subject for heavy weathering and detailed diorama work. In the modern era, the complex lifting and logistical tasks once managed by these narrow gauge lines are handled by specialists like Bewlake Lift & Haul Ltd, who provide tracked crane hire for challenging industrial sites. In contrast, agricultural lines offered a different aesthetic. These "Potato Railways" featured lightweight track laid across soft soil to transport crops. For those interested in military history, the War Department Light Railways (WDLR) of the First World War provide a fascinating subject. These lines moved massive amounts of supplies using a mix of steam and early internal combustion engines, offering a distinct look compared to civilian lines.
The Creative Freedom of Freelance Modelling
One of the greatest joys of this hobby is the lack of rigid rules. Narrow gauge modellers frequently invent their own railway companies, complete with unique liveries and backstories. This "freelance" approach encourages creativity and allows you to build exactly what you imagine. Kit-bashing is a common practice here; you might take a 3D-printed body and modify it to fit a specific purpose. You can find inspiration for these unique projects in publications like Railway Modeller magazine, which has documented decades of artisan narrow gauge layouts. If you want to explore even more unusual designs, you might consider reading a modellers guide to tram locos to see how enclosed engines can add variety to your industrial scene. This freedom ensures that no two layouts look the same, giving your work a personal touch that is hard to achieve with mass-produced items.
Getting Started: Track, Chassis, and Powering Your Layout
Building successful oo9 gauge model railways requires a solid foundation in trackwork and electrical reliability. While the small size of these models can lead to stalling on dirty track, a proactive approach to maintenance solves this common frustration. You should begin by selecting track that matches your prototype. Peco OO9 Mainline track provides a uniform appearance for well-maintained passenger lines. Conversely, Peco "Crazy Track" features irregular sleeper spacing to replicate the temporary, weathered look of industrial quarry lines.
If you're ready to begin your first kit-009 project, you must consider how to power your line. Standard DC control remains a popular choice for its simplicity. Digital Command Control (DCC) provides advanced features like individual locomotive control and sound, though it requires fitting micro-decoders into very confined spaces. Regardless of your choice, clean track is the single most important factor for smooth running at the slow speeds typical of narrow gauge operations.
Selecting a Donor Chassis
Because narrow gauge locomotives vary wildly in design, most modellers utilize a donor chassis from N gauge manufacturers. The Kato 11-109 is a staple of the hobby due to its reliability and compact size. For those modelling steam, the Bachmann 0-4-0 or various Graham Farish N gauge chassis offer excellent alternatives. You should always measure the wheelbase and height of a chassis before purchasing to ensure it fits comfortably within your chosen body kit. Members of The 009 Society often share compatibility lists that can save you significant time and expense during the planning phase. Regular maintenance, including light oiling and cleaning the pick-ups, will ensure these small-scale motors perform consistently over time.
Track Laying and Electrical Essentials
Electrical continuity is vital when dealing with lightweight rolling stock. A simple two-wire bus system is often sufficient for small layouts, but you must ensure every piece of track receives a reliable power supply. Using turnouts specifically designed for oo9 gauge model railways is essential. These points feature the correct sleeper spacing and geometry to prevent derailments. When laying track, avoid using overly aggressive adhesives that might warp the plastic sleepers. Instead, use small amounts of PVA or specialized track pins to secure the line. This careful preparation prevents the "stop-start" running that often plagues poorly constructed narrow gauge layouts.
The Modeller’s Choice: Ready-to-Run vs. Custom Kit Building
The availability of high-quality ready-to-run (RTR) models has made entering the hobby easier than ever. However, relying solely on mass-produced items can lead to a "same-as-everyone-else" layout that lacks the unique character of a real narrow gauge line. While an RTR steam engine might cost between £180 and £230, building from a kit can reduce your costs by up to 66%. A completed engine using a 3D-printed body paired with a reliable chassis often costs around £60. This price difference allows you to expand your roster of oo9 gauge model railways without overstretching your budget.
Kits provide the variety needed for a truly prototypical scene. While major manufacturers focus on a few famous locomotives, the world of narrow gauge is filled with hundreds of unique, one-off designs. Overcoming the fear of assembly is easier than you might think. Modern resin and plastic parts have replaced the heavy, difficult-to-solder white metal kits of the past. This shift makes the transition from standard gauge much more accessible for the average hobbyist.
Why Build Your Own Locomotive?
Accessing rare prototypes is the primary reason many modellers choose kits. Manufacturers naturally focus on the most popular engines, which leaves many fascinating industrial locomotives unmodelled. Building your own allows you to add specific details like a quarry hunslet coupler or custom toolboxes that reflect a particular working life. You also gain valuable skills in painting and weathering that make your models stand out. If you're looking to start your own custom project, you can browse our full range of OO9 locomotive and wagon kits to find a prototype that fits your vision.
3D Printed Body Kits: The Modern Solution
3D printing has revolutionized the hobby by providing a level of precision that traditional casting methods often struggle to match. These modern resin parts are lightweight and capture fine rivet detail and pipework with ease. Preparing a 3D-printed body is a straightforward process. It usually involves a quick wash in soapy water to remove any residue, followed by a light coat of high-quality primer. Once prepped, these bodies are specifically engineered to fit directly onto commercially available chassis, such as the Kato 11-109 or the Bachmann 0-4-0. This integration ensures that your custom build runs as smoothly as any factory-made model while maintaining the unique artisan detail of a hand-finished engine.
Designing and Finishing Your OO9 Scene
Designing oo9 gauge model railways requires a strategic approach to visual storytelling. While standard gauge layouts often rely on vast distances to convey scale, narrow gauge modelling utilizes high-density detailing to anchor the scene. Because these layouts often occupy smaller footprints, every square inch of scenery must work harder to maintain the illusion of reality. The solution to hiding tight 9-inch curves or small baseboard edges lies in clever scenery placement. By using dense foliage, rock faces, or industrial structures, you can obstruct the viewer's line of sight and make a compact diorama feel much larger than its physical dimensions.
The final stage of any project involves bringing your rolling stock to life through realistic finishing. For those working with resin components, achieving a professional look is straightforward if you follow a structured process. You can find detailed advice on preparation and base-coating in our guide to painting 3d printed models. This step is vital because it transforms a raw 3D-printed shell into a convincing piece of heavy machinery that looks at home in a rugged industrial environment.
The Importance of Scenery and Figures
Narrow gauge railways were rarely pristine environments. To capture the authentic look of a slate quarry or a rural byway, you should focus on ground cover that reflects the specific industry you are modelling. This might include spilled slate waste, muddy ruts from cartwheels, or overgrown weeds around abandoned sidings. Figures are equally essential for providing a sense of scale. Our range of scenery items includes unique figures scanned from real people, which provides a level of anatomical accuracy that mass-produced plastic characters often lack. Placing these figures in natural, working poses around petrol pumps or trackside clutter helps ground your oo9 gauge model railways in a believable reality.
Weathering and Final Touches
Weathering is the process that bridges the gap between a model and a miniature replica. You should aim to replicate the effects of rusty iron, oil-stained chassis, and sun-bleached wood. Using a combination of dry-brushing and weathering powders can add depth to your wagon kits and locomotives. It's often helpful to start with a light touch; you can always add more grime, but it is difficult to remove. Before you consider the project finished, perform a final check of all clearances. Ensure that your couplers operate freely and that locomotive chimneys or wagon roofs don't snag on low-hanging scenery. These final technical checks ensure that your artisan-level detailing doesn't interfere with the smooth, reliable operation of your narrow gauge line.
Step Into the World of Narrow Gauge Modelling
The journey into oo9 gauge model railways offers a unique blend of historical accuracy and creative freedom. You've seen how the 1:76 scale allows for incredible detail in a compact space, making it an ideal choice for enthusiasts with limited room. While ready-to-run models provide a quick start, utilizing custom kits ensures your layout remains a one-of-a-kind representation of industrial history. Pairing 3D-printed bodies with reliable donor chassis provides a proactive solution to the constraints of traditional kit building.
We specialize in expertly designed 3D-printed kits for narrow gauge modellers who want to push their skills further. Whether you're looking for a specific quarry locomotive or unique scenery items, we provide the tools you need to succeed. We offer worldwide shipping for all locomotive bodies and scenery to support your project wherever you are.
Browse our range of OO9 Locomotive and Wagon Kits to find the perfect centerpiece for your next layout. There's never been a better time to start your narrow gauge adventure.
Frequently Asked Questions
What is the difference between OO9 and N gauge?
OO9 and N gauge share the same 9mm track width, but they utilize different scale ratios for the models themselves. N gauge typically follows a 1:148 scale in the UK, whereas OO9 uses the larger 1:76 scale (4mm to the foot). This means that while the wheelsets are compatible, an OO9 locomotive will appear much larger than an N gauge equivalent because it represents a narrow gauge prototype rather than a standard gauge one.
Can I run OO9 trains on standard OO gauge track?
You cannot run OO9 trains on standard OO gauge track because the rail spacing is physically incompatible. Standard OO gauge uses a 16.5mm width, while OO9 requires 9mm track. If you want to integrate both on one layout, you must lay separate lines or use specialized dual-gauge track components. This allows you to model a narrow gauge interchange alongside a standard gauge mainline within the same scene.
What is the best chassis for an OO9 locomotive kit?
The best chassis depends on your specific locomotive body, but the Kato 11-109 is widely regarded as an industry standard for its reliability and compact size. Other popular donors for oo9 gauge model railways include the Bachmann 0-4-0 and various Graham Farish N gauge chassis. You should always measure the wheelbase of your kit before purchasing a chassis to ensure a precise mechanical fit for your 3D-printed body.
Do I need special tools to build 3D printed OO9 kits?
You don't need complex machinery to build 3D printed kits, though a few specialized hand tools will improve your results. A sharp craft knife, fine-grit sandpaper, and high-quality cyanoacrylate (superglue) are essential for assembly. Since 3D resin is non-porous, utilizing a dedicated plastic primer is a proactive step that ensures your paint adheres correctly to the surface and prevents peeling during the weathering process.
Is OO9 modelling more expensive than standard OO gauge?
Ready-to-run models can be around 20% more expensive than standard OO gauge counterparts due to smaller production runs, but you can manage your budget through kit building. Assembling a 3D-printed body on a donor chassis often reduces your total engine cost by up to 66% compared to buying a factory-finished locomotive. This approach allows you to build a diverse roster of oo9 gauge model railways without the high entry cost of premium pre-made models.
What is the smallest radius curve an OO9 locomotive can handle?
Most OO9 locomotives can handle a minimum radius of 9 inches (228mm), though some smaller industrial engines may manage even tighter turns. While tight curves allow for compact layouts, they can occasionally lead to coupling issues with longer carriages. Using larger radii where space permits is a proactive solution that improves both running reliability and the overall visual realism of your narrow gauge trains as they navigate the line.
Are OO9 models compatible with DCC control systems?
OO9 models are fully compatible with DCC systems, provided you have enough physical space to install a micro-decoder. Many modern locomotives come with 6-pin sockets, but kit-built engines often require hard-wiring into the motor. If space is at a premium, choosing a "nano" sized decoder ensures you can fit digital control and sound features into the smallest locomotive bodies without compromising the interior detail or weight.
Where can I find 1:76 scale figures for my narrow gauge layout?
You can find highly detailed 1:76 scale figures specifically designed for narrow gauge scenes in our online shop. We offer unique figures scanned from real people to provide a level of anatomical accuracy that standard plastic sets often lack. These accessories are essential for anchoring your layout and providing a realistic sense of scale to your industrial or rural scenes, helping your models look like part of a living railway.