

The most expensive ready-to-run model might actually be the least rewarding addition to your narrow gauge layout. While the 2026 releases of 'Alice' and 'Britomart' offer impressive detail, their high price tags and uniform factory finish often lack the unique character found in a hand-built oo9 quarry hunslet kit. It's common to feel restricted by the cost of mass-produced models, yet many modellers hesitate to start a kit build due to confusion over chassis compatibility or fears of visible layer lines on 3D prints.
We understand these technical hurdles and provide a clear path to creating a locomotive that truly belongs on your layout. This guide promises to help you navigate the assembly process, from selecting the reliable Kato 11-109 chassis to achieving a professional, smooth finish on resin bodies. You'll discover how to transform a high-quality body shell into a smooth-running, historically inspired engine. We will explore the essential steps for preparation, painting, and final detailing to ensure your model stands out as a masterpiece of narrow gauge engineering.
Key Takeaways
- Learn how to identify the correct dimensions for Small or Large Quarry classes and select the appropriate donor chassis to power your build.
- Master the techniques for safely removing 3D printing supports and preparing your oo9 quarry hunslet kit for a seamless assembly process.
- Discover why high-quality automotive primers are essential for resin bodies and how to apply authentic industrial liveries for a professional finish.
- Explore ways to customise your locomotive with unique detailing parts to create a model that stands out from standard ready-to-run options.
- Understand the proactive steps needed to ensure smooth running by matching precision 3D-printed bodies with proven motor units.
The Appeal of the Quarry Hunslet in OO9 Scale
The Quarry Hunslet is an enduring icon of narrow gauge modelling. These diminutive engines originated in the late 19th century to serve the rugged slate industries of North Wales. Understanding the Hunslet Engine Company history reveals why they remain so popular today. The manufacturer produced the 'Small', 'Alice', and 'Mainline' classes specifically for the demanding environments of Welsh quarries. In the modelling world, the OO9 scale represents these prototypes at 4mm to the foot, running on 9mm gauge track. This combination allows for incredibly detailed layouts within very small footprints, making the Hunslet a perfect fit for compact dioramas.
While the market has shifted toward high-quality ready-to-run models, the oo9 quarry hunslet kit remains the preferred choice for those seeking a specific identity for their fleet. Historically, modellers relied on heavy white metal castings that were often difficult to clean and glue. Modern resin printing has revolutionised the hobby. It provides crisp rivet detail and smooth curves that were once impossible to achieve in such a small scale. This shift ensures that even a beginner can produce a model that rivals professional standards.
To see how these locomotives look in action and compare different versions, watch this helpful review:
Why Choose a Kit Over Ready-to-Run?
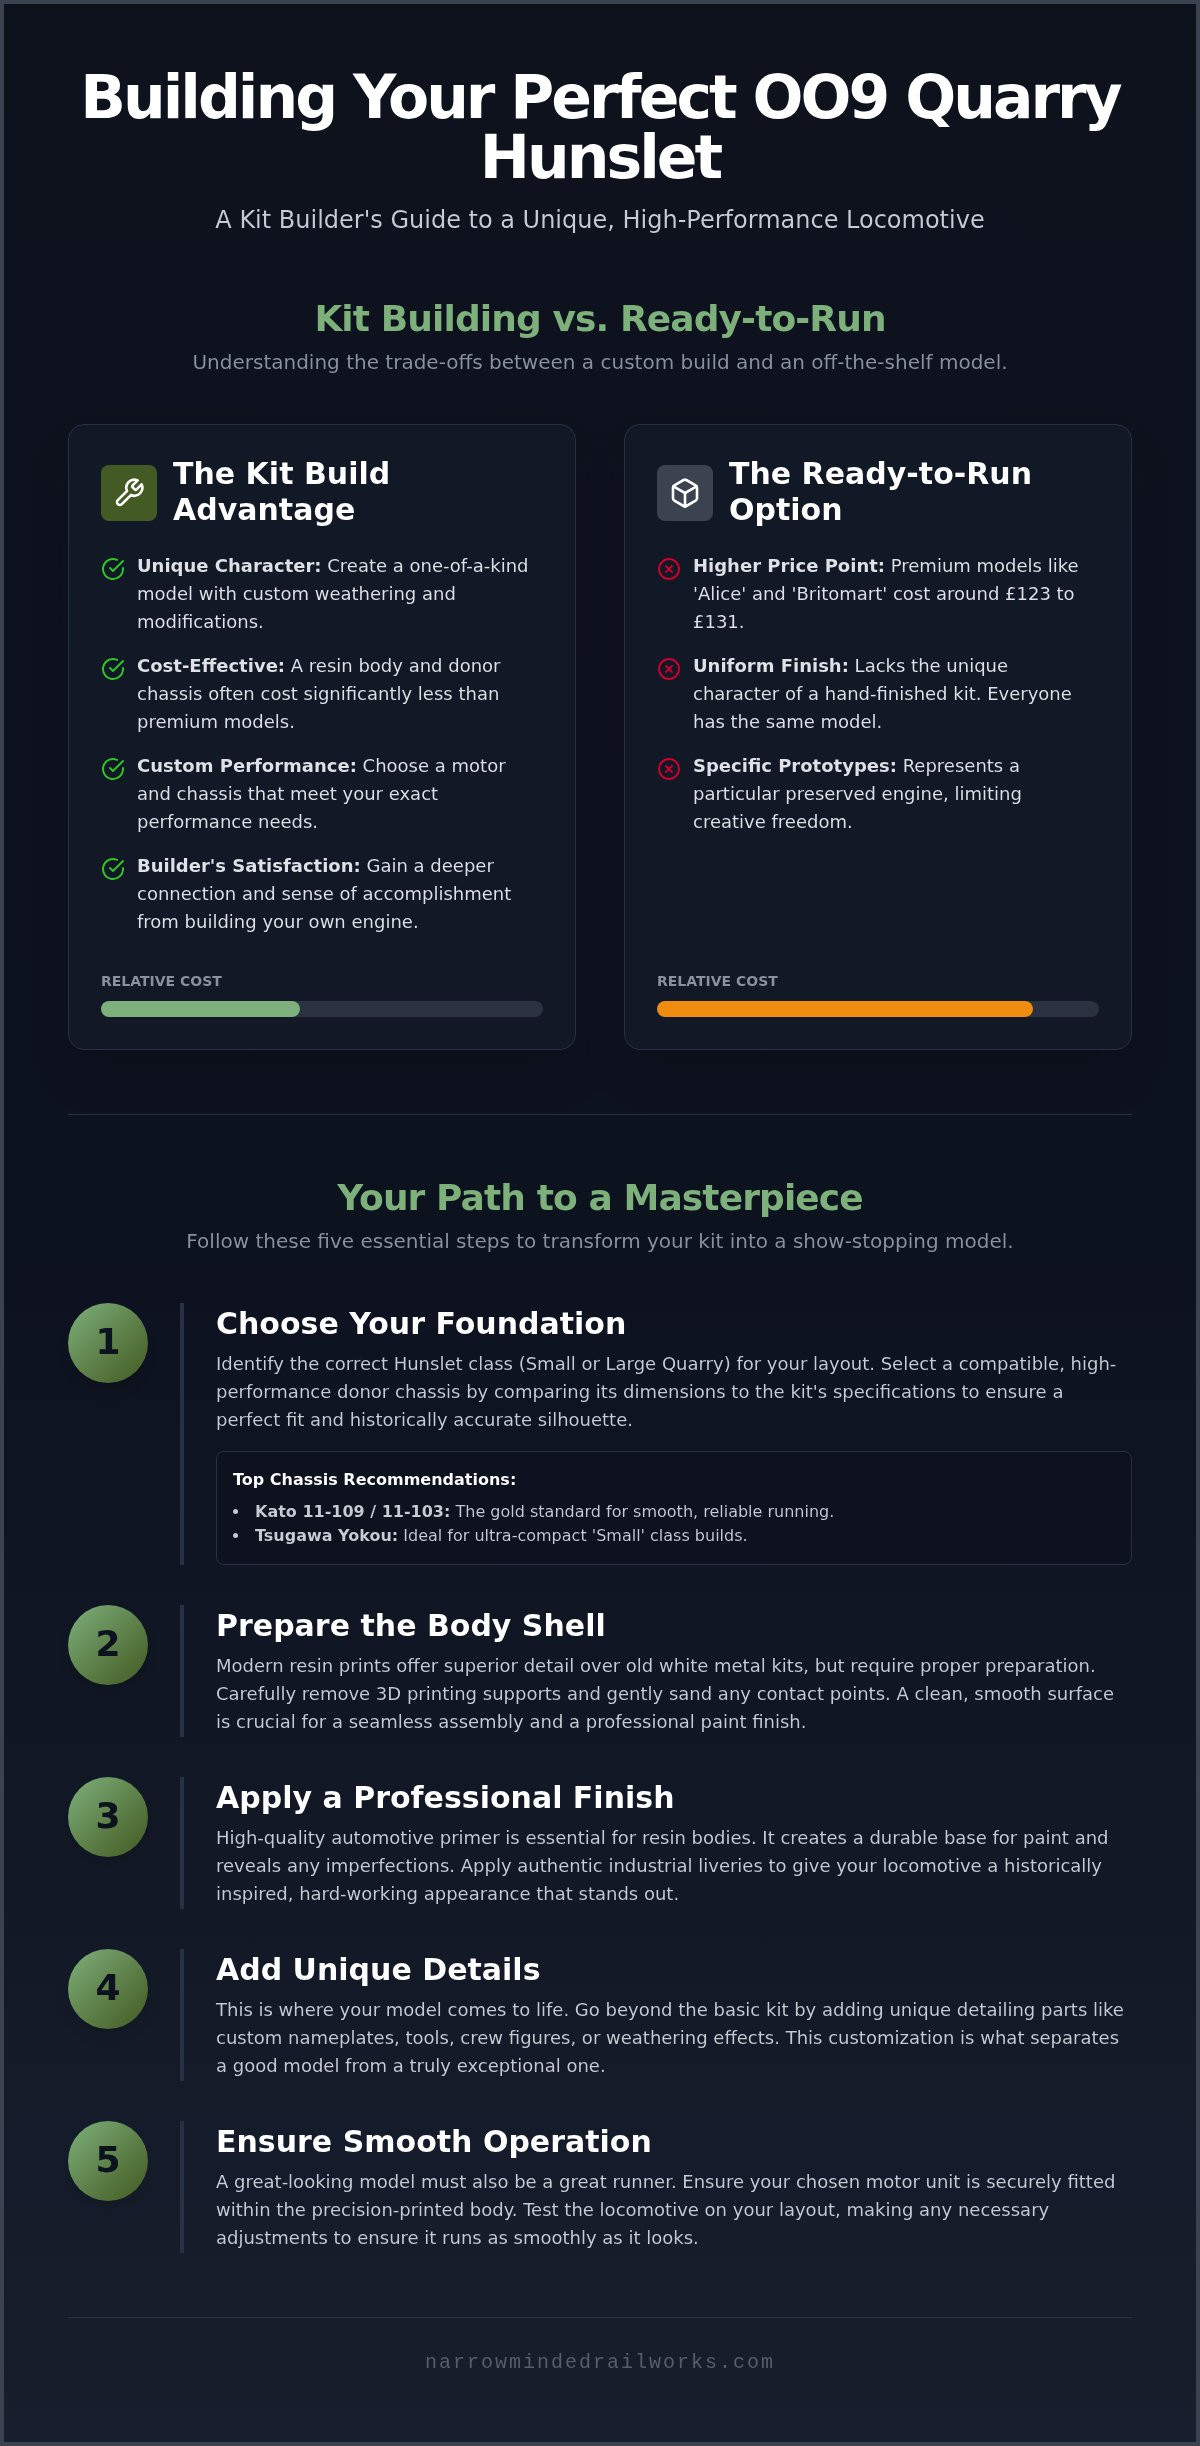
Building your own motive power provides a level of satisfaction that buying a box cannot match. While the 2026 Bachmann releases of 'Alice' and 'Britomart' offer excellent detail for around £123 to £131, they represent specific preserved locomotives. A kit allows you to build a unique industrial workhorse with custom weathering or minor modifications. It's also a cost-effective route. A high-quality resin body combined with a donor chassis often costs significantly less than a premium die-cast alternative. This approach lets you allocate your budget toward better scenery or more rolling stock for your layout.
The Role of 3D Printing in Modern Narrow Gauge
Modern 3D printing technology captures complex boiler shapes and cab interiors without the weight or graininess of older materials. Professional resin prints are vastly superior to home-produced FDM models, as they eliminate the visible layer lines that often ruin a locomotive's finish. We focus on a body-only philosophy. While we don't sell motors or chassis, we ensure every kit is designed with precise tolerances for common donor units. You can choose a motor that fits your specific performance needs, such as the Kato 11-109, ensuring your oo9 quarry hunslet kit runs as well as it looks.
Selecting Your Kit and the Correct Chassis
Choosing the right foundation is the most critical step in your build. The Welsh slate industry utilised various Hunslet designs, ranging from the 'Small Quarry' class to the more powerful 'Mainline' locomotives. These prototypes differ significantly in length and height. Before you commit to an oo9 quarry hunslet kit, you must identify which class fits your diorama's theme. A 'Small' class engine is ideal for tight curves, whereas a 'Large' class offers a more imposing presence on the track.
While we specialise in producing high-detail 3D-printed body shells, we don't sell the motorised chassis or internal components. This constraint allows you the flexibility to choose a power unit that matches your specific budget and performance requirements. Finding the correct chassis involves comparing the kit's internal dimensions with the manufacturer's specifications. A mismatch in wheelbase or wheel diameter will compromise the locomotive's historically accurate silhouette. We recommend checking these dimensions early to ensure a smooth assembly process.
Top Chassis Picks for Hunslet Projects
The Kato 11-103 and 11-109 units are widely considered the gold standard for OO9 modelling. They offer smooth, reliable running at a reasonable price point. For those building the ultra-compact 'Small' class Hunslets, Tsugawa Yokou options provide a smaller footprint that fits within restricted cab spaces. Always verify the chassis length against the kit's specs before purchasing. If you're looking for the best starting point, you can browse our range of OO9 locomotive kits designed for these specific donor units.
What to Look for in a High-Quality Body Kit
A professional resin kit should require very little preparation. When evaluating a body shell, look for crisp rivet detail and sharp edges on the cab windows. Visible layer lines are a common issue with home-printed FDM models, but professional-grade resin prints should be nearly smooth to the touch. It's important to ensure the kit includes essential fittings like the chimney, dome, and safety valves. Identifying a 'clean' print from the start saves hours of tedious sanding; it lets you focus on the enjoyable aspects of painting and detailing instead. High-quality kits often feature pre-drilled holes for handrails, which simplifies the assembly of delicate parts and ensures a more robust final model.
Step-by-Step: Preparing and Assembling Your Kit
Assembly is the stage where your oo9 quarry hunslet kit begins to take shape as a functional locomotive. While 3D-printed resin offers incredible detail, it requires specific handling compared to traditional plastic or white metal. You'll need a few essential tools to ensure a professional finish: fine-grit sandpaper (400 to 1000 grit), high-quality cyanoacrylate (super glue), and a set of needle files. Before any gluing begins, you must degrease the resin body. A simple wash in warm, soapy water removes any residual release agents or oils from the printing process. This step is vital; skipping it often leads to paint flaking off later in the build.
Historical accuracy often depends on understanding how these engines functioned in their original environments. Researching the Narrow Gauge Railway Museum collections can provide valuable insights into the pipework and fittings used on Welsh quarry engines. Once the body is clean and dry, start by dry-fitting it to your chosen chassis. This allows you to identify any areas where the internal resin might need a slight file to sit perfectly level. A secure, square fit at this stage prevents a "wobbly" appearance when the locomotive is in motion on your layout.
Removing Supports and Cleaning
Removing 3D printing supports requires patience and a steady hand. We recommend using sharp side cutters to snip the supports a millimetre away from the body, then finishing the area with a scalpel or file. This prevents the resin from "pitting" or chipping into the main surface. The secret to a perfectly smooth finish is wet sanding. By dipping your sandpaper in water, you keep the resin dust contained and achieve a much finer surface. If you find small "witness marks" where supports were attached, a tiny amount of modelling filler will make these disappear before priming.
Mounting the Body to the Chassis
Because our kits are designed as body-only units, you'll need to create reliable mounting points for your donor chassis. You can easily achieve this by gluing small blocks of plasticard or resin offcuts inside the tanks or under the footplate. Achieving the correct ride height is essential for a prototypical look; the buffer beams should align correctly with your rolling stock. We suggest using a temporary fixing method, such as a small screw or a tiny dab of Blu-Tack, during the initial testing phase. It's best to keep the chassis removable for long-term maintenance, as you'll eventually need to oil the motor or clean the pickups without damaging your oo9 quarry hunslet kit paintwork.
Painting and Detailing Your Narrow Gauge Icon
While 3D-printed resin offers exceptional detail, it can react poorly to standard hobby paints if not sealed correctly. We recommend using a high-quality automotive primer to create a stable surface for your base coats. Unlike standard plastic, resin is slightly porous; a robust primer prevents the paint from soaking in or peeling away. Once primed, you can choose a livery that matches your layout's history. Whether you opt for the vibrant Dinorwic Red, the somber Penrhyn Black, or a heavily weathered 'Industrial Grime' look, the goal is to move beyond the generic factory finish of mass-produced models.
Weathering is the stage where your oo9 quarry hunslet kit truly comes to life. Real quarry engines were rarely clean. They operated in dusty, wet environments that left layers of slate dust and rust on every surface. You can replicate this using weathering powders and oil washes. Focus on the areas around the smokebox and the lower frames where dirt naturally accumulates. Adding finishing touches like a hand-painted crew, real coal in the bunkers, and etched brass nameplates will distinguish your model from any ready-to-run alternative.
Priming and Base Coating
Thinning your paint is the most critical part of the process. If the paint is too thick, it will obscure the fine rivet detail and bolt heads that make these kits special. While brush painting is possible, airbrushing provides the smoothest finish without leaving brush marks. For a more detailed look at the preparation stages, read our guide on Painting 3D Printed Models to ensure a professional result. A smooth base coat serves as the foundation for all subsequent detailing and weathering steps.
Advanced Detailing Techniques
Authenticity lies in the small details. When applying waterslide decals, use a setting solution to help the film conform to the rivets and curves of the boiler. This creates a 'painted-on' appearance that looks far more realistic than a standard sticker. We also recommend adding 'real' coal to the bunkers rather than using the printed resin texture. A small amount of crushed coal fixed with diluted PVA glue adds genuine depth. Finally, fitting Quarry Hunslet couplers ensures your locomotive is ready for operational duties. If you are ready to start your next project, you can find everything you need in our collection of 3D printed narrow gauge kits.
Customising Your Narrow Minded Railworks Hunslet
The beauty of a 3D printed oo9 quarry hunslet kit lies in its potential for modification. While we don't offer pre-assembled models, we do provide the high-fidelity components that allow you to create a locomotive tailored to your specific vision. Our kits are designed with the modeller in mind, featuring modular elements that make customisation straightforward. You aren't limited to a single factory look; instead, you can swap chimneys, domes, or cab fittings to represent different stages of a locomotive's working life. This flexibility ensures that no two models on your layout need to look exactly the same.
We recognise that narrow gauge modelling can sometimes feel like a solitary pursuit when technical issues arise. While we don't sell the internal motors or chassis, we do offer direct support from a fellow modeller for every kit we produce. If you're unsure about fitting a specific part or need advice on which adhesive works best with our resin, we're here to help. Because we specialise in narrow gauge scales like OO9 and GN15, our designs are optimised for the unique challenges of small-scale industrial modelling. This proactive approach helps you move past the build phase and into the rewarding process of running your own unique motive power.
Beyond the Locomotive: Building a Scene
A locomotive alone cannot tell a full story. To truly capture the atmosphere of the North Wales slate industry, you should consider pairing your Hunslet with our range of OO9 wagon kits. From slate wagons to internal quarry stock, these models provide the essential context for your engine's work. You can also use our figures and scenery tools to add a sense of scale and life to your dioramas. If you're just starting your journey into kit building, our guide on Your First OO9 Loco Kit offers practical advice for choosing your initial project. Building a cohesive scene is what transforms a simple model into a window into another era.
Joining the Narrow Minded Community
We believe that sharing your progress is one of the most enjoyable parts of the hobby. We encourage you to share your builds on social media and connect with other modellers who are working on their own versions of the oo9 quarry hunslet kit. Seeing how others have weathered their locos or modified their cabs can provide fresh inspiration for your next project. Our commitment to the narrow gauge community means we're constantly refining our designs based on modeller feedback. When you choose one of our kits, you're joining a community of enthusiasts who value character and craftsmanship over generic ready-to-run solutions. Browse our latest OO9 locomotive kits today and start building a locomotive that is truly your own.
Bring Your Narrow Gauge Layout to Life
Building a high-quality oo9 quarry hunslet kit represents the perfect balance between historical accuracy and personal creativity. You've discovered how to select the right donor chassis and master the techniques required to finish professional resin prints. While we don't supply ready-to-run models, our 3D-printed bodies offer a proactive solution for those who want to avoid the uniformity of mass-produced engines. These kits provide the foundation for a locomotive that truly reflects the character of your specific layout.
Our designs are expertly optimised for Kato and Tsugawa chassis, providing crisp industrial detail that remains sharp after painting. Because we offer worldwide shipping, you can access these specialised kits from anywhere in the world. Finishing your locomotive with authentic weathering and custom details will ensure it becomes a standout feature of your miniature world. Taking these steps transforms a simple project into a rewarding modelling achievement.
Explore our range of OO9 Quarry Hunslet and Locomotive Kits
We can't wait to see your unique industrial creations in action. Happy modelling!
Frequently Asked Questions
Which chassis is best for an OO9 Quarry Hunslet kit?
The Kato 11-109 chassis is the industry standard for an oo9 quarry hunslet kit due to its reliability and compact motor. While we don't supply these units, our designs are precision-engineered to fit them perfectly. Some modellers also use Tsugawa Yokou chassis for smaller variants. You should always verify the wheelbase dimensions before purchasing to ensure the wheels align with the wheel arches of the resin body for a prototypical appearance.
Are 3D printed resin kits difficult for beginners to build?
Resin kits are very accessible for beginners because they require less cleaning than traditional white metal alternatives. The assembly process involves simple preparation steps like degreasing and light sanding. We provide direct support to help you navigate your first build. While the material is different from standard plastic, it takes detail exceptionally well. Most novices find that following a structured guide allows them to produce a high-quality locomotive on their very first attempt.
Do your kits come with wheels and motors included?
Our kits are supplied as high-detail body shells and do not include wheels, motors, or chassis. This approach allows you to select a power unit that fits your specific performance requirements and budget. We focus on providing the best possible 3D-printed exterior detail while leaving the mechanical choices to the modeller. You'll need to source a donor unit, such as a Kato chassis, separately from a specialist model railway retailer to complete your project.
What kind of glue should I use for a 3D printed locomotive body?
You should use high-quality cyanoacrylate, commonly known as super glue, for all resin assembly. Standard plastic cement won't work because it relies on melting the material to create a bond, which resin doesn't do. For delicate parts like handrails, a gel-based super glue offers more control and a slower drying time. Always ensure the surfaces are clean and free from any residual oils to achieve a strong and permanent bond between components.
How do I remove the 'staircase' effect or layer lines from a 3D print?
Professional resin prints have minimal layer lines, but you can achieve a flawless finish through wet sanding with fine-grit paper. Using 600 to 1000 grit sandpaper with a little water prevents dust and smooths the surface without damaging the fine rivet detail. Following this with a high-quality automotive primer will fill any microscopic imperfections. This proactive preparation ensures that your oo9 quarry hunslet kit looks as smooth as a factory-produced die-cast model.
Can I use N gauge track for my OO9 Hunslet model?
You can technically run OO9 models on standard N gauge track because both use a 9mm gauge. However, N gauge sleepers are spaced for 1:148 scale, which can look incorrect for a narrow gauge layout. We recommend using dedicated OO9 track from manufacturers like Peco, which features wider sleeper spacing to represent the rugged nature of quarry lines. This choice provides a much more authentic foundation for your Hunslet and its accompanying rolling stock.
What is the difference between a Small and Large Quarry Hunslet?
The primary difference lies in the physical dimensions and boiler capacity of the prototypes. Small Quarry Hunslets were designed for the restricted environments of internal quarry galleries, whereas the Large Quarry class handled heavier loads on the main lines. In OO9 scale, this means a Small Hunslet will have a shorter wheelbase and a more compact footprint. Understanding these differences is essential when selecting a donor chassis to ensure the motor unit fits inside the cab.
How do I fit couplers to a kit-built locomotive?
Fitting couplers involves creating a secure mounting point on the underside of the buffer beam or chassis. Many modellers use small blocks of plasticard to set the coupler at the correct height for their rolling stock. You can choose between traditional stirrup couplers or modern NEM-style pockets depending on your preference. Ensuring the height is consistent across your entire fleet prevents accidental uncoupling and ensures smooth operation during shunting duties on your narrow gauge layout.