


The reward is not simply finishing the build. It’s seeing separate models, textures and details come together as one convincing scene. That sense of cohesion is central to the satisfaction of a completed diorama: a miniature world with a clear setting, atmosphere and story. The result feels whole because every element has a place.
During a build, it’s natural to focus on individual choices, from a model’s scale to the landscape colours. Stepping back shows how those decisions work together and how small details can make a scene feel lived-in, not merely assembled.
This article explores what makes a finished diorama rewarding, how miniature and scale-model scenes create a sense of place, and the different directions a scene can take. Whether you’re drawn to a railway setting, a historical moment or an imagined landscape, you’ll find ways to think about the finished scene as a whole, not just a collection of parts.
Key Takeaways
- See how scale, models and landscape combine to make a miniature scene feel coherent.
- Explore how a diorama’s setting and focal point can shape the story it tells.
- Understand how final adjustments and realistic details help bring a scene together.
- Find narrow-gauge kits and diorama tools and scenery from Narrow Minded Railworks for railway-inspired scenes.
Miniature and scale-model dioramas
A diorama combines models, scenery and setting to present a single scene. Scale determines how the parts relate, while composition helps viewers understand the scene at a glance.
Final Completion Steps
To finish, review the assembled scene as a whole and resolve details that distract from it. This final check matters because loose joins or an unclear focal point can weaken an otherwise carefully built model.
Beginners can compare styles by subject, available display space and scale. For example, hobbyist scenes often use 1:35 or 1:48, while HO railway modelling uses 1:87. Consider how much of the setting the chosen scale allows, not just the size of the central model.
For photographs, place the diorama against a plain background and use soft, even light. Hold the camera near the model’s eye level to make the scene feel more immersive. A stable shelf or display case also makes viewing easier.
Realistic Finishing Details
Realistic finishing uses surface texture, colour variation and small signs of wear to connect models with their surroundings. A consistent finish helps the scene read as one place rather than a collection of separate pieces.
Useful materials include card or foam for terrain, paint for surfaces and scenic textures for ground cover. A craft knife, ruler and fine brushes help shape and apply details. Choose materials to suit the scene’s scale and setting. The satisfaction of a completed diorama often comes from these considered finishing touches.
Build texture gradually: shape the ground, add a base colour, then place grass, stones or weathering where the scene calls for them. Keep strong colours and high-detail objects near the focal point, where they can add interest without competing with it.
Costs, Timing, and Finished-Diorama Care
In the UK, build costs depend on the base, models, materials and level of detail. Completion time depends on those choices and on drying time between paint and scenery layers. A detailed landscape takes more stages than a simple display base.
Common mistakes include mismatched scales, a crowded composition and visible gaps between scenery pieces. Before calling the build finished, inspect it from the intended viewing angle and blend joins with matching texture or paint.
Keep the scene in a stable display place, away from knocks and frequent handling. Remove dust gently with a soft brush, especially around fine scenery, and avoid pressing on delicate parts. A clear cover can reduce dust while keeping the finished scene visible.
Diorama scene possibilities
A diorama can freeze a historical event, suggest an imagined world or recreate a natural habitat. Each choice changes what the viewer notices first: a central figure, a landscape, or the relationship between them. William Siborne’s Battle of Waterloo model shows how broad the form can become. Created between 1830 and 1838, it measures 8.33 by 6 metres and uses around 70,000 model soldiers.
Historical scenes work best when the setting supports the story, rather than competing with it. Siborne’s model represents the Battle of Waterloo, fought on 18 June 1815, while a smaller scene could focus on one road, building or group of figures. A railway scene offers another narrative: a train approaching a platform can suggest arrival, departure or everyday activity through placement alone.
Fictional scenes allow a different kind of invention. The Mandalorian Tatooine diorama is over 3 feet long, showing how a recognisable fictional setting can occupy a substantial display. At a more compact scale, the mini spacemen rainbow diorama used figures 15 millimetres high and appeared in the Massive Voodoo Challenge 2020. Scale and subject can therefore shape very different compositions.
Natural history provides another established direction. Carl Akeley created the first natural history dioramas for New York’s Museum of Natural History in 1889. These scenes typically combine a painted background, a foreground and taxidermy specimens. For a miniature version, the same arrangement can guide attention from a backdrop towards a carefully chosen subject.
To choose a scene, start with its story or subject, then decide what deserves the focal position. A harbour might centre on a vessel; a woodland scene might centre on a clearing or animal. Keep the setting selective: a few details that establish the place often communicate more clearly than a crowded collection of unrelated objects.
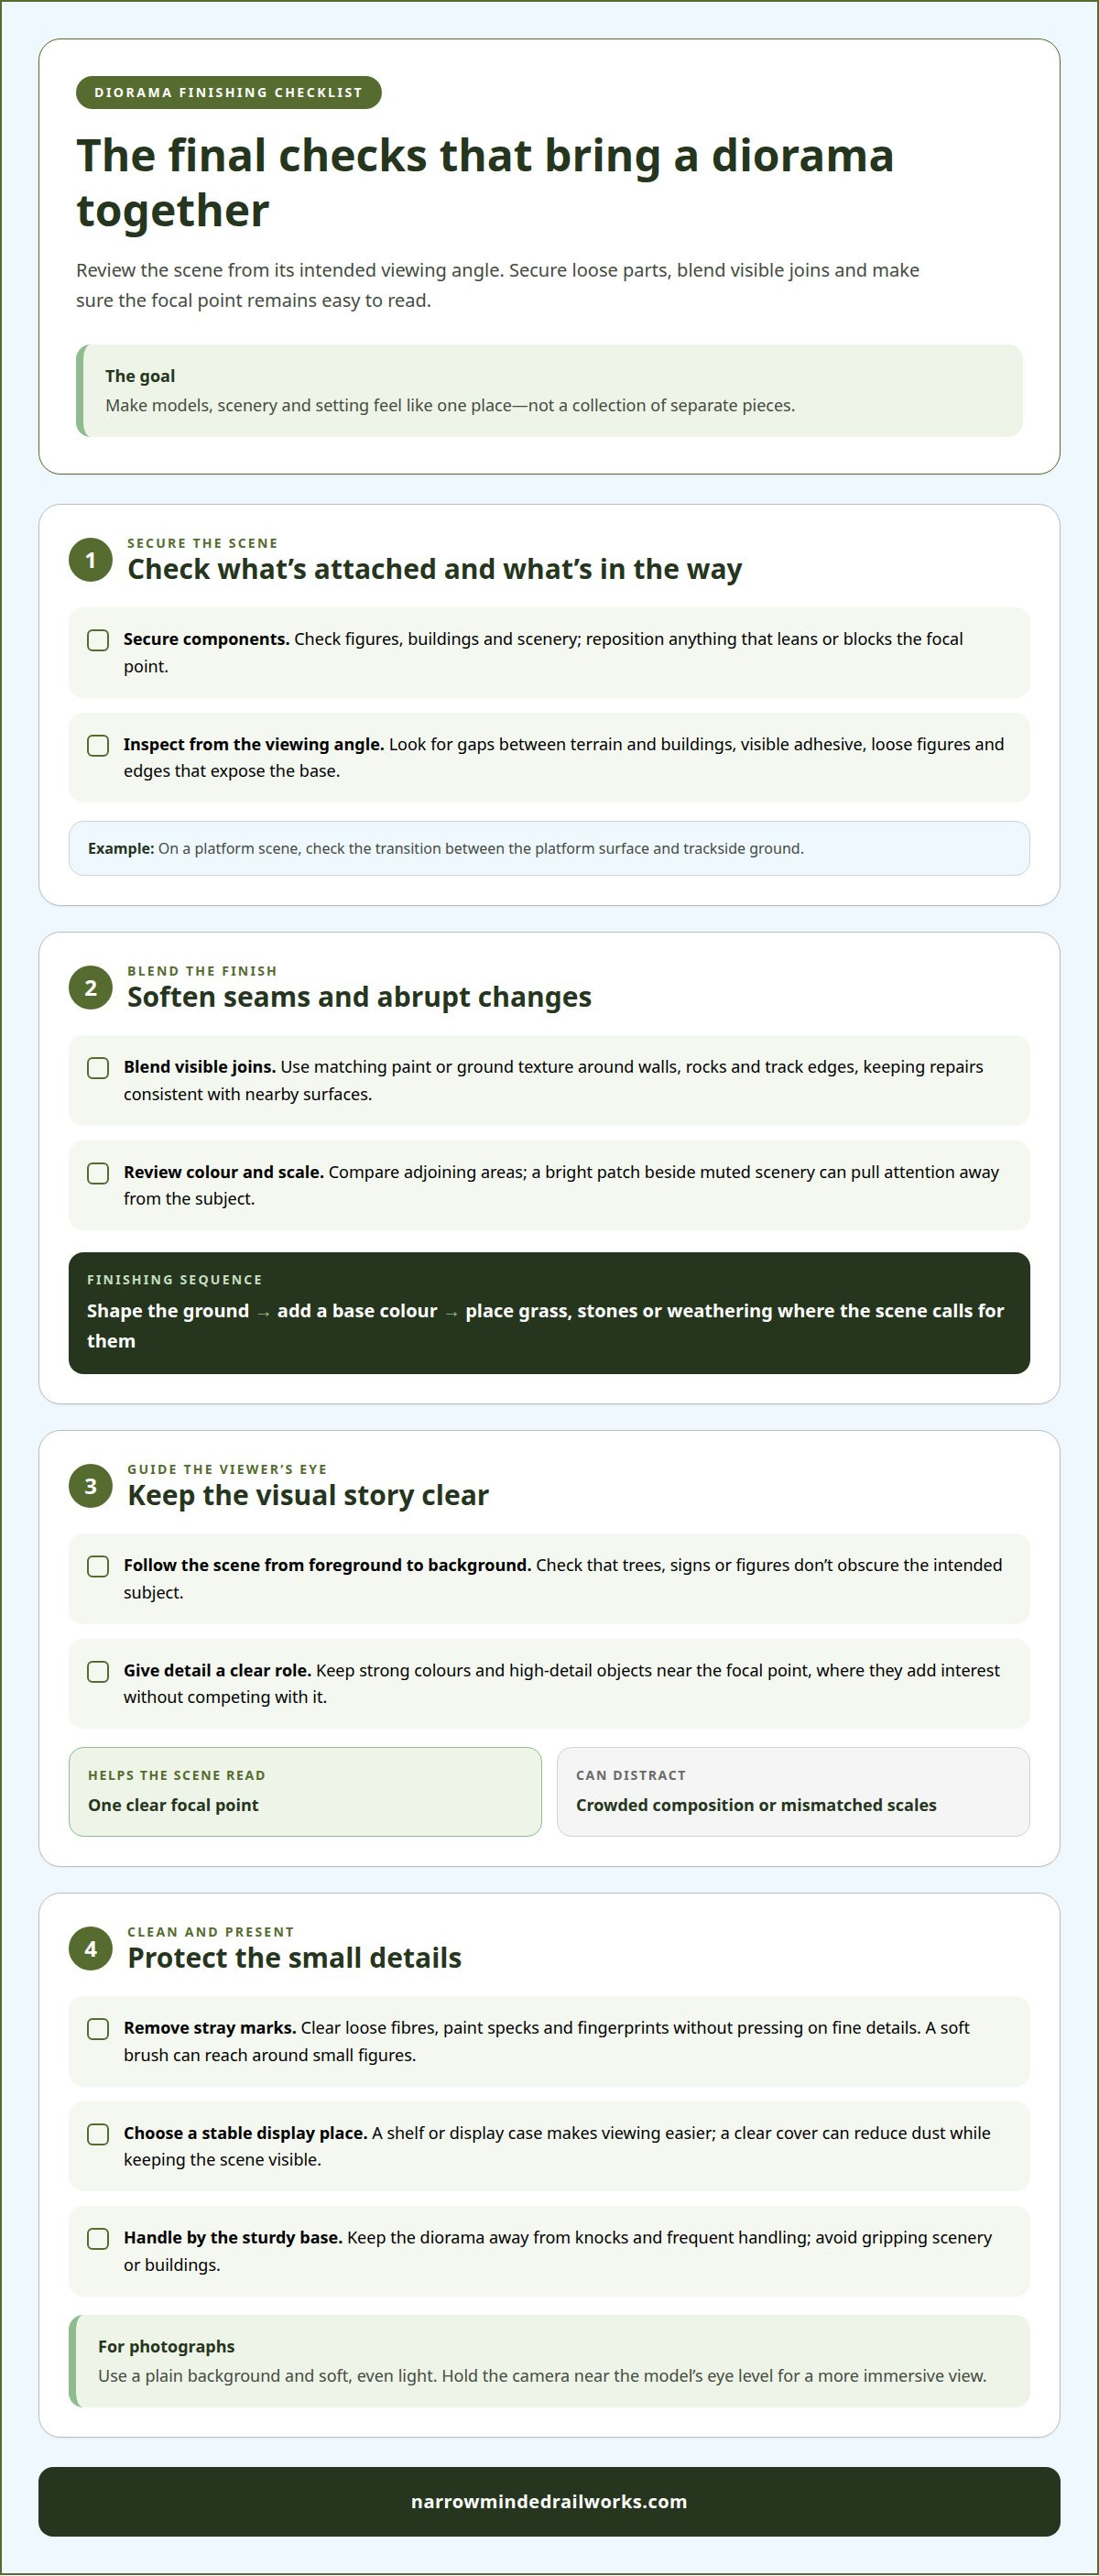
What are the final steps in completing a diorama?
Finishing means reviewing the model, scenery and presentation before display. It matters because even a small unfinished join can distract from the scene’s central story.
Begin with a slow inspection from the intended viewing angle. Look for gaps between terrain and buildings, loose figures, visible adhesive and edges that expose the base. A platform scene, for example, needs a convincing transition between the platform surface and trackside ground. Repair faults before adding delicate finishing touches.
- Secure the components. Check that figures, buildings and scenery remain firmly attached. Reposition anything that leans or blocks the focal point.
- Blend visible joins. Use matching paint or ground texture to soften seams around walls, rocks and track edges. Keep the repair consistent with nearby surfaces.
- Review colour and scale. Compare adjoining areas for abrupt changes. A bright patch beside muted scenery may draw attention away from the intended subject.
- Remove stray marks. Clear loose fibres, paint specks and fingerprints without pressing on fine details. A soft brush can reach around small figures.
Next, check the scene’s visual story by following the viewer’s eye from foreground to background. If a railway engine should lead the composition, make sure trees, signs or figures don’t obscure it. Adjusting even one object can make the scene easier to read.
Finish by considering how the diorama will be handled and displayed. Lift it by its sturdy base rather than gripping scenery or buildings. Photograph the finished scene before moving it, then place it where accidental knocks are less likely. The satisfaction of a completed diorama comes from seeing deliberate choices work together, not from adding detail without purpose.
How do you add realistic finishing details to a diorama?
Realism comes from details that match the scene’s setting, scale and story. A muddy track, weathered wall or worn platform can make a model feel used rather than newly assembled. Choose details that explain how the place functions, then apply them selectively.
Start with the ground. For a rural lane, vary the earth tones and add shallow ruts where vehicles would pass. A station scene might need compacted ground beside the platform, with weeds only in neglected corners. Keep texture in scale: oversized stones or coarse grass can make small figures and buildings look out of proportion.
Next, use colour to suggest material and wear. Apply a restrained wash around brick joints, then pick out raised edges with a lighter shade. On a metal railing, add small areas of muted rust near joins and exposed ends. Avoid spreading weathering evenly: real surfaces collect marks where people, water or machinery affect them.
- Ground: Blend sand, fine gravel or static grass into the surrounding terrain.
- Buildings: Add stains beneath gutters and around doorways, where rain and use leave marks.
- Figures: Match clothing colours to the scene, such as muted workwear beside an industrial track.
- Railway details: Use subdued tones on sleepers and trackside surfaces, keeping the rails visually distinct.
Place each detail with the viewer’s eye in mind. A sign near a platform entrance can establish the location, while tools beside a work shed suggest activity. Leave quieter areas around the main subject so added texture supports the story instead of competing with it.
Test a finish on spare material before applying it to the scene. This reveals whether a wash spreads too far or a texture looks too coarse. Build layers gradually, allowing each painted or scenic surface to settle before adding another. For materials that support this work, explore tools for finishing a diorama.
Narrow Minded Railworks: Diorama Tools & Scenery
Narrow Minded Railworks offers Diorama Tools & Scenery for model makers developing and finishing miniature scenes. If your composition centres on a narrow-gauge railway, OO9 Locomotive & Wagon Kits and GN15 Locomotive & Scenery Kits provide related modelling options. O-16.5 / 7mm Scale Kits offer another scale choice for shaping a railway-inspired setting.
These offerings suit different stages of a project, from establishing its railway subject to adding scenery and completing the surrounding scene. Narrow Minded Railworks designs and sells 3D-printed products, including locomotive bodies, wagons and scenery items for enthusiasts. Choose the category that matches the scene you’re building, whether you’re planning a railway setting or refining its details.
Contact Narrow Minded Railworks to discuss your diorama project.
Let Your Next Scene Take Shape
A finished diorama can prompt another creative decision: what scene would you like to bring to life next? You might explore a different setting, shift the viewpoint or build around one object that hints at a larger story. Giving the next project a clear focus helps make each modelling choice deliberate, from the initial layout to the final details.
The satisfaction of a completed diorama comes from making a small world feel coherent and personal. That doesn’t require adding every possible detail. Let the subject guide the composition and leave space for viewers to discover its story.
If you’re planning a railway-inspired scene or developing its scenery, contact Narrow Minded Railworks to discuss your project and explore a suitable next step.
Take your time choosing a scene that interests you, then enjoy making it your own.
Frequently Asked Questions
What makes completing a diorama satisfying?
Completing a diorama is satisfying because it turns separate modelling decisions into a scene with a clear identity. A railway platform, for example, becomes more than track and buildings when its arrangement suggests a specific moment, such as a train arriving. Seeing your original idea take recognisable form gives the finished work personal meaning. That connection between intention and outcome is central to the satisfaction of a completed diorama.
How long does it take to complete a diorama?
It depends on the design choices and drying time between paint and scenery layers. A detailed landscape takes more stages than a simple display base.