


Fine brushwork matters, but the base coat and tools do much of the work when you’re learning how to paint realistic brickwork. Start with a mortar-coloured base, let it dry, then pick out the raised bricks with a fine brush. Build variation with layered reds and light dry-brushing. This keeps the mortar clearly defined and helps the wall look naturally aged rather than uniformly painted.
It’s tempting to focus on painting every brick edge neatly, but overly regular colour and finish can make a model wall look flat. A more convincing result combines careful edges with subtle colour variation and restrained weathering. Prepare suitable brushes and tools, apply the base and brick colours, then add an aged finish without covering the mortar. The steps work for small scenery pieces and larger model walls alike.
Key Takeaways
- Use a grout-coloured base so the mortar remains visible between the bricks.
- Keep a fine brush ready to define brick edges without filling the mortar lines.
- Layer varied brick shades and light dry-brushing to create depth and a naturally aged finish.
- Choose tools suited to the model’s scale and surface, including brushes for detail and scenery work.
Defining brick edges with a fine brush
Prepare a model wall by removing loose dust and letting its surface dry. Apply the mortar-coloured paint evenly, then allow it to dry before adding brick texture. This gives fine brushwork a clean base and helps keep mortar lines visible.
- Wash brushes and rollers before use, then let them become damp. Dampening brushes and rollers before use can help prepare them for painting. Stir the acrylic paint before loading a brush so its colour stays consistent. Keep a fine brush for outlines and a broader brush for larger raised areas.
- Choose a fine brush with a point that holds its shape. Load only the tip with brick-coloured acrylic, then remove excess paint against the palette. Work along one brick edge at a time, following the raised shape rather than drawing straight lines across the mortar.
- Use light strokes around corners and narrow faces. Rotate the model wall instead of twisting your wrist into awkward angles. If paint gathers in a mortar groove, lift it promptly with a clean, slightly damp brush. This keeps the grout-coloured base clear and the brick boundaries distinct.
- Build coverage gradually. A thin first pass lets the texture show through and makes small corrections easier. Let that layer dry before adding another, especially where two brick faces meet. Vary the pressure slightly so edges look defined without becoming uniformly dark outlines.
- During a break, wrap a paint-covered roller in plastic cling wrap rather than leaving it exposed to air. For model brickwork, use a fine brush to place small colour changes on selected bricks. After the brick colour dries, light dry-brushing can pick out raised edges without filling the mortar.
Choosing a grout-coloured base coat
If you're learning how to paint realistic brickwork, start with a base colour that reads clearly as mortar beside your chosen brick shades. Grey similar to grout creates familiar joints, while tan acrylic suggests light, earthy concrete mortar. Paint the whole model wall with this colour, then let it dry before adding brick texture.
- Choose a base that contrasts with your planned brick colours without overpowering them. Test grey or tan beside a sample of your reds. A visible difference helps the joints remain distinct once the brick faces receive colour.
- Stir the acrylic paint before application to keep its colour consistent across the surface. Apply it evenly over the brick faces and joint channels. This gives the wall one continuous mortar-coloured layer, rather than requiring you to paint each narrow joint separately.
- For evenly spaced mortar joints, follow the wall’s moulded brick pattern. On a flat surface, mark the courses and vertical joints lightly before painting. Keep the gaps consistent, then preserve them as visible base-coloured lines while applying brick colour.
- Let the mortar layer dry completely before painting the brick texture. The key to how to paint realistic brickwork is keeping this base visible between bricks. If the surface is still wet, brick paint can mix into the mortar colour and blur the boundaries.
- Check corners, recessed joints and thin areas before moving on. Touch up any spots where the base looks uneven, then allow those repairs to dry. Any sheen is suitable for a grey grout-like base, so choose the finish that best suits the model’s intended appearance.
Use grey or tan as the mortar colour, not the brick-face colour. A grey base coat similar to grout gives the joints a familiar appearance, and any sheen is suitable for that grey. Alternatively, paint a model brick wall tan or another light, earthy acrylic colour to represent concrete mortar. Choose the base coat to suit the intended mortar, since it will remain visible in the joints after you paint the bricks.
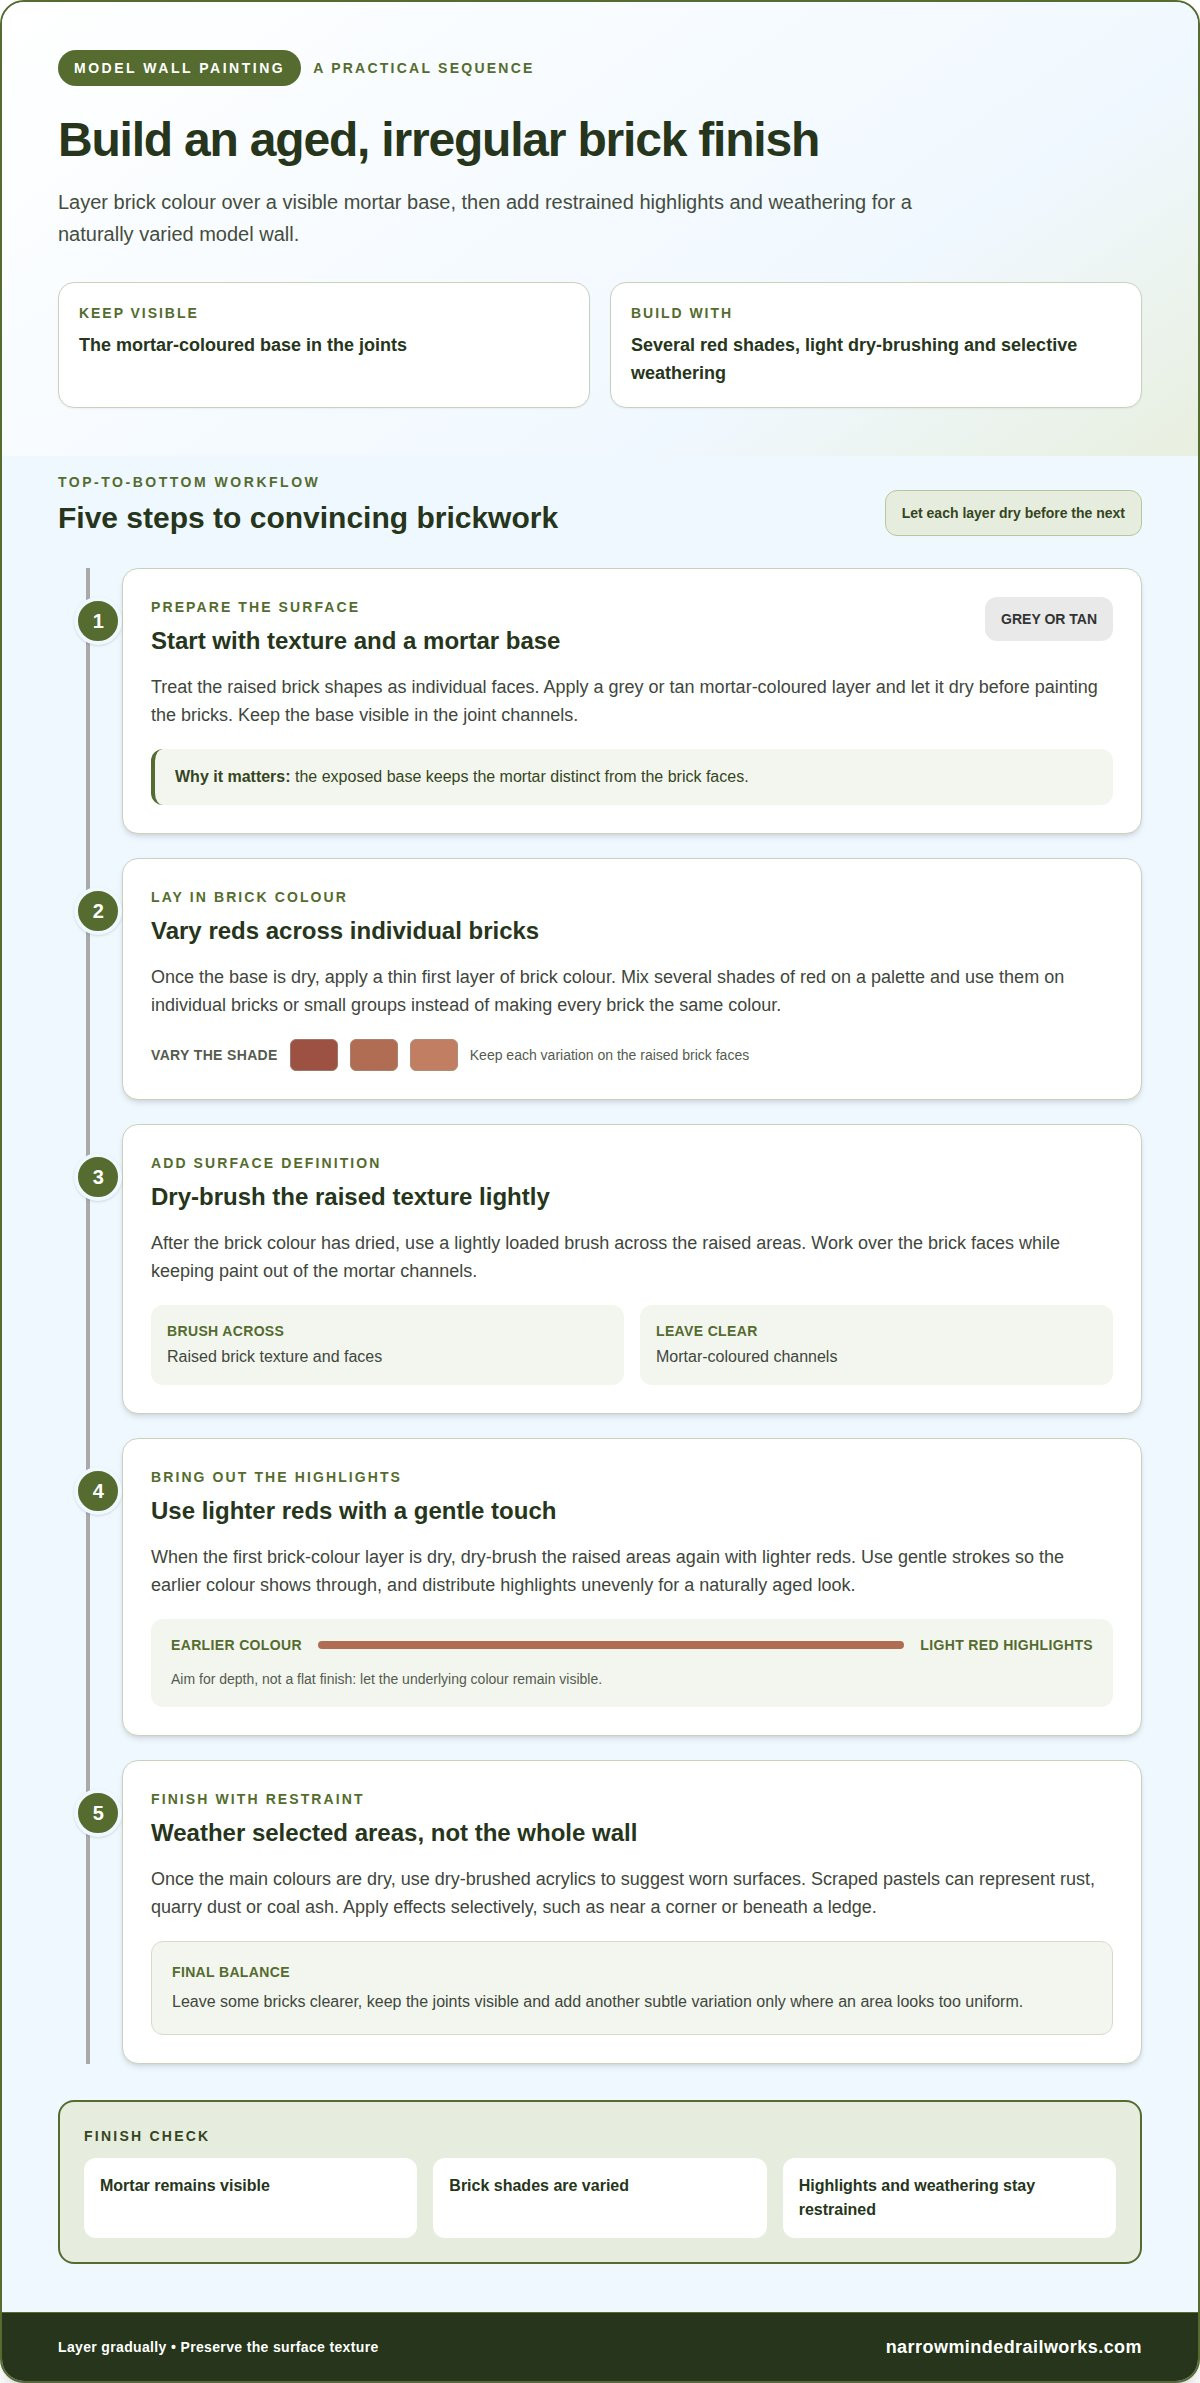
Creating an aged, irregular brick finish
- Real brick has physical texture, mortar joints and natural colour variation. On a model, paint creates the appearance of these features on the surface. Treat the raised brick shapes as individual faces, then use colour and dry-brushing to suggest wear without hiding the mortar.
- Once the first brick-colour layer is dry, mix several shades of red on a palette. Apply them to individual bricks or small groups instead of painting every brick the same colour. Add occasional dabs of mixed shades as you work. This breaks up uniform blocks and gives the wall a more natural, varied appearance.
- Let the mortar-coloured layer dry before adding brick paint. Use a lightly loaded brush to dry-brush the raised texture, working across the brick faces and keeping paint out of the mortar channels. The exposed base coat preserves the contrast between bricks and joints.
- After the first brick-colour layer dries, dry-brush the raised areas again with lighter reds. Use gentle strokes so the earlier colour shows through, creating depth rather than a flat finish. Distribute the highlights unevenly for a naturally aged look.
- Add restrained weathering once the main colours are dry. Dry-brushed acrylics can suggest worn surfaces, while scraped pastels can represent rust, quarry dust or coal ash. Apply these effects selectively, perhaps near a corner or beneath a ledge. Leave some bricks clearer so the varied finish remains easy to read.
Use the palette to keep the red variations distinct, choosing one shade at a time for each small section. Using several shades of red in sections on a mixing surface can give model brickwork a more natural appearance. Blotches of mixed colour variations can be added to a model wall while painting to create variety. Place these marks selectively among the painted areas, varying their position and size so the finish does not become a repeated pattern. Step back as you work and adjust any area that looks too uniform with another restrained variation. Keep the joints clear and let the different reds remain visible across the raised brick faces.
Tools and accessories for painting brick
Drying time varies with the paint, surface and room conditions, so let each layer dry before adding the next. There’s no fixed number of coats: use thin layers until coverage looks even, while keeping the texture and mortar visible. Dust painted brick gently. Touch up chips with matching colour, and use a compatible clear finish only if the model needs added protection.
- Choose the brush for the surface. A fine brush places paint on individual model bricks, while a brush 2-3 inches wide suits broader faux-brick surfaces. Match the tool to the scale: a large brush can flood small details, whereas a fine brush makes broad walls slow to cover.
- Reserve an 18 mm nap roller cover for suitable larger surfaces. Its textured pile holds paint and covers broad areas, but it can obscure small raised details on a model. Use it only where the surface can take a roller, then return to a brush for edges and mortar boundaries.
- Keep a palette, clean water for acrylics and a lint-free cloth within reach. Use the palette to mix brick shades and remove excess paint before it touches the wall. Wipe the brush between colours to prevent unwanted mixing, especially when moving from dark reds to lighter highlights.
- Prepare tools before painting. Wash brushes and rollers, then use them damp, since damp tools soak up more paint. Stir paint for consistent colour. During a pause, wrap a paint-covered roller in plastic cling wrap to limit exposure to air; clean brushes promptly after finishing.
- Keep a small brush for touch-ups and a separate clean brush for dusting. Dab matching paint onto a chip rather than coating the surrounding bricks. If you apply a protective finish, use it sparingly and test it on a hidden area first, as it can change the surface sheen.
For model-building tools and scenery suited to a brickwork project, explore Diorama Tools & Scenery.
Narrow Minded Railworks
Narrow Minded Railworks supports model railway and diorama projects with kits, scenery and tools. If your painted brickwork is part of a narrow-gauge layout or a standalone scene, its OO9 Locomotive & Wagon Kits, GN15 Locomotive & Scenery Kits, O-16.5 / 7mm Scale Kits, and Diorama Tools & Scenery offer relevant ways to develop the surrounding setting. The right choice depends on your scale and the scene you’re building, while the brickwork techniques in this guide help you finish walls with convincing colour and texture. For help choosing an offering for your model-building project, contact Narrow Minded Railworks.
Carry the brickwork into your next scene
Use the finished wall as a reference for the rest of the model. Decide what surrounds it, such as a loading area, a retaining wall or a weathered building beside the track. The setting can guide the scene’s character and help the brickwork feel integrated rather than added as a separate detail.
Keep a small painted sample nearby as a colour and texture guide for your next piece. It can help you make consistent choices across connected scenery while leaving room for natural variation. The patient approach to how to paint realistic brickwork also works across a wider layout: build details gradually, then consider how they relate to the scene.
For support with a model railway or diorama project, contact Narrow Minded Railworks to discuss your plans. Your next section of scenery can grow from the wall you’ve just finished, with each new detail helping the scene feel more complete.
Frequently Asked Questions
What paints and materials are best for painting realistic brickwork?
Choose paint to suit the wall’s material and test it on a hidden area before covering the model. Acrylics are practical for model brickwork; mix earthy reds, browns and muted greys to create variation. Keep a palette and clean water nearby. A small sample piece lets you judge how the colours work together before painting the finished scene.
How do you create realistic brick colour variation, texture, and weathering?
Let the setting guide where you place colour variation. Bricks beneath a roof edge can stay richer in colour, while exposed corners may look more faded. Add subtle darker marks in recesses and near the base to suggest accumulated grime, keeping the pattern irregular. On a wall beside a track, restrained dust tones can tie the brickwork into the surrounding scenery.
What brushes, sponges, rollers, and tools are best for painting brickwork?
Use a pointed detail brush for tight corners and a flat brush for broader model surfaces. Dab selected bricks with a small piece of sponge to create mottled variation without obvious lines. Reserve a roller for large, accessible areas with little fine relief. A palette, water pot and cloth help you control the paint and keep colour changes clean.