


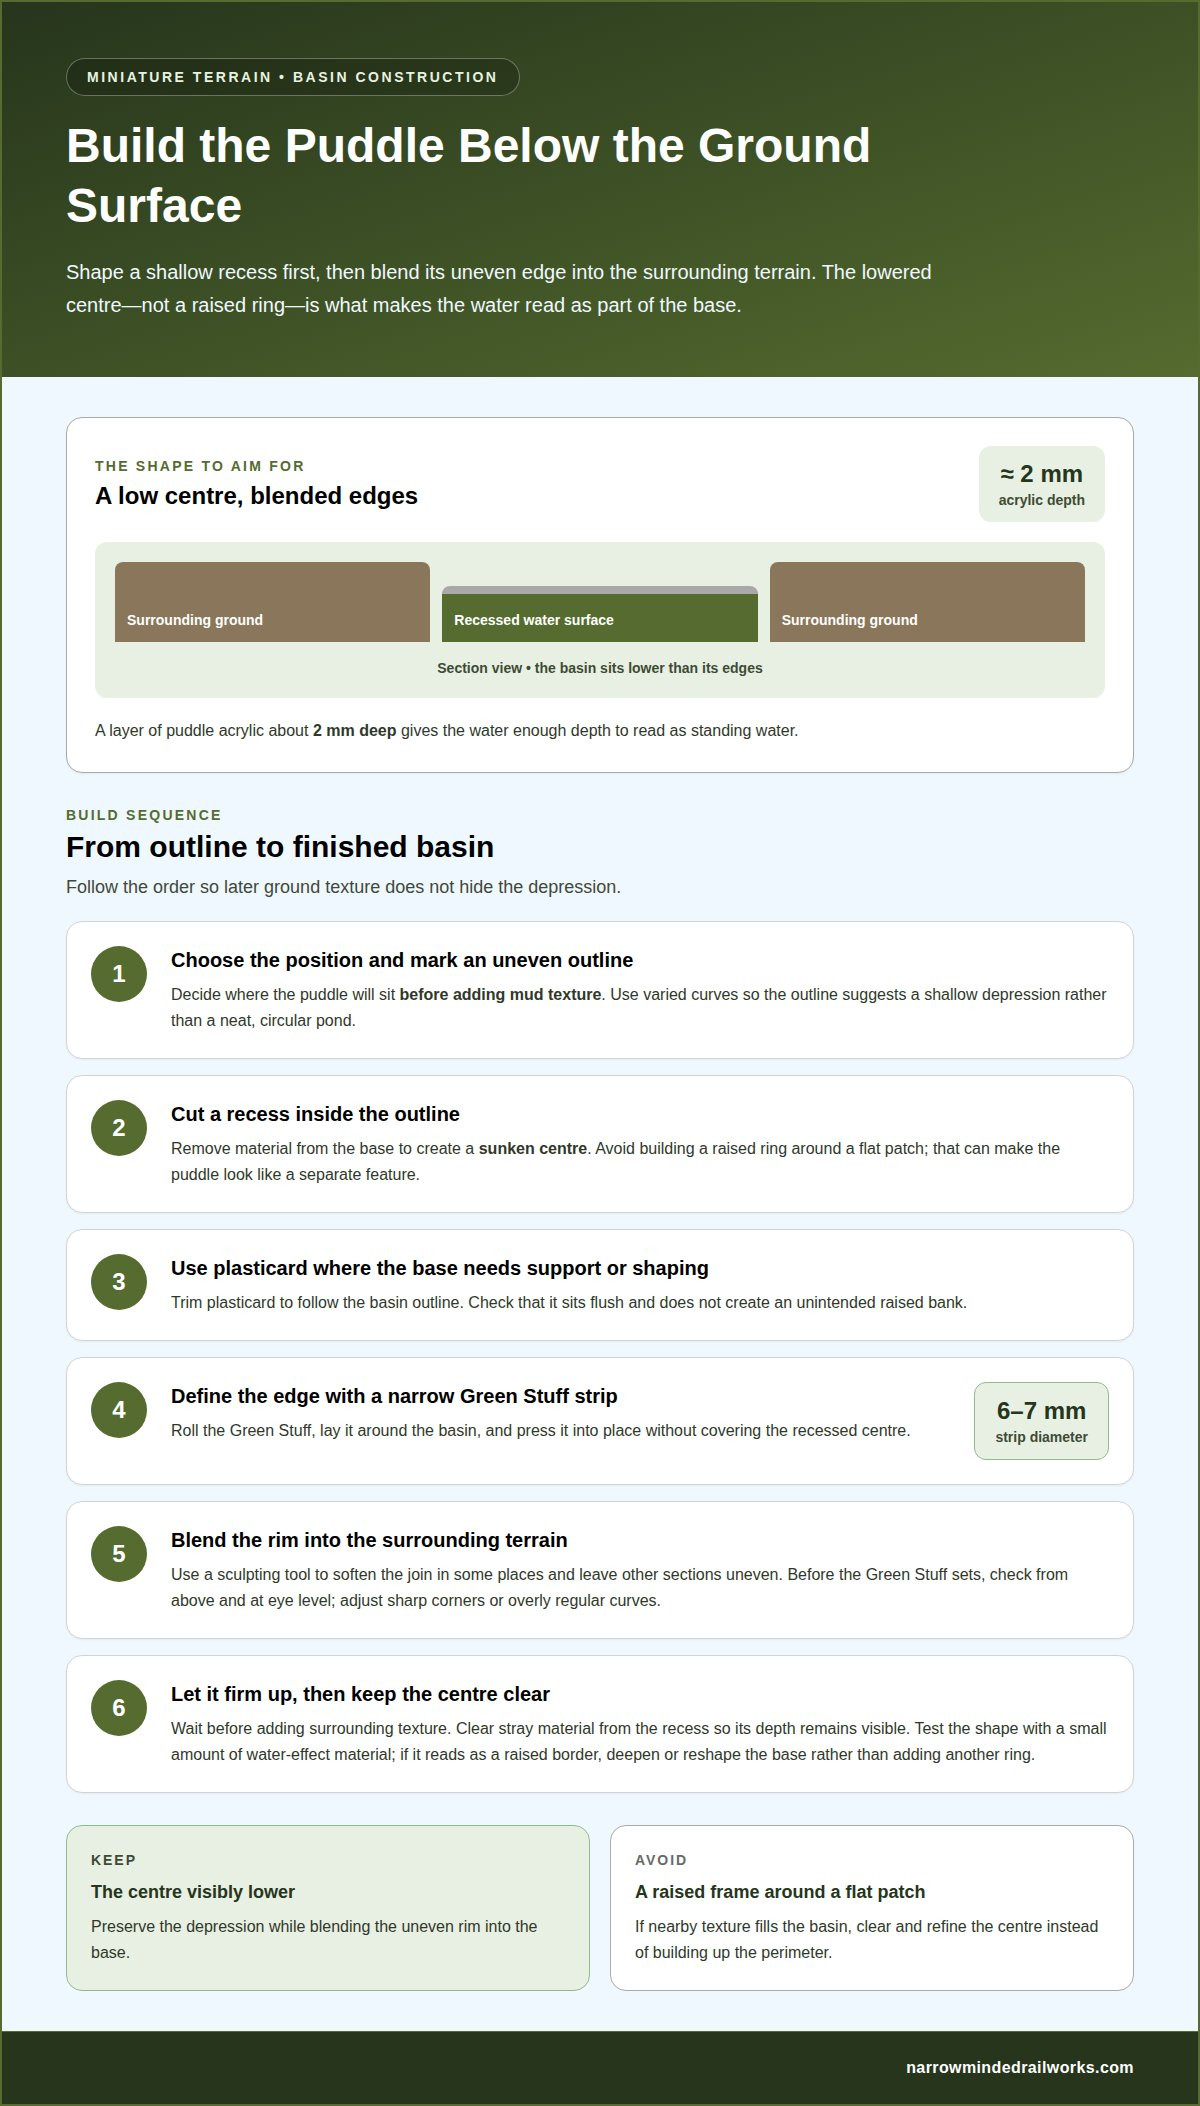
A convincing puddle starts below the surface, not with a raised ring of material. To learn how to model puddles and mud, cut a shallow recess into the base, texture and paint its bottom, then build up the wet effect with puddle acrylic. A layer about 2 mm deep gives the acrylic enough depth to read as standing water.
A convincing puddle depends on more than a glossy finish. Shape and colour matter too, while mud needs varied texture and subdued tones that connect wet areas to the surrounding ground instead of making them look pasted on.
This guide explains how to form the basin, blend its surface into the base and apply acrylic in layers. You’ll also learn how to remove bubbles with a cocktail stick and paper towel, and when to add wet-effect fluid around the finished puddle.
Key Takeaways
- Shape a recessed basin rather than building a raised ring, and use rolled Green Stuff about 6 or 7 mm in diameter to form its edge.
- Texture and paint the puddle floor before filling it so its colours and ground detail remain consistent with the surrounding base.
- Keep objects either fully below the waterline or clear of it, and add wet-effect fluid only once the surrounding texture has dried.
- Let each acrylic layer dry before adding another, and use vegetation around the edge to suggest a persistent pool.
Applying wet-effect fluid around puddles
For miniature puddles, use puddle acrylic to create depth and wet-effect fluid to add sheen to the surrounding ground. When learning how to model puddles and mud, treat these finishes separately: acrylic creates the water surface, while fluid suggests dampness nearby.
- Let the surrounding ground texture dry completely before applying wet-effect fluid. This helps the finish sit on top of the texture instead of mixing with damp material.
- First, brush a thin coat around the puddle’s edge. Follow the product’s application guidance and keep the fluid within the intended muddy area.
- Let the first application settle, then inspect the finish. If porous texture absorbs the fluid, apply more until the surface looks consistently damp.
- Position stones, plants and battlefield objects either fully beneath the puddle surface or entirely outside it. Fluid can gather around objects that interrupt the waterline.
- Add small tufts of vegetation along selected edges to suggest a permanent, stagnant pool. Keep the growth irregular rather than forming an even border.
- In Blender, shape a shallow depression, add a muddy colour, then assign a reflective water material. Adjust roughness and reflections while viewing the model under the scene’s lighting.
- In Unreal Engine, apply a water material and adjust its reflections to suit the scene. For footprints, press repeated depressions into soft mud; for tyre tracks, create paired grooves with raised ridges between them.
- On a physical miniature, finish the acrylic puddle before applying wet-effect fluid nearby. This keeps the glossy water distinct from the damp texture around it.
- A useful test of how to model puddles and mud is whether the wet area reads clearly against dry ground. If the boundary looks too uniform, adjust the fluid’s coverage rather than the puddle’s shape.
Making a puddle basin with plasticard and Green Stuff
- Choose the puddle’s position on the base before adding mud texture. Mark an uneven outline with varied curves, so it resembles a shallow depression rather than a neat, circular pond.
- Cut a recess into the base within the outline. A sunken basin gives the finished water a natural edge, while a raised ring can make the puddle look like a separate feature.
- Use plasticard to reinforce or shape the base around the cut-out where needed. Trim it to follow the basin’s outline, then check that it sits flush and does not create an unintended raised bank.
- Roll Green Stuff into a narrow strip about 6 or 7 mm in diameter. Lay it around the basin’s edge, pressing it into place to define the boundary without covering the recessed centre.
- Blend the Green Stuff into the surrounding ground with a sculpting tool. Soften the join in some places and leave other sections uneven. A varied rim helps the depression sit naturally in rough terrain.
- Check the basin from above and at eye level before the Green Stuff sets. Adjust sharp corners or overly regular curves, then clear stray material from the centre so it remains visibly lower.
- Let the shaped area firm up before adding surrounding texture. Keep the recess clear as you work nearby, since loose material can fill the basin and obscure its depth.
- Before completing the base, test the finished shape with a small amount of water-effect material. If the recess looks like a raised border instead, deepen or reshape the base rather than adding another ring.
For a realistic miniature-base puddle, cut a recess into the base instead of building a ring of material around it. The lower centre and irregular surrounding ground should read as one continuous terrain feature, not a raised frame around a flat patch. Blend sections of the Green Stuff rim into the base to create a subtle transition, while preserving the depression’s outline.
Before continuing, view the basin from above and from the side to confirm its centre remains lower than its edges. If nearby texture obscures the depression, clear the centre and refine the transition instead of adding material around the perimeter. This integrates the puddle with the base and keeps its edge from becoming a separate raised feature.
Removing bubbles from puddle acrylic
In 3D, reflective water materials create reflections; subtle surface ripples add movement. Common mistakes include pouring another layer before the previous one dries, and leaving bubbles trapped in the acrylic.
- Prepare the puddle recess before pouring. Remove loose grit and check that the base sits level, so the acrylic settles evenly instead of pooling to one side.
- Pour a controlled first layer of puddle acrylic. Leave it undisturbed as it settles, since unnecessary movement can introduce bubbles or shift the material.
- Inspect the surface while bubbles are visible. Gently guide each one towards the surface with a cocktail stick rather than stirring the acrylic.
- Lift bubbles out with the corner of a paper towel. Touch only the bubble; dragging the towel across the puddle can mark its glossy surface.
- Let the first acrylic layer dry before applying another. A dry layer provides a stable surface for the next pour and reduces the chance of trapping new bubbles beneath it.
- Build depth with separate applications rather than one hurried pour. Let each layer dry, then check for bubbles before adding the next coat.
- For a larger puddle, pour steadily across the recess. Pause to remove visible bubbles before the acrylic settles, using a fresh part of the cocktail-stick tip if needed.
- Check the finished surface from several angles under light. Reflections can reveal bubbles or uneven patches that are hard to see from directly above.
- If a bubble appears after pouring, guide it upwards with a cocktail stick and lift it out with paper towel. Wait for the current layer to dry before adding another.
Remove bubbles gently and precisely: guide each visible bubble upwards with a cocktail stick, then lift it out with paper towel. Bring bubbles to the surface before removing them, rather than trapping them under a later pour. Work only on the affected spot, leaving the surrounding acrylic undisturbed.
Use the same patience between coats. Let each puddle-acrylic layer dry before applying another, repeating that pause after every application. Bubble removal and drying are separate parts of the process: first clear visible bubbles, then allow the layer to dry before building further depth.
Texturing and painting the puddle bottom
Apply texture and paint to the recessed floor before filling it. This preserves the ground detail beneath the finished water.
Choose Mud and Puddle Texture Maps
Choose free mud and puddle maps that include clear surface detail and stated usage permissions. Check that the texture suits your scene: cracked, dry mud won’t match a saturated track. For a miniature, recreate the same effect with physical ground texture and paint. A mud-puddle 3D model with 8K textures and PBR treatment offers one example of detailed digital materials.
Add Mud Texture with Displacement and Roughness
In a digital scene, connect a displacement map to create visible height variation across the mud. Use a roughness map to vary how the surface responds to light, with wetter patches smoother and drier ground less reflective. Check the result under the scene lighting; excessive displacement can make small mud ridges look oversized. On a physical base, create similar variation with fine texture before painting.
- Clear loose material from the basin floor, then apply the base texture. Keep the recess open so its shape remains visible beneath the puddle.
- Paint the floor to match the nearby ground, using darker colour in deeper areas. Blend the muddy earth into the puddle’s centre instead of leaving a sharp colour boundary.
- In a digital scene, test displacement and roughness together. A raised mud clump reflects light differently from a smooth, wet depression, so adjust both maps while viewing the same camera angle.
- Inspect the painted floor before adding water effect. Check that the texture remains visible, the deepest colour sits in the recess and the surrounding ground still reads as mud.
- For physical modelling, keep paint and texture thin near the basin’s edge. A heavy build-up can shrink the recess and make the finished puddle look shallow.
Narrow Minded Railworks
Narrow Minded Railworks offers model railway kits and scenery items for miniature layouts where carefully modelled ground helps set the scene. If you’re building a muddy trackside or a rain-soaked diorama, its Diorama Tools & Scenery can support the wider scenery work around your puddles. OO9 Locomotive & Wagon Kits, GN15 Locomotive & Scenery Kits, and O-16.5 / 7mm Scale Kits provide options for different narrow-gauge modelling projects.
Choose the scale and scene you want to create, then use the basin, texture, paint and wet-effect steps in this guide to bring the ground together. For miniature kits or scenery items to complement realistic muddy details, explore Narrow Minded Railworks’ range.
Plan your next miniature scene
As you decide how to model puddles and mud in your next miniature scene, consider what the wet ground should convey. A trackside pool can suggest recent rain, while a muddy rut can draw attention to a figure or vehicle. Let that purpose guide the shape, position and surrounding details, so the finished surface feels part of the scene rather than an isolated effect.
Start with a small area and assess it alongside the rest of your layout. The relationship between the ground, scenery and focal point helps you judge whether the wet finish supports the composition. Then develop the idea across a larger diorama or railway setting, using techniques suited to your chosen scale and materials.
For a next step that brings model railway kits and scenery into your project, contact Narrow Minded Railworks. Choose a scene that gives your muddy details a clear purpose, then enjoy building it one considered layer at a time.
Frequently Asked Questions
How to create convincing puddle edges and shallow water?
Create a shallow depression with an uneven outline, then darken its centre and blend the edges into the surrounding ground. To model puddles and mud convincingly, build up gloss varnish or clear water medium in thin layers rather than making the entire surface uniformly shiny. Add a few muddy, matte patches beside the water and keep the puddle edges irregular. Narrow Minded Railworks’ Diorama Tools & Scenery can help bring detailed miniature scenes to life.