

A freelance industrial steam loco kit can look right yet still be difficult to run if its couplings and motor bogie don’t suit your layout. Assess coupling type and position against the stock you plan to haul, then compare the bogie’s dimensions and wheel size with the model’s available space. The specified motor bogie has wheels with a diameter of 10.5, and the hollow boiler can accommodate lead strips where extra weight is needed.
Compatibility matters: a well-chosen body is only part of a practical build, and small mismatches can affect assembly and running. This guide explains how to assess coupling fit and motor-bogie requirements before choosing a freelance industrial steam loco kit.
You’ll also learn what kit components to look for, how the model’s freelance design influences the build, and where Narrow Minded Railworks’ narrow-gauge locomotive kits fit into your project. The aim is to help you make a clear, informed choice based on your existing stock and the space available in the model.
Key Takeaways
- Check coupling type, height and position against the wagons you intend to run before committing to a body design.
- Assess the motor bogie’s dimensions and drive arrangement alongside the space available inside the locomotive.
- Plan for suitable tools and extra components by reviewing the kit contents and build sequence before assembly begins.
- Allow for the time needed to fit, test and adjust components; build pace depends on the model’s requirements and your workshop experience.
- Choose a kit that suits your preferred narrow-gauge scale and the role you want the finished model to play on your layout.
What parts and materials are included in a steam locomotive kit?
A steam locomotive kit may include a body and separate working details, but the contents depend on its design. Check the parts list before planning assembly. Identify the body, running gear, motion components and fittings, then note which items are supplied and which you must source separately. This inventory helps prevent assumptions about materials or components from shaping your build.
The Coed Talon Colliery locomotive ‘Express’ is a useful example of a freelance industrial design. Its form combines a coal truck with a portable engine, based on a single photograph. The model has a separate motion and flywheel unit, which makes painting easier. This illustrates why a parts list should identify both major assemblies and small, removable components.
To see an example of a steam locomotive kit build, watch this video:
Next, compare the listed components with the locomotive’s intended configuration. The earlier, what-if version of ‘Express’ is set before a shed was added with a second vertical boiler, after the main boiler was decommissioned. This affects which body details belong to the version you are modelling. Choose the configuration before fitting details, or parts may represent different stages of the locomotive’s imagined history.
- Body and boiler: Check their shape against the selected configuration, including the hollow boiler.
- Motion and flywheel: Confirm whether these form a separate unit, as they do on this model.
- Motor bogie: Compare its wheel diameter with the model’s available space. The specified wheels have a diameter of 10.5.
- Weight: Plan for the model’s weight requirement. Lead strips can fit inside the hollow boiler.
These are design-specific facts, not a universal contents list for every steam locomotive kit. For example, don’t assume a body kit includes a motor bogie. Use the parts list to establish what is supplied, then plan separately for any components the build requires. With a freelance industrial steam loco kit, matching the bogie and body is especially important because the design may not follow a standard prototype arrangement.
Materials matter during finishing. Check which material each part is made from and whether assembly requires separate adhesive or paint. Identify the materials before choosing a finishing method. The separate motion and flywheel unit on ‘Express’ also suggests a practical sequence: keep it apart while painting the body, then fit it according to the build instructions.
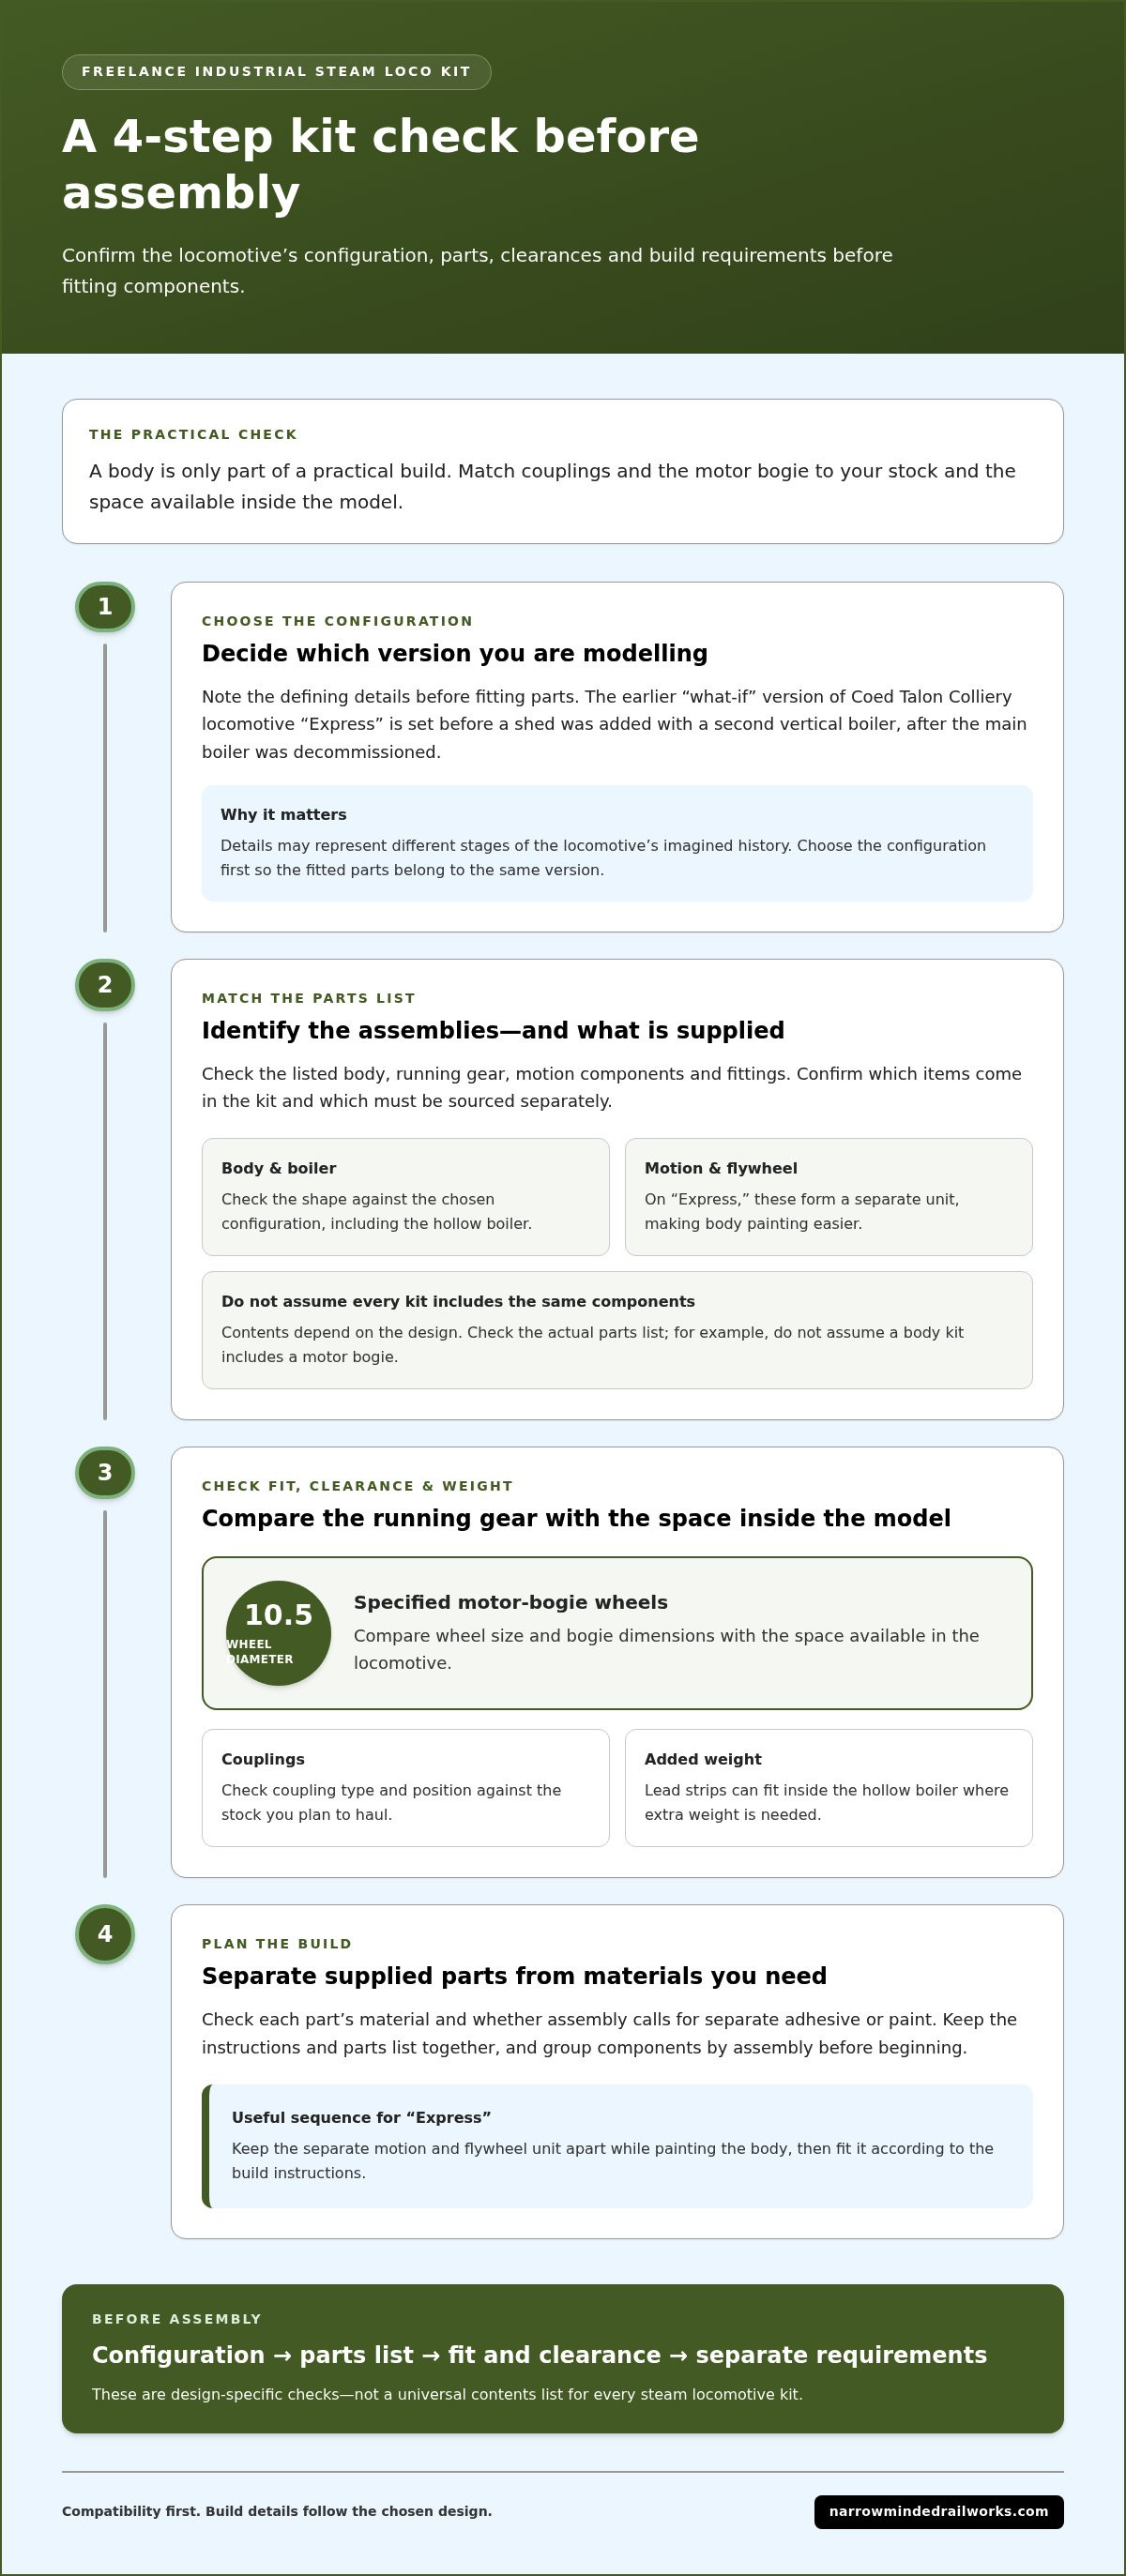
Use this sequence to review a kit before beginning:
- Choose the locomotive’s configuration and note its defining details.
- Match the parts list against the body, motion, flywheel and motor bogie.
- Check wheel clearance and decide where the required weight will sit.
- Sort supplied parts from materials and components needed separately.
Finally, check age guidance and fulfilment details where they apply. The seller states that its detailed scale models are not for children under 14 years old. It also dispatches the item within 5 days after receiving cleared payment. Those details do not define the kit’s components, but they help set expectations before a model enters the workshop.
What extra tools, components and workshop skills are needed to build a kit?
A parts list is only the starting point. Assembly may also require hand tools, finishing materials and components specified separately for the design. Before opening the pack, lay out the instructions and sort parts into body, running gear and small fittings. Note anything you must provide, so essential items aren’t overlooked halfway through assembly.
With a freelance industrial steam loco kit, careful fitting matters because a non-standard design may not follow familiar prototype proportions. A craft knife, fine files and abrasive paper can help remove small imperfections and prepare mating surfaces. Tweezers are useful for holding small fittings, and a cutting mat provides a stable work surface. Choose tools that give you control rather than forcing a part into place.
Useful workshop items can include:
- Cutting and shaping tools: A sharp craft knife and fine files help trim or smooth parts where needed.
- Small-part handling: Tweezers can hold details steady while you position or attach them.
- Measuring and alignment: A ruler and small square help compare components and keep assemblies straight.
- Surface preparation: Fine abrasive paper can smooth joins before priming or painting.
- Assembly supplies: Keep suitable adhesive and paint available when the instructions call for them.
Don’t assume one adhesive suits every material. Identify each component’s material, then choose an adhesive intended for it. Apply it sparingly and test the fit before joining visible surfaces. Dry-fitting lets you spot gaps, interference or incorrect orientation before making a permanent bond.
Mechanical fitting takes a different approach from cosmetic finishing. If your build uses a separate chassis or motor, check how it sits inside the body before final assembly. The bogie must move freely through its intended range, and wiring must not obstruct moving parts. For a powered model, plan a clear wire route and keep connections accessible during initial testing.
Painting also benefits from a planned sequence. Where the design allows, separate removable details and prepare each surface before applying colour. On ‘Express’, the motion and flywheel unit is separate to aid painting. This shows why parts should be grouped by assembly, rather than painted indiscriminately after everything is joined.
Work steadily through the build:
- Read the instructions and identify separately supplied materials or components.
- Dry-fit major parts, then inspect alignment and clearances.
- Prepare surfaces and attach parts using suitable adhesive.
- Finish accessible surfaces before fitting delicate details.
- Test movement and component clearance before completing final assembly.
Patience, accurate handling and the ability to follow an assembly sequence are more useful than specialist machinery for many small-kit tasks. If scenic finishing is part of the project, diorama tools and scenery can help shape the setting around the locomotive. Keep the work area organised, return small fittings to a tray, and record any adjustments that affect later assembly.
How long does it take to build a live-steam locomotive kit?
There’s no reliable build time that applies to every live-steam locomotive kit. The work depends on what the kit supplies, how much machining or fitting remains, and whether the model needs a working boiler and steam system. A body-focused freelance design is a different project from a complete live-steam locomotive. First identify which type of build you’re planning.
A live-steam project involves more than assembling a locomotive body. A live-steam project may involve mechanical assembly and preparation for operation, depending on the kit. A kit for a motorised model may instead focus on the body and detail parts. Don’t use the build time for one type to estimate the other.
Use the kit instructions to divide the work into distinct stages. This makes the main time factors clear before assembly begins:
- Preparation: Inventory parts, read instructions and organise tools and materials.
- Mechanical assembly: Fit the frame, running gear and drive components in the specified sequence.
- Steam-system work: For a live-steam model, allow for fitting and integrating its boiler and associated components.
- Finishing: Prepare surfaces, paint the body and add details that are easier to handle separately.
- Testing and adjustment: Check movement and operation, then correct problems before final finishing.
The longest stage varies by design. A kit with prepared components may need careful fitting and finishing, while a project requiring additional mechanical work has more stages. For example, aligning running gear and integrating a steam plant are different tasks from assembling a body around a separate drive unit. The parts list and instructions are better guides than the word “steam” in a kit description.
Workshop habits also affect how long a project takes. A clean, organised bench helps prevent small fittings from going missing. Dry-fitting before applying adhesive or paint can reveal alignment issues early. Rushing a join or coating, by contrast, can mean rework. Note any adjustments, especially when later assembly depends on the position of an earlier component.
Experience affects the pace, but not every task benefits from speed. A first-time builder may need longer to interpret drawings, identify parts and practise clean finishing. Familiarity with the assembly sequence can make later steps more efficient. Either way, pause between mechanical assembly and cosmetic finishing to inspect clearances and movement.
Plan around milestones rather than guessing the total duration. Set targets for completing the inventory, main assemblies, finishing and final checks. If a stage reveals a fit problem, resolve it before moving on. This makes progress measurable without suggesting every kit or workshop follows the same timetable.
For a UK modeller, a practical estimate starts with the actual scope: body assembly, powered running gear or a complete working live-steam installation. Record the remaining tasks and the order they depend on. This gives you a useful project plan. A generic build-time estimate can mislead when kits contain different parts and require different skills.
Loco kits
Assess a loco kit by separating its prototype inspiration from its model requirements. The Coed Talon Colliery locomotive ‘Express’ is described as a combination of a coal truck and a portable engine. Its freelance design draws on a single photograph, not a complete set of prototype drawings. The model interprets a source image, so it isn’t a dimension-for-dimension reproduction.
Start by deciding what the photograph shows and what the model needs to do on your layout. Identify the visible features that define the locomotive’s character, then consider how its body, running gear and couplings will work with your railway. This keeps the build focused. A convincing freelance model needs a coherent design, while practical compatibility depends on your track, stock and available space.
‘Express’ also represents a specific earlier, what-if configuration. It shows the locomotive before a shed was added with a second vertical boiler, after the main boiler was decommissioned. This gives the modeller a clear choice of period within the imagined history. Decide which configuration you want before adding details, then keep the boiler arrangement and surrounding features consistent.
A useful evaluation begins with the running equipment. The specified motor bogie has wheels with a diameter of 10.5. Compare the wheel size with the body’s clearance and the bogie’s intended position. Then assess coupling compatibility with the wagons you plan to haul. Check coupling type, height and location against your existing stock, because a visually suitable locomotive can still be awkward to operate if those interfaces differ.
Weight also affects how a model runs. The hollow boiler provides space for lead strips, so weight can be positioned within the body. Consider this alongside the motor bogie and body arrangement, rather than treating weight as a finishing detail. A compact freelance design may need careful placement to avoid obstructing the drive or interfering with the shell.
The separate motion and flywheel unit on ‘Express’ allows for a more manageable finishing sequence. Keeping it apart while painting makes the surfaces around the motion easier to reach. Before joining assemblies, dry-fit them and check access to visible details. This helps preserve the model’s character and avoids finding that a completed section blocks a later task.
Use this review before choosing or assembling a loco kit:
- Read the design: Identify the photograph or prototype features that inform the model.
- Select a configuration: Keep details consistent with the chosen version of the locomotive.
- Check operation: Compare bogie clearance and couplings with the layout and rolling stock.
- Plan finishing: Note which assemblies remain separate for painting and access.
These checks help turn a distinctive concept into a model suited to your railway. If you’re ready to choose a narrow-gauge project, explore locomotive kit options and compare the design with your layout needs.
Treat the photograph as a guide to the locomotive’s visible character, not as proof of details it cannot show. Since the design draws on a single photograph, distinguish what is clearly represented from what you must decide for the model. Keep those decisions consistent with your chosen configuration, and don’t add features simply to imply historical certainty the reference cannot provide. This approach helps create a considered model without suggesting it reproduces a complete record.
As the build progresses, apply the same reference-led judgement to the silhouette and placement of details. Step back and compare the model’s overall arrangement with the photograph, then check that additions support the freelance design rather than compete with it. If a detail is uncertain, make a deliberate choice and apply it consistently. The goal isn’t to resolve information the photograph does not provide, but to create a coherent model whose appearance, configuration and practical requirements work together. Keep this in mind during finishing, when small decisions can noticeably affect the locomotive’s character.
Narrow Minded Railworks: OO9 Locomotive & Wagon Kits
Narrow Minded Railworks offers OO9 Locomotive & Wagon Kits for modelers developing narrow-gauge layouts and freelance locomotive projects. Its range also includes GN15 Locomotive & Scenery Kits and O-16.5 / 7mm Scale Kits, giving you options to consider alongside your preferred scale and layout plan. Choose a kit by comparing its intended scale, body design and role with your existing stock; coupling fit and motor bogie selection remain important parts of planning your build. Diorama Tools & Scenery can help you shape the surrounding scene. To explore the available kit and scenery categories, visit narrowmindedrailworks.com.
Turn Your Layout Plan into a Build Brief
Before choosing your next project, write a short build brief describing what you want the locomotive to do and how it should look. Note the layout’s curves and clearance limits, the stock it will work with, and the visual features that matter most. This gives you a practical reference when comparing kit designs, rather than relying on appearance alone.
For a freelance industrial steam loco kit, a clear brief can also help you decide where to allow flexibility. Separate essential requirements from details you can adapt during construction. This keeps your choices focused and helps you plan a model that feels individual while suiting your railway.
Narrow Minded Railworks offers model railway kits for narrow-gauge projects. If you’re ready to explore options or discuss your plans, contact Narrow Minded Railworks. Take your layout requirements with you, and use them to shape a build that you’ll be pleased to develop.
Frequently Asked Questions
What does “freelance industrial steam locomotive kit” mean?
A freelance industrial steam loco kit is based on an imagined or adapted industrial locomotive, rather than a precise copy of a documented prototype. It gives the builder room to interpret the design while planning how the model will run on a layout. For example, the Coed Talon Colliery locomotive ‘Express’ was designed from a single photograph, so it is an interpretation rather than a fully documented replica.
Which freelance industrial steam locomotive kits are available in the UK?
UK options include OO9 Locomotive & Wagon Kits, GN15 Locomotive & Scenery Kits, and O-16.5 / 7mm Scale Kits. Kits are unpainted, unprimed and unassembled. Resin is delicate: avoid drops and handle thicker sections. We cannot be held responsible for breakages once your item has arrived. If the piece is broken in the post, please provide images and we will see what we can do to help.