

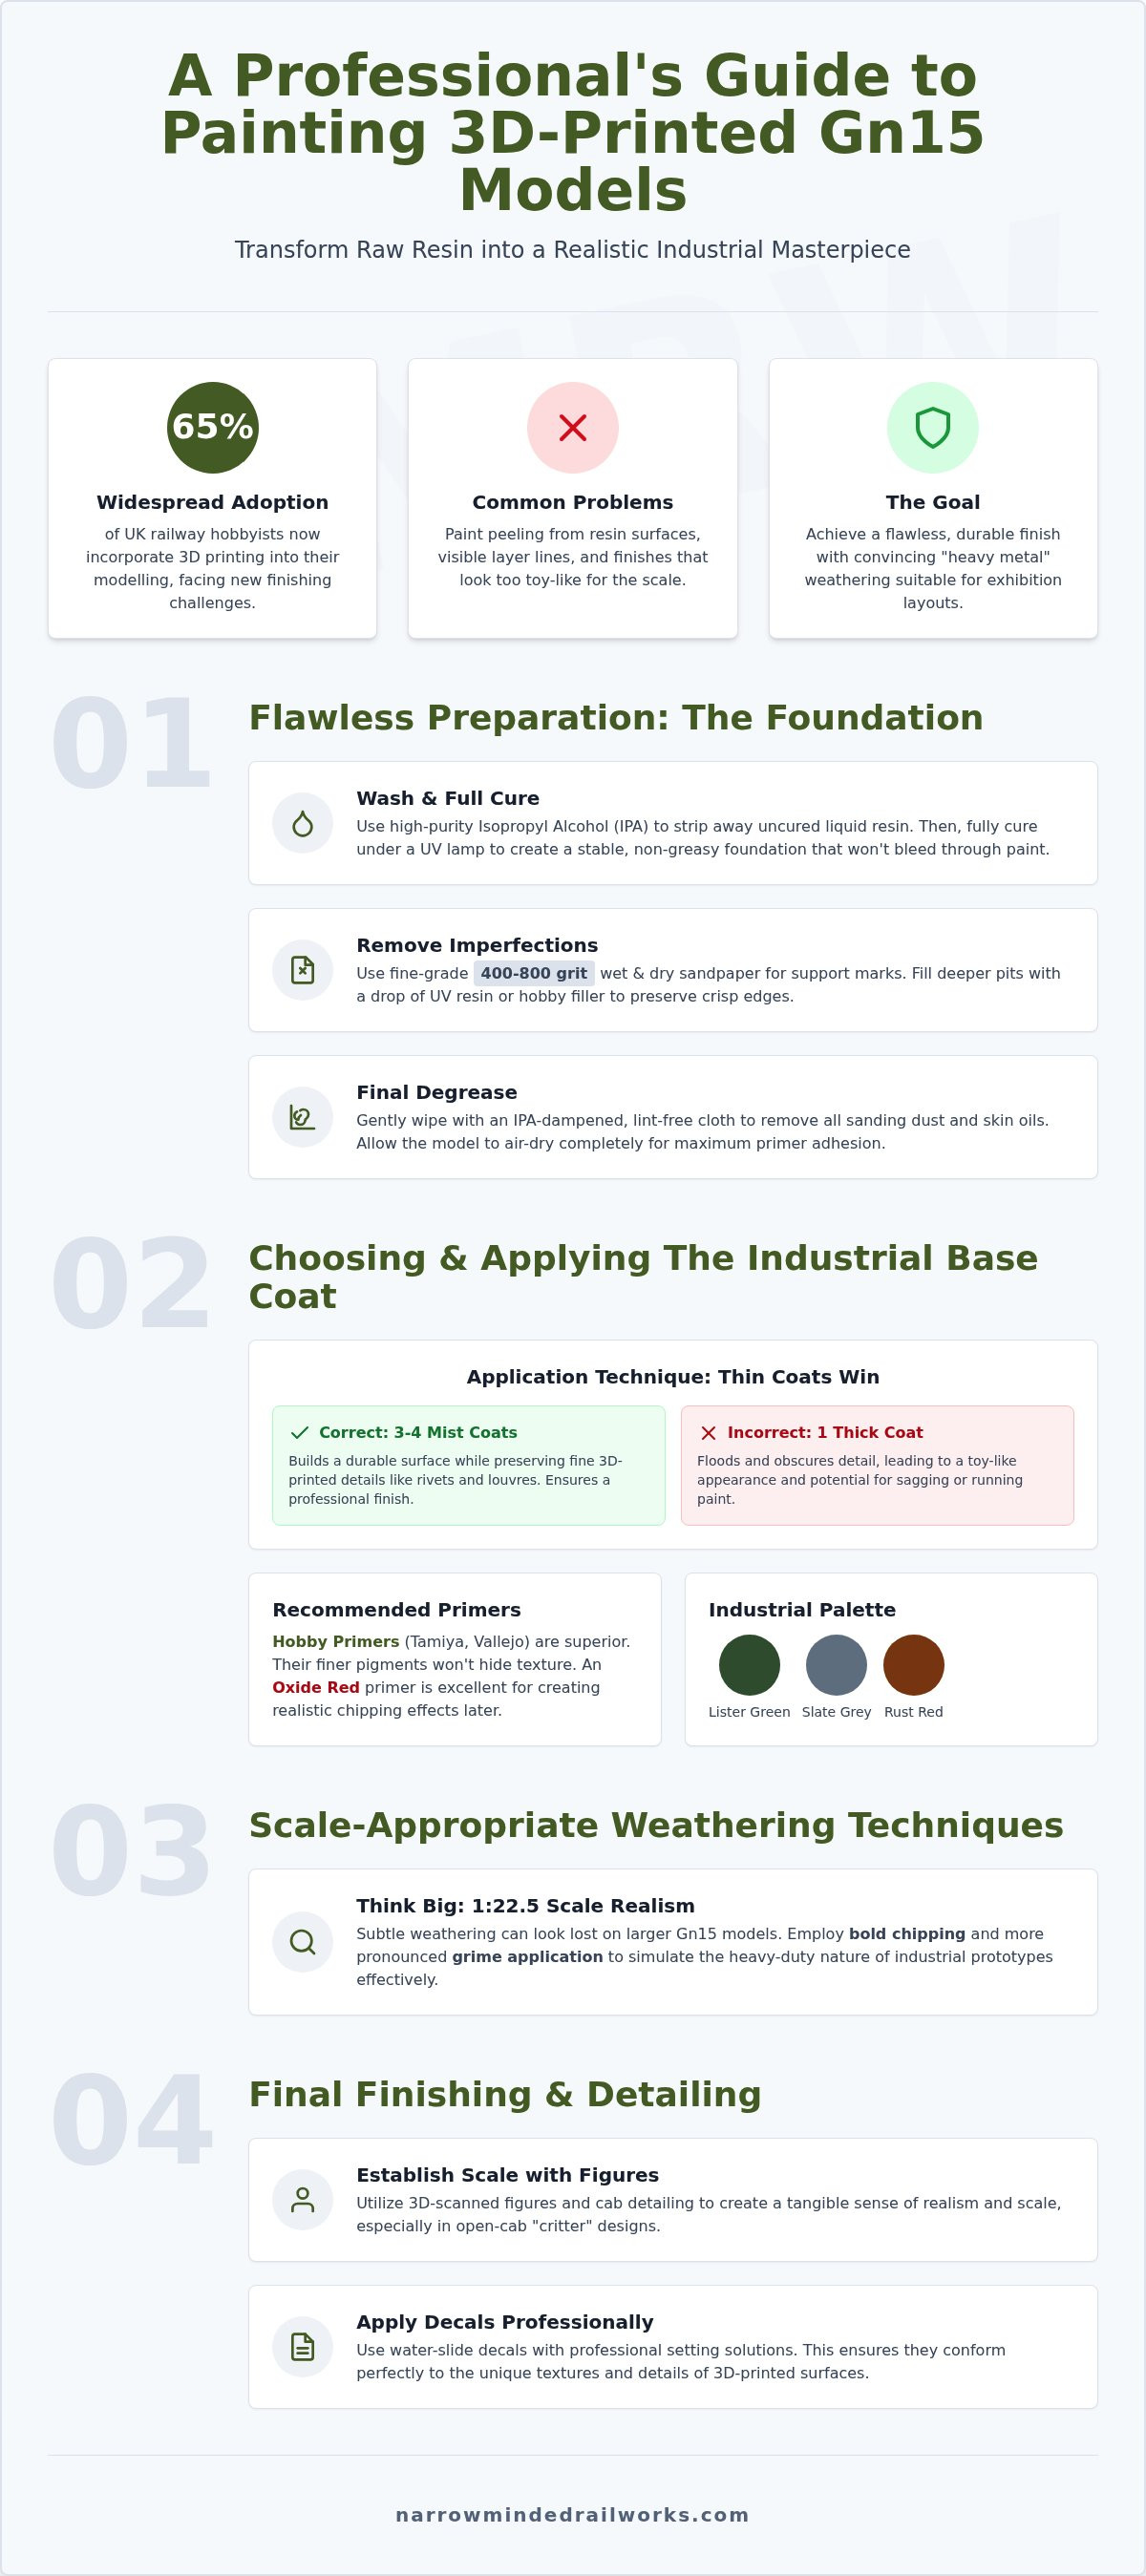
With 65% of UK railway hobbyists now incorporating 3D printing into their modelling, the focus has shifted from sourcing unique kits to achieving a professional finish. While 3D-printed resin offers incredible detail for industrial "critters", it often presents challenges with surface adhesion and visible layer lines. Mastering the art of painting gn15 models requires a specific approach to preparation; however, using the correct high-build primer ensures a flawless base for your paintwork. You've likely felt the frustration of paint peeling off a resin surface or weathering that looks too subtle for the 1:22.5 scale, leaving your hard work looking like a toy rather than a heavy-duty machine.
This guide provides the specific professional techniques required to transform raw resin into a realistic industrial masterpiece. You'll learn how to eliminate support marks and apply convincing rust and grime effects that suit the rugged nature of narrow gauge prototypes. We will walk through the entire process, from selecting the right primers to the final detailing that makes your Narrow Minded Railworks kit look like a genuine piece of industrial history. By following these structured steps, you can ensure your 3D-printed models stand up to the scrutiny of any exhibition layout.
Key Takeaways
- Master the specific preparation steps required for painting gn15 models to ensure long-term paint adhesion on UV-cured resin surfaces.
- Identify the best high-build primers and industrial colour palettes to effectively mask layer lines and create a convincing "heavy metal" appearance.
- Learn scale-appropriate weathering techniques, such as bold chipping and grime application, designed specifically for the larger 1:22.5 scale.
- Utilise 3D-scanned figures and cab detailing to establish a sense of realism and scale within the open-cab designs of industrial "critters".
- Apply water-slide decals and sealants professionally using setting solutions that conform to the unique textures of 3D-printed kits.
Preparing 3D-Printed Resin for a Flawless Finish
3D-printed resin behaves differently than the injection-moulded plastic found in traditional kits. While resin allows for the intricate bolt heads and textures seen in Gn15 scale models, the material can be temperamental if the surface isn't properly stabilised. You might find that the resin feels slightly tacky or "greasy" to the touch. To resolve this, perform a thorough wash and cure check. Use high-purity isopropyl alcohol to strip away any uncured liquid resin, then ensure the model has spent enough time under a UV lamp to reach full hardness. A fully cured model provides a stable foundation that won't warp or "bleed" resin through your finished paintwork. Skipping this step often results in paint failure later, making the process of painting gn15 models much more difficult.
Removing Support Nibbles and Layer Lines
Support structures are a necessity of the printing process, but they often leave behind small "nibbles" or pockmarks. While these marks can be unsightly, they don't have to ruin your finish. Start by using fine-grade wet and dry sandpaper, typically between 400 and 800 grit, to smooth out layer lines and support remnants. If you encounter deeper pits, avoid over-sanding, as this can round off the crisp, industrial edges of your "critter" locomotive. A proactive solution involves filling these small gaps with a tiny drop of UV resin or a dedicated hobby filler. Once cured and sanded flush, these repairs become invisible under a base coat, preserving the heavy-duty aesthetic of the original design.
The Final Clean Before Priming
The last hurdle before you pick up an airbrush or spray can is removing every trace of dust and oil. While many modellers reach for warm soapy water, this can sometimes leave a thin film that interferes with paint bonding. A better approach is a quick, gentle wipe with a lint-free cloth dampened with IPA. This ensures all sanding dust and skin oils are completely stripped away. You must allow the model to air-dry naturally until every trace of moisture has vanished. A bone-dry surface is the only way to guarantee your primer will bite into the resin properly. For those just starting out, our previous article on Painting 3D Printed Models offers additional insights into managing these unique materials. When you are painting gn15 models, taking the time to degrease your kit now prevents the heartbreak of peeling paint during the weathering stage.
Choosing and Applying the Industrial Base Coat
Once your resin is clean, the first layer of paint determines the durability of the whole project. Unlike metal or standard plastic, resin requires a primer with high "bite" to prevent flaking. While many UK modellers use automotive primers like Halfords Grey for cost efficiency, these can often obscure the fine louvres and rivets found on 3D-printed bodies. A more precise general painting method involves multiple thin coats to build up a resilient surface without flooding the detail. When painting gn15 models, your choice of primer colour also sets the stage for weathering; a dark grey or oxide red base can act as a natural shadow beneath the top coat.
Applying thin layers is particularly important for 1:22.5 scale models. Large surfaces can be tempting to cover quickly, but heavy layers will inevitably sag or hide the 3D-printed rivets. Applying three or four mist coats is far more effective than one thick application. This approach ensures that every cooling fin and latch remains sharp, which is essential for a professional finish. If you aren't comfortable with an airbrush, a high-quality rattle can is a viable alternative, provided you control the flow carefully.
Recommended Primers for GN15 Kits
Automotive primers provide a tough finish, but you must apply them with care. If the spray is too heavy, you risk losing the delicate bolt detail that defines these industrial kits. Specialised hobby primers from Tamiya or Vallejo are often the superior choice for resin. These are formulated with finer pigments that won't hide the 3D-printed textures. If you plan on heavy chipping later, starting with an oxide red primer allows you to reveal a realistic "metal" undercoat when you distress the top layer.
Selecting Your Industrial Palette
Industrial locomotives rarely stayed in pristine condition, so choosing the right palette is vital for realism. Common liveries like Lister Green, Slate Grey, or a deep Rust Red provide the perfect foundation for a hard-worked machine. Instead of using colours straight from the jar, try mixing in a small amount of light grey to create a "faded" effect. This mimics the look of a locomotive that has spent years working in a quarry. If you are new to this gauge, our guide on Getting Started in GN15 Scale covers the history of these prototypes in more detail. When you are painting gn15 models, remember that industrial machines were tools, not showpieces.
Our GN15 locomotive and scenery kits are designed to take these base coats beautifully, providing a robust surface for the weathering stages to follow.
Weathering Techniques for 1:22.5 Scale Realism
Weathering in GN15 is distinct from smaller scales like OO9 or N gauge. Because the 1:22.5 scale is significantly larger, standard "all-over" washes can often appear muddy or unrealistic. You might find that subtle effects disappear on a large locomotive body. To fix this, you must adopt a bolder approach to painting gn15 models by treating weathering as a physical layer rather than just a colour change. Industrial "critters" were rarely pampered; they lived in damp quarries and dusty brickworks. Your goal is to replicate that hard-working life through heavy chipping and deep, recessed shadows.
Effective weathering begins with the foundation. If you haven't yet mastered the base, reviewing technical guides on how to prime your print ensures your weathering layers won't lift the underlying paint. Once your base is stable, use acrylic washes to define the 3D-printed grilles and engine louvres. These recesses should be dark and oily to provide the necessary contrast against the main body colour. Weathering powders are excellent for the final touch, adding a matte, dusty texture to the lower chassis and footplates that paint alone can't achieve.
Creating Realistic Rust and Corrosion
Rust isn't just a single shade of brown; it's a complex layer of textures. You can achieve depth by layering multiple tones, starting with a dark "burnt umber" and finishing with bright "orange-rust" highlights. The sponge technique is your best tool here. Dip a small piece of packing sponge into your paint, dab most of it off, and lightly tap it onto high-wear areas like buffer beams and cab edges. This creates random, jagged chipping that looks far more authentic than brush-painted marks. Focus your heaviest corrosion on the steps and lower panels where moisture and grit naturally accumulate.
Oil, Grease, and Grime
Industrial locomotives are notoriously leaky, particularly around the axles and engine housing. While matte finishes are standard for rust, you should use gloss or satin varnishes to simulate fresh oil and grease. Applying a dark, pin-point wash around the axle boxes creates the illusion of lubricating oil seeping out during a shift. However, it's easy to go too far. To maintain "scale presence", always step back and view the model from a distance. If the weathering looks like a single mass of brown, you've lost the underlying detail. A successful GN15 finish balances heavy grime with clean areas to highlight the machine's mechanical structure.
Cab Detailing and Establishing Scale with Figures
The open-cab design is a hallmark of industrial narrow gauge locomotives, making the interior one of the most visible parts of the model. In the 1:22.5 scale, a bare cab immediately breaks the illusion of a working machine. While the confined space of a small "critter" cab can make traditional painting difficult, the high-resolution detail of 3D-printed resin provides clear guides for your brush. When painting gn15 models, the goal is to highlight these mechanical controls so they stand out against the darker industrial colours of the bodywork.
Beyond the controls, adding a human element is the most effective way to communicate the sheer size of these machines. Because GN15 uses standard 16.5mm track, it can be easy for viewers to mistake the models for smaller OO or HO scales. A correctly scaled, 3D-scanned figure provides an immediate visual reference that "sells" the larger proportions. These figures are not just accessories; they are essential tools for establishing the narrative of your layout. They bridge the gap between a static model and a living piece of industrial history.
Interior Cab Detailing
To make the interior controls pop, use a technique known as dry brushing. After applying a dark base coat to the cab floor and walls, take a flat brush with a tiny amount of silver or gunmetal paint. Wipe most of the paint off onto a paper towel until the brush is almost dry, then lightly flick it across the raised levers and handles. This catches the crisp edges of the 3D print without messy overspill. You can further enhance the realism by adding small details like coal shovels, oil cans, or even a miniature lunch box. If you are still exploring the origins of these systems, our guide on What is a Narrow Gauge Railway? provides the historical context needed to theme your detailing accurately.
Painting Your GN15 Crew
3D-scanned resin figures offer a level of anatomical realism that traditional cast figures often lack, but they require careful finishing to avoid a "plastic" appearance. Start with a matte primer to provide a textured surface for your skin tones. To achieve a lifelike finish, apply a matte varnish to the clothing but use a satin varnish for the skin to give it a natural, healthy sheen. Positioning your crew so they are interacting with the controls or leaning out of the cab helps tell a story of a busy working day. You can find highly detailed 3D-scanned figures among our GN15 locomotive and scenery kits, ensuring your crew looks as professional as your locomotive.
Final Finishing: Decals, Sealing, and Maintenance
The final stage of painting gn15 models is often the most satisfying; however, it requires a steady hand to avoid compromising the weathering work you have already completed. While your locomotive now looks like a hard-working industrial machine, it lacks the final identifiers and protection needed for regular layout use. 3D-printed resin surfaces, even when sanded, can possess microscopic textures that cause water-slide decals to "silver" or trap air. To resolve this, you must prepare the surface specifically for transfers before applying a final protective seal that locks in your grime and rust effects.
Choosing the right finish is a balance between aesthetic realism and physical durability. Industrial "critters" were rarely glossy, so a flat or matte finish is usually the standard choice. However, a completely matte model can sometimes look "dead" under exhibition lighting. A proactive solution is to use a satin varnish on certain mechanical parts to suggest oily metal while keeping the main bodywork dull. This final layer doesn't just dictate the look; it provides a hard-wearing barrier against skin oils and dust during operation.
Decal Application on 3D Resin
Water-slide decals often struggle to adhere to the matte paints used for industrial liveries. To fix this, apply a small "island" of gloss varnish exactly where the decal will be positioned. This provides a perfectly smooth surface that prevents air bubbles from forming under the film. Once the decal is in place, use a setting solution like Micro Sol to soften the carrier film. This allows the transfer to "melt" into the 3D-printed rivets and louvres, making it look painted on rather than stuck on. After the decal has dried for 24 hours, lightly weather over it with your sponge or powders to blend the bright lettering into the rest of the locomotive's worn aesthetic.
Varnishing and Long-Term Care
A final seal is critical for 3D-printed models because resin can be more brittle than injection-moulded plastic, and unsealed weathering powders will eventually rub off. Use a high-quality hobby varnish to protect your work, applying it in two thin mist coats rather than one heavy layer. Once your fleet is on the layout, maintenance is straightforward. Avoid using damp cloths, which can streak your weathering; instead, use a soft, dry makeup brush to gently flick away dust. This keeps the finish crisp without risking the delicate 3D-printed details like cab levers or sand pipes. If you are ready to start your next project, you can Browse our range of GN15 Locomotive and Wagon Kits to find your next industrial masterpiece.
Bringing Your Industrial Fleet to Life
Finishing a high-quality resin kit requires patience; however, the rewards of a well-executed industrial finish are unparalleled. By mastering the preparation of UV resin and applying bold weathering techniques, you can transform a raw 3D print into a convincing heavy-duty machine. We have explored how proper priming prevents paint failure and why scale-appropriate detailing is the secret to a professional layout. Success in painting gn15 models depends on these foundational steps, ensuring your industrial "critters" look as if they have spent decades in a working quarry.
Our specialist 3D-printed UV resin designs are specifically engineered for easy painting and assembly, providing a robust canvas for your creative work. Whether you are adding the final crew member or sealing your latest weathering project, these professional techniques will help you achieve a high-quality finish every time. With worldwide shipping available for all our kits, starting your next narrow gauge masterpiece is simple. Explore our GN15 Collection for your next painting project and begin building your own industrial legacy today.
Frequently Asked Questions
What is the best primer for 3D-printed resin GN15 kits?
The most effective primers for 3D-printed resin are specialized hobby brands like Tamiya or Vallejo. While automotive primers are often cheaper, they can be too thick for the fine rivets and louvres found on narrow gauge kits. A proactive solution is to apply several light mist coats rather than one heavy layer. This ensures a strong mechanical bond to the UV resin without burying the intricate industrial details that define these "critters".
Do I need to wash my GN15 kit before painting?
You must always wash your resin kit before you begin the process of painting gn15 models. Residual skin oils or tiny traces of uncured resin will prevent paint from adhering properly. A proactive solution is to use high-purity isopropyl alcohol or warm soapy water followed by a complete air-dry. Taking this step ensures your primer bites into a clean surface, preventing the heartbreak of peeling paint during the weathering stage.
Can I use acrylic paints on 3D-printed models?
Acrylic paints are the ideal choice for finishing 3D-printed resin models due to their fast drying times and ease of layering. However, they struggle to bond directly to raw resin without a foundation. A proactive solution is to use a dedicated resin primer first. Brands like The Army Painter or Citadel offer excellent pigment density, which is essential for achieving a professional finish on the larger surfaces of 1:22.5 scale locomotives.
How do I remove support marks from a resin locomotive body?
Support marks are best removed using fine-grade wet and dry sandpaper, typically between 400 and 800 grit. While these marks are a natural part of the 3D-printing process, they shouldn't remain visible on your finished model. A proactive solution is to fill any deeper pockmarks with a tiny drop of UV resin or hobby putty. Once sanded flush and primed, these repairs become completely invisible, maintaining the sharp edges of the industrial design.
Should I paint my GN15 model before or after assembly?
Painting in sub-assemblies is generally the best approach for GN15 locomotives because of their highly visible open cabs. While it is tempting to build the entire kit first, this makes detailing the controls and levers much harder. A proactive solution is to paint the cab interior and chassis separately. You can then perform the final assembly once the internal weathering is complete, ensuring every corner of the model receives a professional finish.
How do I make my GN15 locomotive look like real rusty metal?
Creating realistic rust on 3D-printed kits requires layering different shades of brown and orange to build texture. Relying on a single colour often looks flat and "toy-like" at the 1:22.5 scale. A proactive solution is to use the sponge technique to apply random, jagged chips of dark burnt umber followed by bright rust highlights. This method mimics the way industrial paint naturally degrades in harsh environments like quarries or brickworks.
What glue is safe to use on painted resin kits?
Cyanoacrylate (super glue) or two-part epoxies are the safest and strongest adhesives for resin kits. Traditional plastic cement won't work because it relies on melting the material, which resin does not do. A proactive solution is to scrape away a small amount of paint from the joining surfaces before gluing. This allows the adhesive to bond directly to the resin, creating a much more durable mechanical connection than gluing onto a layer of paint.
How do I stop paint from chipping off my 3D-printed loco?
To prevent paint from chipping off your 3D-printed loco, you must apply a final protective sealant. Painting gn15 models involves significant handling during operation, which can wear down acrylic layers and weathering powders. A proactive solution is to apply two thin coats of matte or satin varnish once your detailing is complete. This provides a hard-wearing barrier that protects your work from skin oils and layout dust without altering the industrial appearance.