

A standard "out of the box" locomotive often lacks the gritty, industrial soul required for a truly convincing narrow gauge layout. You've likely felt the frustration of scouring the market for an oo9 tram loco kit, only to find 3D prints with visible layer lines or bodies that simply won't seat correctly on a motor. It's a common hurdle that stops many modellers from creating the roadside tramway of their dreams.
We understand that while you want a unique focal point, you don't want to spend weeks troubleshooting mechanical misalignments. This guide provides a clear path to selecting, building, and finishing a professional-grade tram locomotive. You'll learn how to achieve a seamless fit onto a reliable Kato chassis, which must be sourced separately, ensuring your narrow gauge line runs as smoothly as it looks. We will cover everything from initial preparation to the final details that turn a simple kit into a characterful piece of history for your micro-layout.
Key Takeaways
- Identify the core aesthetic features of narrow gauge tramways, such as enclosed wheels and boxy cabs, that provide character to a micro-layout.
- Learn to select the correct oo9 tram loco kit by matching it with reliable Kato 11-103, 11-105, or 11-109 chassis, which must be purchased separately.
- Master the preparation of high-quality 3D-printed resin components by following professional cleaning and support-removal techniques.
- Discover how to achieve a secure, seamless fit between your kit body and the motor unit to ensure reliable operation on your track.
- Explore creative ways to integrate your finished tram into immersive scenes, including roadside hedges, cobblestones, and industrial wharves.
What is an OO9 Tram Loco Kit?
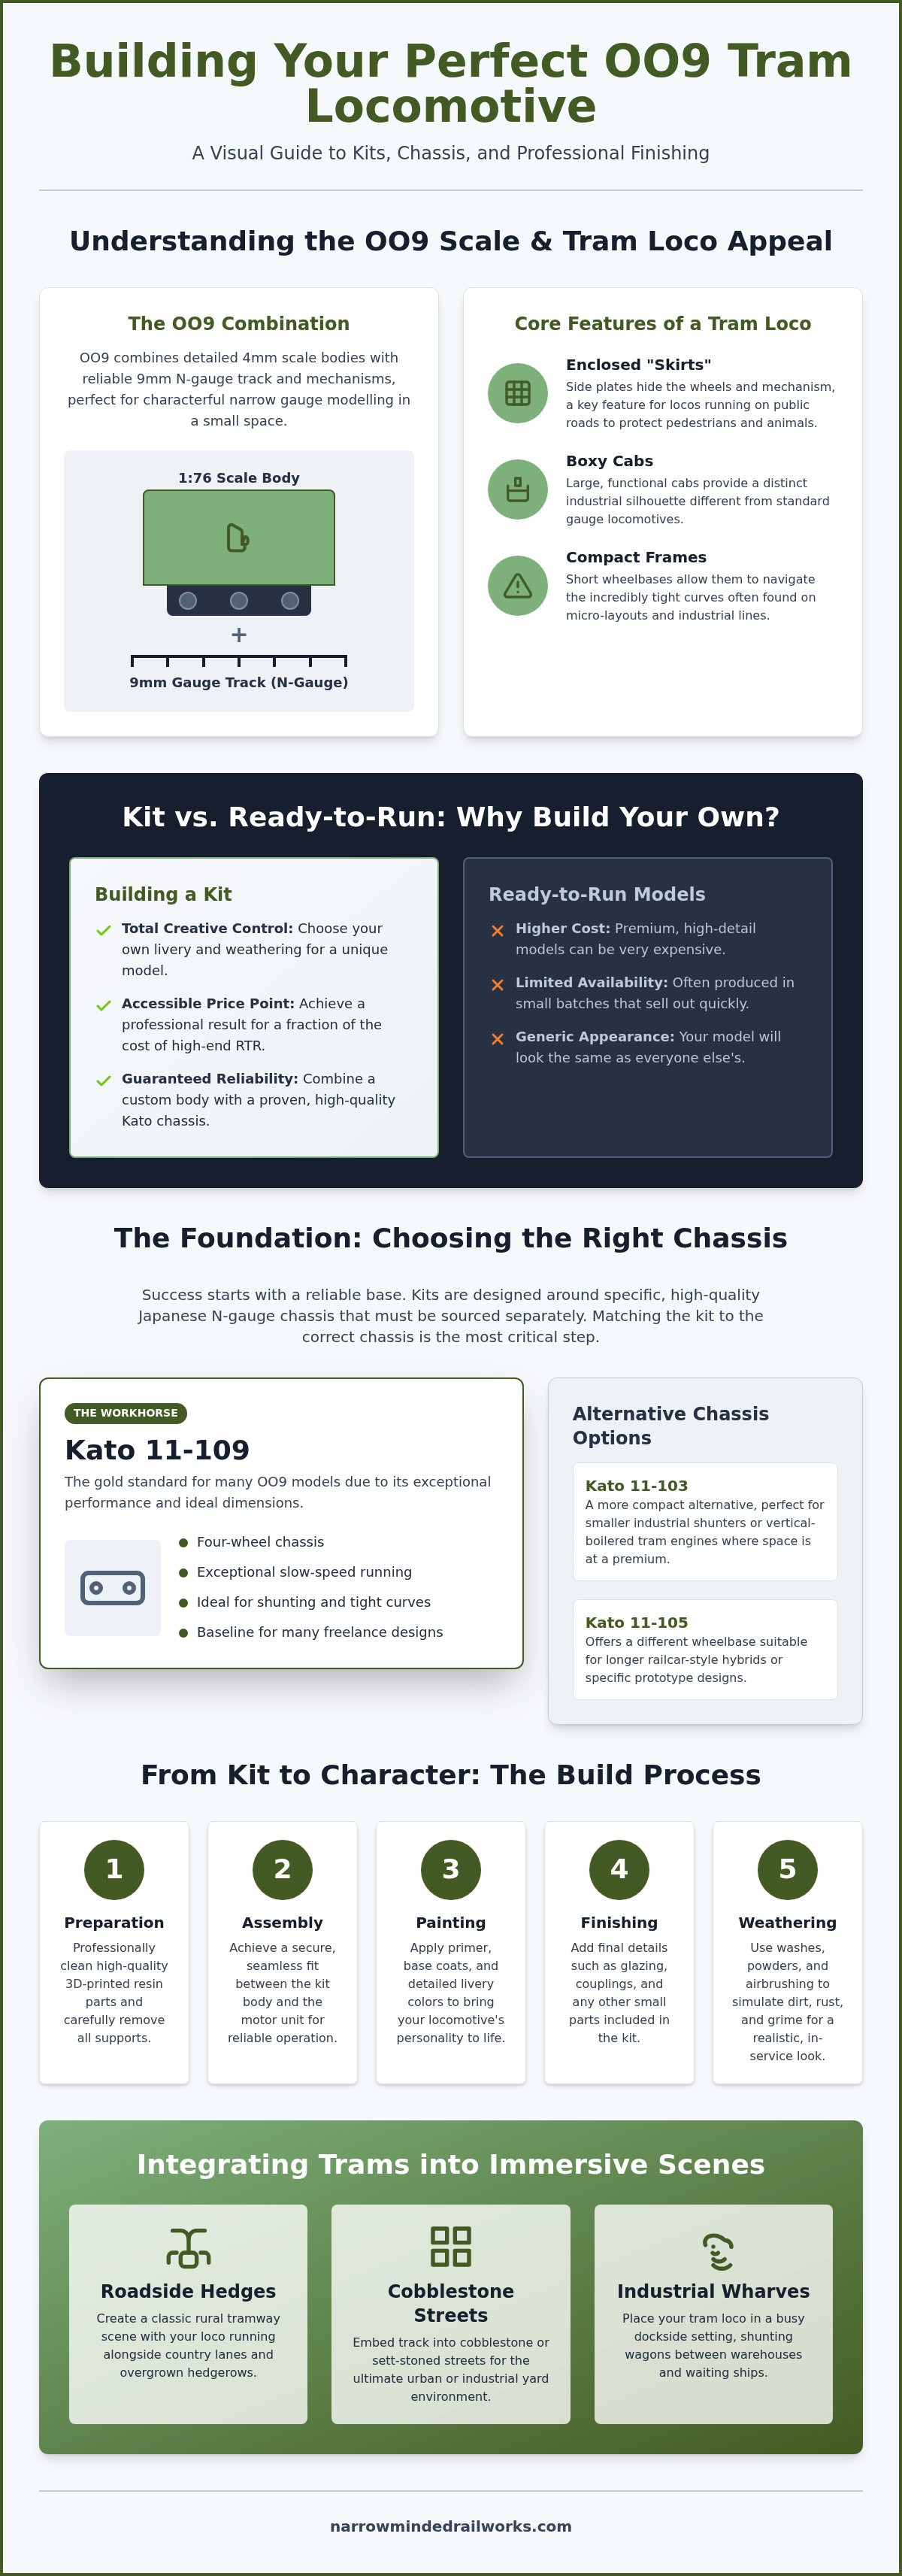
OO9 is a popular choice for modellers who want the high detail of 4mm scale without the massive space requirements of standard gauge. If you are asking What is OO9 scale?, it refers to models built to a 1:76 scale that run on 9mm track. This specific combination allows you to use reliable N gauge mechanisms under larger, more characterful narrow gauge bodies. An oo9 tram loco kit typically replicates a locomotive designed for roadside running or industrial service. These models are defined by their enclosed "skirts" that hide the wheels, large boxy cabs, and compact frames. This aesthetic isn't just for show; historically, these features protected pedestrians and livestock on lines that ran alongside public roads.
The Appeal of Narrow Gauge Tramways
Roadside tramways were a charming fixture of British narrow gauge history. Because these locomotives were designed for street running, they possess a unique, industrial silhouette that standard locomotives lack. They are particularly well suited for micro-layouts. Their short wheelbases allow them to navigate incredibly tight curves that would derail larger engines. This makes them the perfect choice for a bookshelf layout or a small diorama. For many, the freelance nature of these designs is the primary draw. You aren't restricted to a specific prototype. Instead, you can create a fictional industrial line that feels grounded in reality while fitting into a very small footprint.
Kit vs. Ready-to-Run: Why Build Your Own?
While ready-to-run models offer convenience, they often lack the specific character required for a standout layout. High-quality ready-to-run narrow gauge locomotives can be expensive and are often produced in limited runs that sell out quickly. Choosing an oo9 tram loco kit allows you to create a professional-looking model at a more accessible price point. We don't provide the motorized chassis ourselves, but we've designed our precision 3D-printed bodies to fit seamlessly onto reliable Kato units. This approach gives you the best of both worlds: a unique, custom-finished locomotive with a mechanism that works perfectly every time. You have total control over the livery and weathering from the first day of the build, ensuring your loco doesn't look like everyone else's.
Choosing the Right Kit for Your Chassis
Building a successful narrow gauge model starts with a reliable foundation. Japanese N gauge chassis, particularly those manufactured by Kato, have become the gold standard for modellers in this scale. Their popularity stems from high precision engineering and a compact size that fits perfectly beneath 4mm scale bodies. While the history of narrow gauge railways reveals a diverse range of wheel arrangements, the majority of modellers find that a few specific motor units can cover almost every freelance or prototype requirement. Selecting an oo9 tram loco kit that is designed for a specific chassis ensures that you won't have to struggle with complex modifications later in the build.
Matching the wheelbase of your kit to the motor unit is the most critical step in the selection process. If the wheelbase is too long or too short, the locomotive will look unbalanced and may suffer from poor weight distribution. Many of our kits utilize a "skirted" design, which features side plates that drop down to hide the wheels and chassis entirely. This creates a much cleaner, more authentic tramway appearance while allowing you to use a modern, reliable mechanism without breaking the visual immersion of your scene.
The Kato 11-109: The Workhorse of OO9
The Kato 11-109 is a four-wheel chassis that has earned its reputation through exceptional slow-speed running qualities. This makes it an ideal choice for tramway layouts where shunting at a wharf or roadside station is a primary focus. Its dimensions are the baseline for many of our designs, providing a stable platform that navigates tight curves without stalling. We don't sell these motor units directly, so you'll need to source them from a specialist model shop. By designing around this specific unit, we ensure that your finished oo9 tram loco kit has the mechanical reliability to match its visual detail.
Alternative Chassis Options for Custom Builds
Some projects require a more specialized footprint than the 11-109 can provide. The Kato 11-103 is a more compact alternative, often used for smaller industrial shunters or vertical-boilered tram engines where space is at a premium. For those interested in longer railcar-style hybrids, the 11-105 chassis offers a different wheelbase that fits specific prototype designs. If you're still deciding which path to take, it's helpful to review our guide on choosing your first OO9 loco kit to understand which chassis best suits your layout goals. You can also explore our range of OO9 locomotive and wagon kits to find a body shell that matches your preferred motor unit.
The Anatomy of a 3D Printed Tram Kit
An oo9 tram loco kit from Narrow Minded Railworks is more than just a plastic shell. It's a precision-engineered component designed to bridge the gap between a bare chassis and a characterful model. The main body shell provides the structural core, often featuring integrated details that would be difficult to assemble from traditional etched brass or white metal. This includes robust roof sections and side skirts designed to withstand regular handling on a layout. Because tram engines are typically enclosed, 3D printing is the ideal medium. It allows for complex, hollow shapes that maintain high structural integrity while keeping the weight low enough for small motor units to handle.
Modellers often worry about visible layer lines, a common issue with older filament-based prints. However, modern high-resolution resin printing has largely eliminated this concern. While some very light sanding might be required on curved surfaces, the finish on a professional resin kit is comparable to injection-moulded plastic. This technology allows us to include fine details like rivet heads and window frames directly into the print, saving you hours of tedious assembly. You get the intricate look of a scratch-built model with the structural stability of a single-piece body.
Resin vs. Filament: Understanding Your Kit
Choosing the right material is essential for a professional finish. We primarily use high-quality resin because it captures the minute details that define narrow gauge prototypes. Window frames and intricate boiler fittings remain sharp, which is often a struggle with traditional filament prints. While resin can be more brittle than filament, it offers the rigidity needed for a permanent model. It won't warp over time, ensuring your locomotive remains a reliable part of your fleet for years. If you're looking for more background on these types of engines, check out our modeller’s guide to tram locos for a deep dive into history and kit types.
Design Inspirations: From Bagnall to Falcon
Our designs draw heavily from the rich history of British tramways. You'll find clear influences from the W.G. Bagnall designs used on the Rye and Camber Tramway, known for their compact, functional appearance. Another staple of the genre is the "Large Falcon" style, which features the classic boxy silhouette many enthusiasts associate with roadside running. For those who want to verify prototype details, the Narrow Gauge Railway Society is an invaluable resource for historical drawings and photographs. These inspirations allow you to build an oo9 tram loco kit that feels authentic, even if you're operating on a purely freelance industrial layout.
How to Build and Finish Your OO9 Tram
Building an oo9 tram loco kit requires a methodical approach to ensure the 3D-printed body and the chassis work in harmony. While Kato motor units provide excellent slow-speed control, their light weight can sometimes lead to flickering lights or stalling on complex pointwork. We recommend adding small lead or tungsten weights inside the spacious tram body to improve electrical contact. If you find the internal space is limited by the motor housing, you can glue thin strips of lead to the underside of the roof or behind the side skirts. This simple addition transforms a light plastic model into a purposeful, heavy-hauling locomotive.
Achieving a professional fit between the body and the chassis is the most rewarding part of the build. Because our kits are precision-printed, they usually click into place, but environmental factors can cause minor variations in resin shrinkage. If the chassis feels tight, don't force it. Instead, use a fine needle file to gently shave the internal mounting lugs until the unit seats correctly. For skirted tram models, check that the side plates provide enough clearance for the wheels to rotate freely. A small amount of friction here will quickly drain the motor's power and cause unnecessary wear. Once you've perfected the mechanical fit, you can browse our OO9 locomotive and wagon kits to find a matching set of rolling stock for your new engine.
Preparing the 3D Printed Surface
Before applying primer, you must ensure the surface is chemically clean. Residual resin or oils from handling can prevent paint from adhering properly. Wash the body in warm, soapy water and scrub it gently with an old toothbrush. If you notice small nubs from the printing supports, remove them carefully with sharp side cutters. Sanding these areas with 600-grit wet and dry paper will create a smooth finish that disappears under a coat of primer. For a comprehensive look at this process, see our article on Painting 3D Printed Models. This preparation stage is vital because any imperfections will be magnified once the final colour is applied.
Painting and Weathering Your Tramway
The livery you choose defines the personality of your oo9 tram loco kit. A pristine, lined green finish suggests a well-maintained passenger tramway, whereas a matte black or oxide red finish fits a gritty industrial setting. Always use a dedicated plastic primer to provide a "key" for the topcoat. Masking the windows is essential if you aren't using separate glazing; small pieces of masking tape or liquid mask will keep the apertures crisp. Once the base colour is dry, apply weathering powders to the vents and grilles. These recessed areas naturally collect soot and grime on real locomotives. Highlighting them with a dark wash or dry-brushing creates a sense of depth that makes the model look like a heavy, metal machine rather than a 3D print.
Integrating Trams into Your Narrow Gauge Layout
Designing a scene for your oo9 tram loco kit requires a shift in perspective from traditional railway modelling. Most narrow gauge lines are tucked away in rural valleys, but tramways often interact directly with the public world. While space is often a constraint for modellers, the compact nature of a tramway layout offers a proactive solution for those with limited room. These models are the perfect choice for desk-sized micro-layouts because their prototypes frequently navigated tight, urban environments or shared space with local roads. A tramway layout thrives on verticality and dense detail within a small footprint, making it an ideal choice for a bookshelf or diorama project.
Scenery Tips for Roadside Running
One of the biggest challenges in narrow gauge modelling is creating convincing "street running" trackwork. While embedding rails into a road surface can risk poor electrical contact, using thin card or modelling plaster provides a proactive solution. You must ensure the inner flangeway remains clear so the locomotive's wheels don't lift off the track. Once the road surface is level with the rail head, you can scribe cobblestones or add patches of static grass to suggest a line that is slowly being reclaimed by nature. If you're new to this part of the hobby, it's worth reading our guide on What is a Narrow Gauge Railway? to understand the historical context of these lines. Adding a few 3D-scanned figures waiting at a roadside halt will immediately provide a sense of scale to your finished oo9 tram loco kit.
Expanding Your Fleet
Operational interest doesn't stop with the locomotive itself. To create a convincing scene, you'll want to pair your tram with appropriate rolling stock that reflects the local industry. A tram loco shunting slate wagons at a wharf or timber bolsters at a roadside sawmill tells a much richer story than an engine running alone. Although some modellers struggle to find rolling stock that matches the unique look of a tramway, our kits are designed to look at home alongside a wide variety of traditional narrow gauge wagons. You can create a distinct consist by mixing coal wagons with local produce vans, suggesting a line that serves both industrial and community needs. If you're ready to start your next project, you can browse our full range of OO9 Tram and Loco Kits to find the perfect addition to your narrow gauge fleet.
Start Your Tramway Project Today
Traditional kit building often presents challenges with complex metalwork and poor mechanical fits, but selecting a precision-engineered oo9 tram loco kit provides a proactive solution. By pairing high-detail resin bodies with industry-standard Kato chassis, you don't have to struggle with the mechanical frustrations of older models. These kits are specifically designed for modellers who value both character and operational reliability, ensuring your locomotive performs as well as it looks on a micro-layout.
We provide high-detail 3D prints that arrive ready for your workbench, and we offer worldwide shipping on all our narrow gauge kits to support enthusiasts everywhere. Although the Kato motor units must be purchased separately, our kits ensure a seamless integration that makes professional results accessible to everyone. We encourage you to take the next step in your modelling journey and create a unique focal point for your layout.
Explore our range of 3D Printed OO9 Tram Loco Kits and begin building a narrow gauge tramway that truly stands out.
Frequently Asked Questions
Does the kit include the motor and wheels?
Our kits do not include the motor, wheels, or chassis. We focus on providing high-quality 3D-printed body shells, which allows modellers to choose their preferred mechanism. You must purchase a compatible Kato chassis separately from a specialist retailer. This approach ensures you have a reliable, brand-new motor unit for your oo9 tram loco kit while keeping the customisation of the body in your hands.
Which Kato chassis is best for an OO9 tram loco?
The Kato 11-109 is the most versatile choice for the majority of our tram locomotive designs. It provides a stable four-wheel base and excellent slow-speed shunting capabilities. If you're building a more compact industrial shunter, the Kato 11-103 might be a better fit. Always check the specific kit description to ensure the body shell is designed for your chosen chassis' wheelbase and mounting points.
Do I need to solder anything to build a 3D printed kit?
You don't need any soldering skills to assemble our 3D-printed kits. Traditional etched brass kits require complex soldering, but our resin and filament bodies are designed for simple adhesive assembly. The only electrical work involved would be if you choose to add your own DCC decoder or lighting to the separate Kato chassis. For the body shell itself, a few basic hand tools and some glue are all you require.
What kind of glue should I use for 3D printed resin kits?
We recommend using a high-quality cyanoacrylate (Super Glue) for our resin-printed models. Standard plastic cement used for injection-moulded kits won't work on resin because it doesn't create a chemical bond with the material. A medium-viscosity super glue is ideal as it gives you a few seconds to adjust the parts before it sets. Always ensure the surfaces are clean and dry before applying any adhesive to ensure a permanent, secure bond.
Can I run an OO9 tram on standard N gauge track?
Yes, you can technically run an OO9 tram on standard N gauge track since both use a 9mm gauge. However, N gauge track features sleepers that are scaled for standard gauge railways, which can look out of place on a narrow gauge layout. We suggest using dedicated OO9 or HOe track. This track has wider sleeper spacing and a more rugged appearance that better reflects the character of a roadside tramway.
How do I remove the visible lines from a 3D printed model?
While our high-resolution resin prints have minimal texture, you can remove any faint lines with a proactive approach to finishing. Use a fine-grit sandpaper, such as 600 or 800-grit wet and dry paper, to gently smooth the surface. Applying a high-build plastic primer will also help fill any microscopic gaps. Following this with a light sand before your final topcoat ensures a professional, smooth finish for your oo9 tram loco kit.
Are these kits suitable for a complete beginner to modelling?
Our kits are an excellent starting point for beginners because they eliminate the most difficult parts of traditional kit building. You don't have to worry about complex chassis assembly or gear alignment since you use a pre-built Kato motor unit. As long as you can follow basic instructions for cleaning, painting, and gluing, you can achieve a professional result. It's a much more accessible way to enter the world of narrow gauge modelling.
Do you ship your OO9 kits internationally?
We provide worldwide shipping on all our narrow gauge locomotive and wagon kits. Whether you are building a layout in the UK, Europe, or further afield, we can deliver our precision-printed parts to your door. Shipping costs and delivery times vary depending on your location, but we always aim to dispatch orders promptly. This service ensures that modellers everywhere have access to unique, high-quality kits for their fictional or prototype-inspired lines.