

Most modellers spend more time searching for the perfect ready-to-run narrow gauge engine than they do actually running trains. You might feel frustrated by the limited availability of specific prototypes or confused by which chassis actually fits a 3D-printed body. It's a common challenge to find a kit-009 that matches your skill level while ensuring the final model performs reliably on your tracks.
While the delicate nature of resin prints can seem intimidating, utilizing a proven donor mechanism like the Kato 11-109 offers a proactive solution for a successful build. This guide helps you master the art of narrow gauge modelling by providing a clear framework for selecting, assembling, and finishing your first locomotive. You'll gain the confidence to choose the right components and achieve a professional-looking paint finish. We'll cover everything from chassis compatibility to the final weathering stages; this ensures you can finally see a locomotive you built yourself running smoothly across your layout.
Key Takeaways
- While ready-to-run narrow gauge models are often limited, building a kit-009 provides a proactive way to create a diverse and authentic locomotive roster.
- Finding a reliable mechanism can be challenging, but selecting kits designed for the Kato 11-109 chassis ensures your model runs smoothly from the start.
- Although 3D-printed resin requires specific preparation, following a structured cleaning and sanding routine allows you to achieve a smooth, professional paint finish.
- Selecting between various kit types can be difficult; however, choosing your first project based on a clear skill-level framework ensures a successful and rewarding build.
Understanding kit-009: The Gateway to Narrow Gauge Modelling
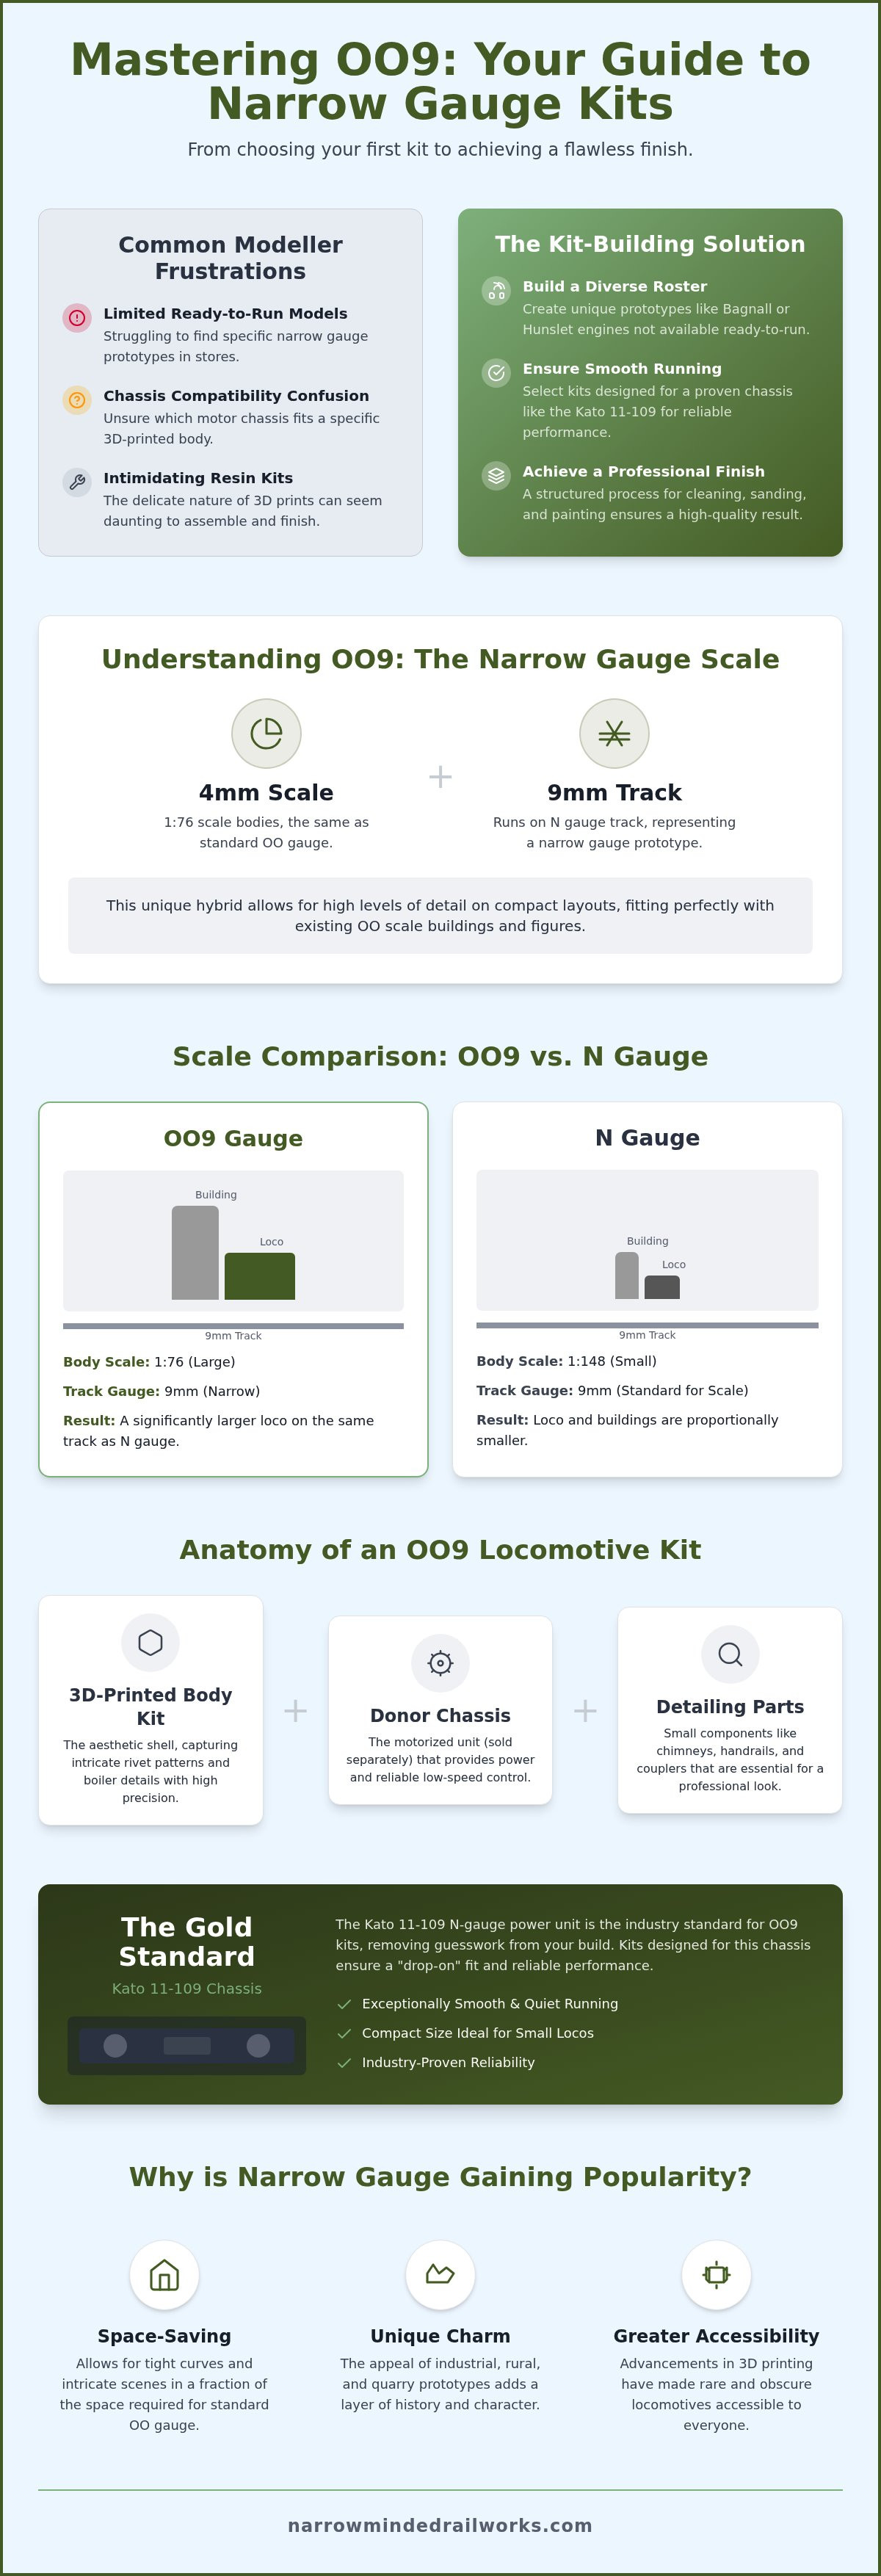
Defining the scale is the first step for any newcomer. OO9 uses the OO9 narrow-gauge model scale, which pairs 4mm scale bodies with 9mm track. This represents narrow gauge prototypes, usually between two feet and two feet six inches wide, running on standard N gauge track widths. It's a unique hybrid that allows for high levels of detail while maintaining a compact footprint.
Standard gauge modelling often revolves around ready-to-run products. Narrow gauge is different. Because manufacturers can't cover every obscure quarry or industrial line, the hobby relies on a kit-built culture. While finding specific prototypes in shops is difficult, building a kit-009 provides a proactive way to expand your collection. Choosing a kit-009 project allows you to model specific prototypes like Bagnall or Hunslet engines that simply don't exist in retail shops. This reliance on kits isn't just about necessity; it's about the satisfaction of creating something unique.
If you're moving from N gauge, you'll appreciate the familiarity of the track work. The wiring and point motors remain identical. However, you'll need to adjust your perspective on scenery and rolling stock. If you're coming from OO gauge, the scale remains 4mm to one foot, so your existing buildings and figures will fit perfectly. The only change is the track width and the smaller, more nimble nature of the locomotives. This blend of familiar elements makes the transition manageable for experienced modellers.
Why Narrow Gauge is Gaining Popularity in 2026
Space constraints are a reality for many modellers. Narrow gauge offers a solution by allowing for tight curves and intricate scenes in a fraction of the space required for standard OO gauge. The charm of industrial, rural, and quarry prototypes adds a layer of history that standard mainlines sometimes lack. Recent advancements in 3D printing have made rare locomotives accessible to everyone. Modellers are no longer limited by what a major factory chooses to produce.
OO9 vs. N Gauge: Clearing the Confusion
It's easy to get confused because both use 9mm track. However, the scales are entirely different. N gauge is 1:148 scale, while OO9 is 1:76. This means an OO9 locomotive is significantly larger than an N gauge one, even though they share the same rails. You can use N gauge track for your layout, but you cannot use N gauge buildings or figures without breaking the realism of your narrow gauge railway. Understanding this distinction is the first step toward a successful build.
The Anatomy of an OO9 Locomotive Kit
Every locomotive starts with a vision, often inspired by the historic prototypes found at the Narrow Gauge Railway Museum. When you purchase a kit-009, you aren't buying a single box containing every single nut and bolt. Instead, you're acquiring a precision-engineered body designed to work with a specific motor. This modular approach can feel complex for beginners who expect a "ready-to-run" experience. We simplify this by focusing on a "drop-on" assembly philosophy. This ensures the shell aligns perfectly with the internal components without requiring advanced engineering skills.
The donor chassis provides the "guts" of your engine. It's the motorized unit that dictates how well your train will crawl at low speeds. While the body provides the character, the chassis provides the reliability. Many modellers worry about compatibility between different brands. We address this by standardizing our designs around the most reliable mechanisms on the market. This removes the guesswork and helps you focus on the creative aspects of the build. If you're eager to get started, exploring a range of OO9 locomotive and wagon kits is the best way to see how these components come together.
The body kit itself serves as the aesthetic shell. Modern kits utilize 3D-printed resin, which captures intricate rivet patterns and boiler details that were once only possible with expensive brass etchings. You'll also find detailing parts like chimneys, handrails, and couplers. While these small components require a steady hand, they're essential for achieving a professional look. These parts are designed to fit together logically, reducing the time you spend on trial and error.
The Kato 11-109: The Gold Standard for OO9
Locating a reliable, small-scale motor is a common hurdle for narrow gauge enthusiasts. The Kato 11-109 N-gauge power unit has become the industry standard because of its smooth running and compact size. It's true that these chassis are sold separately from the body kits, which adds an extra step to your shopping list. To solve this, Narrow Minded Railworks designs its prints specifically for this footprint. This ensures you don't have to spend hours hacking away at plastic to make things fit. You can simply secure the body to the motor and begin testing your new engine.
3D Printing Technology in Kit Design
Traditional white metal kits provide weight but often lack crispness. High-detail resin 3D printing offers a proactive solution by providing sharp edges and complex geometries. These bodies are lightweight, which helps prevent your locomotive from becoming top-heavy on steep gradients. Because 3D design allows for rapid iteration, manufacturers can quickly correct prototype inaccuracies. This results in a better fit and finish for the end user. You'll find that these resin prints require less preparation than traditional cast metal, allowing you to move to the painting stage much faster.
Selecting Your First kit-009: A Decision Framework
Choosing your first project in OO9 narrow gauge modelling is a pivotal moment for any hobbyist. You might feel paralyzed by the sheer variety of prototypes available or worry about selecting a model beyond your current abilities. A proactive solution is to follow a structured decision framework that balances your technical skills with the specific requirements of the model. By categorizing projects based on their assembly complexity, you can ensure a successful first build without the stress of overwhelming parts lists.
A common constraint for beginners is the fear of complex assembly and alignment. To solve this, look for "one-piece" bodies where the main structure is printed as a single unit. These kits reduce the number of glue joints and eliminate the risk of a crooked boiler or cab. As you gain experience, you can progress to multi-part kits that allow for deeper interior detailing and separate fittings. Building a kit-009 involves several separate costs that you should plan for early. You'll need the body kit, the donor chassis, specific paints, and couplers. Planning these purchases together prevents your project from stalling due to missing components.
Always verify the chassis requirements before you commit to a purchase. While many of our designs are optimized for the Kato 11-109, some prototypes might require different mechanisms. If you already own a specific motor, the body you choose must match that footprint exactly. This technical compatibility is the most important factor in ensuring your kit-009 project results in a smooth-running locomotive rather than a static display piece.
Steam Locomotives: From Quarry Hunslets to Bagnalls
Steam engines like the "Quarry Hunslet" are iconic symbols of narrow gauge history. They offer immense character but can present challenges during the painting stage. Open cab designs show off impressive backhead detail, though they require a painted crew to look truly finished. Closed cabs are slightly more forgiving for those new to interior finishing as they hide more of the internal space. You can find more advice in our guide on choosing your first OO9 loco kit to help narrow down these prototype choices.
Diesel and Tram Locos: The Perfect Beginner Entry
Diesel shunters provide an excellent entry point for new builders. Their boxy, flat surfaces make them incredibly easy to mask and paint with professional results. If you prefer an industrial or roadside aesthetic, a tram loco is a fantastic option. These models often feature side skirts that hide the chassis entirely. This design choice simplifies the final assembly and ensures the engine looks authentic even if the donor chassis isn't an exact match for the prototype's wheels.
Building and Finishing Your 3D-Printed Kit
Transforming a raw resin print into a functional model requires a systematic approach. You might notice small support marks or a slight tacky residue on your new kit-009 body shell. This is a normal part of the 3D printing process. To solve this, begin by washing the model in warm, soapy water to remove any residual chemicals. Once the model is completely dry, you can begin the physical assembly and finishing stages.
Removing support marks is the most critical step for achieving a professional look. While these marks are unavoidable during the printing phase, they're easily managed with a sharp hobby knife and patience. Trim the nubs flush with the surface before moving to the sanding stage. After the surface is smooth, apply a thin layer of primer. This reveals hidden imperfections that are often invisible on raw resin. If you find small pits, a proactive solution is to use a tiny amount of modelling filler before a final light sand.
When you reach the painting stage, your choice of tool depends on the desired finish. Airbrushing provides a thin, even coat that preserves fine rivet detail. If you don't own an airbrush, high-quality brushes and thinned acrylics work well for smaller industrial locomotives. Finally, align the body with your chassis. Most of our designs utilize a simple "drop-on" fit that secures the shell to the mechanism without complex brackets. If you're ready to pick up your first project, you can browse our full range of OO9 kits to find a prototype that fits your layout.
Prepping the Surface: Sanding and Priming
Print lines can sometimes be visible on curved surfaces like boiler tops or cab roofs. A proactive solution is using high-grit sandpaper, specifically between 400 and 800 grit. This smooths the resin without destroying the underlying detail. We recommend using a "filling" primer designed for plastic or resin. This fills micro-gaps and provides a perfect key for your topcoat. For a deeper look at this process, refer to our guide on painting 3D printed models.
Adding Character: Weathering and Decals
Narrow gauge railways are rarely pristine. While a clean paint job is a great start, adding weathering brings your model to life. Use dark washes to highlight recessed details like door hinges and rivets. Weathering powders can replicate the coal dust and rust typical of industrial sites. Complete the look with water-slide decals or brass nameplates. These small additions provide a sense of history and scale that transforms a basic shell into a unique locomotive with its own identity.
The Narrow Minded Railworks Difference
Narrow Minded Railworks operates on a simple principle: we're modellers first. We understand that the transition from standard gauge to narrow gauge can feel like a steep learning curve. While some retailers act as third-party middlemen, we maintain direct control over our designs and production. This ensures that every kit-009 we produce meets the standards we'd expect for our own layouts. We don't just sell kits; we provide the support necessary to see your project through to completion.
The narrow gauge community is global, and our support reflects that. We offer worldwide shipping to ensure enthusiasts from any corner of the globe can access high-quality 3D-printed bodies. While technical hurdles are part of the hobby, we offer transparent support to help you navigate them. If you encounter a challenge during assembly, our team provides proactive solutions rather than leaving you to guess. This commitment to clarity is why so many builders start their journey with us.
A locomotive is only the beginning of a cohesive layout. To help you build a complete scene, we offer an expanding range of OO9 wagon kits and scenery accessories. This ecosystem allows you to maintain a consistent level of detail across your entire narrow gauge world. By providing matching wagons and industrial tools, we help you avoid the visual "clash" that occurs when mixing products from vastly different manufacturing eras.
Quality Control and 3D Print Precision
High-resolution printing is the backbone of our work. While 3D prints often require some cleanup, our focus is on minimizing your sanding time through precision settings. We constantly iterate our designs based on customer feedback to ensure the best possible experience. Every locomotive body we produce is physically tested against a real Kato chassis to verify the fit before it reaches your workbench. This proactive testing phase eliminates the frustration of major misalignments and ensures your kit-009 project remains enjoyable from start to finish.
Beyond the Loco: Building a Full Narrow Gauge World
Creating an authentic narrow gauge railway involves more than just engines. You'll need matching wagons, industrial scenery, and appropriate figures to bring the scene to life. We take a proactive approach to customer service: if it doesn't fit, we help you fix it. This sets realistic expectations for new builders while ensuring you never feel stuck. When you're ready to expand your roster, explore our current range of OO9 Locomotive & Wagon Kits to find your next project.
Start Your Narrow Gauge Journey Today
Starting a new project can feel overwhelming when you're faced with unfamiliar scales and assembly techniques. While the transition to kit building involves learning new skills, utilizing precision-engineered components provides a proactive solution to common assembly hurdles. We've explored how choosing a body designed for a reliable donor chassis removes the mechanical guesswork. You now have the practical knowledge to prepare and paint your resin model for a professional finish that rivals any ready-to-run alternative.
Building a kit-009 is a proactive way to bypass the shortage of commercial models while creating a unique locomotive for your layout. Our highly detailed 3D-printed resin bodies are designed specifically for the Kato 11-109 chassis, ensuring a smooth fit and finish every time. We're proud to support the narrow gauge community with worldwide shipping from the UK, making these prototypes accessible to modellers everywhere.
Ready to see your own handiwork on the rails? Browse our full collection of OO9 Locomotive Kits to find the perfect engine for your industrial or rural scene. Your first custom build is closer than you think, and the satisfaction of a running model is well worth the effort.
Frequently Asked Questions
What is the difference between kit-009 and N gauge?
OO9 and N gauge share the same 9mm track width but represent entirely different scales. While N gauge models are 1:148 scale, OO9 is 1:76 scale. This means an OO9 locomotive is significantly larger than an N gauge equivalent. You can use N gauge track for your layout, but you'll need 4mm scale figures and buildings to maintain realism. This distinction is vital for ensuring your scenery matches your rolling stock.
Do Narrow Minded Railworks kits include the motor or chassis?
Our kits consist of high-quality 3D-printed body shells and do not include the motor or chassis. We acknowledge that sourcing these parts separately adds an extra step to your project. To solve this, we design every kit-009 to fit specific, widely available donor mechanisms. This ensures you can purchase a reliable motor from a major manufacturer while using our shells for the prototype's character.
Which chassis is best for a beginner kit build?
The Kato 11-109 is the most reliable donor mechanism for first-time builders. While other chassis exist, the 11-109 offers superior low-speed performance and a compact footprint that fits most narrow gauge prototypes. We prioritize this chassis in our design process to ensure a drop-on fit. This proactive approach minimizes the need for complex modifications during your first build and ensures your engine runs smoothly.
How do I remove the "lines" from a 3D-printed model?
Print lines are a natural byproduct of the resin layering process. While they can be visible on raw prints, they're easily managed with high-grit sandpaper between 400 and 800 grit. After light sanding, apply a filling primer to bridge any remaining micro-gaps. This two-step process provides a proactive solution for achieving a smooth, professional surface before you apply your final topcoat of paint.
What glue should I use for 3D-printed resin kits?
You must use cyanoacrylate (CA) glue, commonly known as super glue, for assembling 3D-printed resin. Standard plastic cements work by melting polystyrene, but they have no effect on cured resin. We recommend using a medium-viscosity CA glue for better control during assembly. This ensures a strong bond between the resin body and any additional detailing parts like handrails or chimneys without damaging the material.
Can I use standard OO gauge controllers for OO9 locomotives?
Yes, you can use standard 12V DC controllers designed for OO gauge. Because OO9 locomotives use the same voltage as their larger counterparts, your existing analog equipment will work perfectly. It's true that some controllers offer different power curves, but a standard unit provides reliable operation. Please note that we do not sell or support Digital Command Control (DCC) systems for our kits.
Where can I find instructions for my specific kit-009 model?
Instructions for your kit-009 project are typically available through our digital support portal or included within the product listing. We recognize that assembly can sometimes be confusing for beginners. To solve this, we provide clear diagrams and assembly tips for our most popular prototypes. If you can't find the specific guide you need, our team is available to provide direct assistance to ensure your build is a success.
What happens if my 3D-printed kit arrives with broken parts?
If your kit arrives with damage, we provide a transparent replacement policy for broken components. While we use protective packaging for worldwide shipping, resin can be brittle during transit. Acknowledge the issue by taking a photo of the damaged parts and contacting our support team immediately. We'll arrange for a replacement print to be sent out so your build isn't delayed by unexpected shipping accidents.