


O-16.5 and NG7 are two labels used for the same narrow-gauge modelling scale, so o-16.5 narrow gauge kits suit modellers working in that 7mm-scale field. The right kit depends on the rolling stock you want to build and how it fits your layout.
It’s easy to assume that different labels mean different scales, especially when choosing locomotives and wagons for a narrow-gauge railway. In practice, understanding how O-16.5 relates to NG7 helps you assess whether a kit matches your modelling plans before you start building.
This guide explains the relationship between the terms and what rolling stock kits can offer, from locomotive and wagon subjects to the choices involved in creating a coherent layout. You’ll also see where O-16.5 kits fit within a range of narrow-gauge modelling options, so you can make an informed choice for your project.
Key Takeaways
- Understand how O-16.5 and NG7 relate before choosing rolling stock for your layout.
- Consider the role each locomotive or wagon will play so your kit choice supports the railway you want to model.
- Learn what to consider when comparing kit materials and how 3D-printed parts can fit into a modelling project.
- Explore the differences between O-16.5, O-14 and On30 to choose a scale and gauge convention that suits your plans.
Narrow-gauge rolling stock
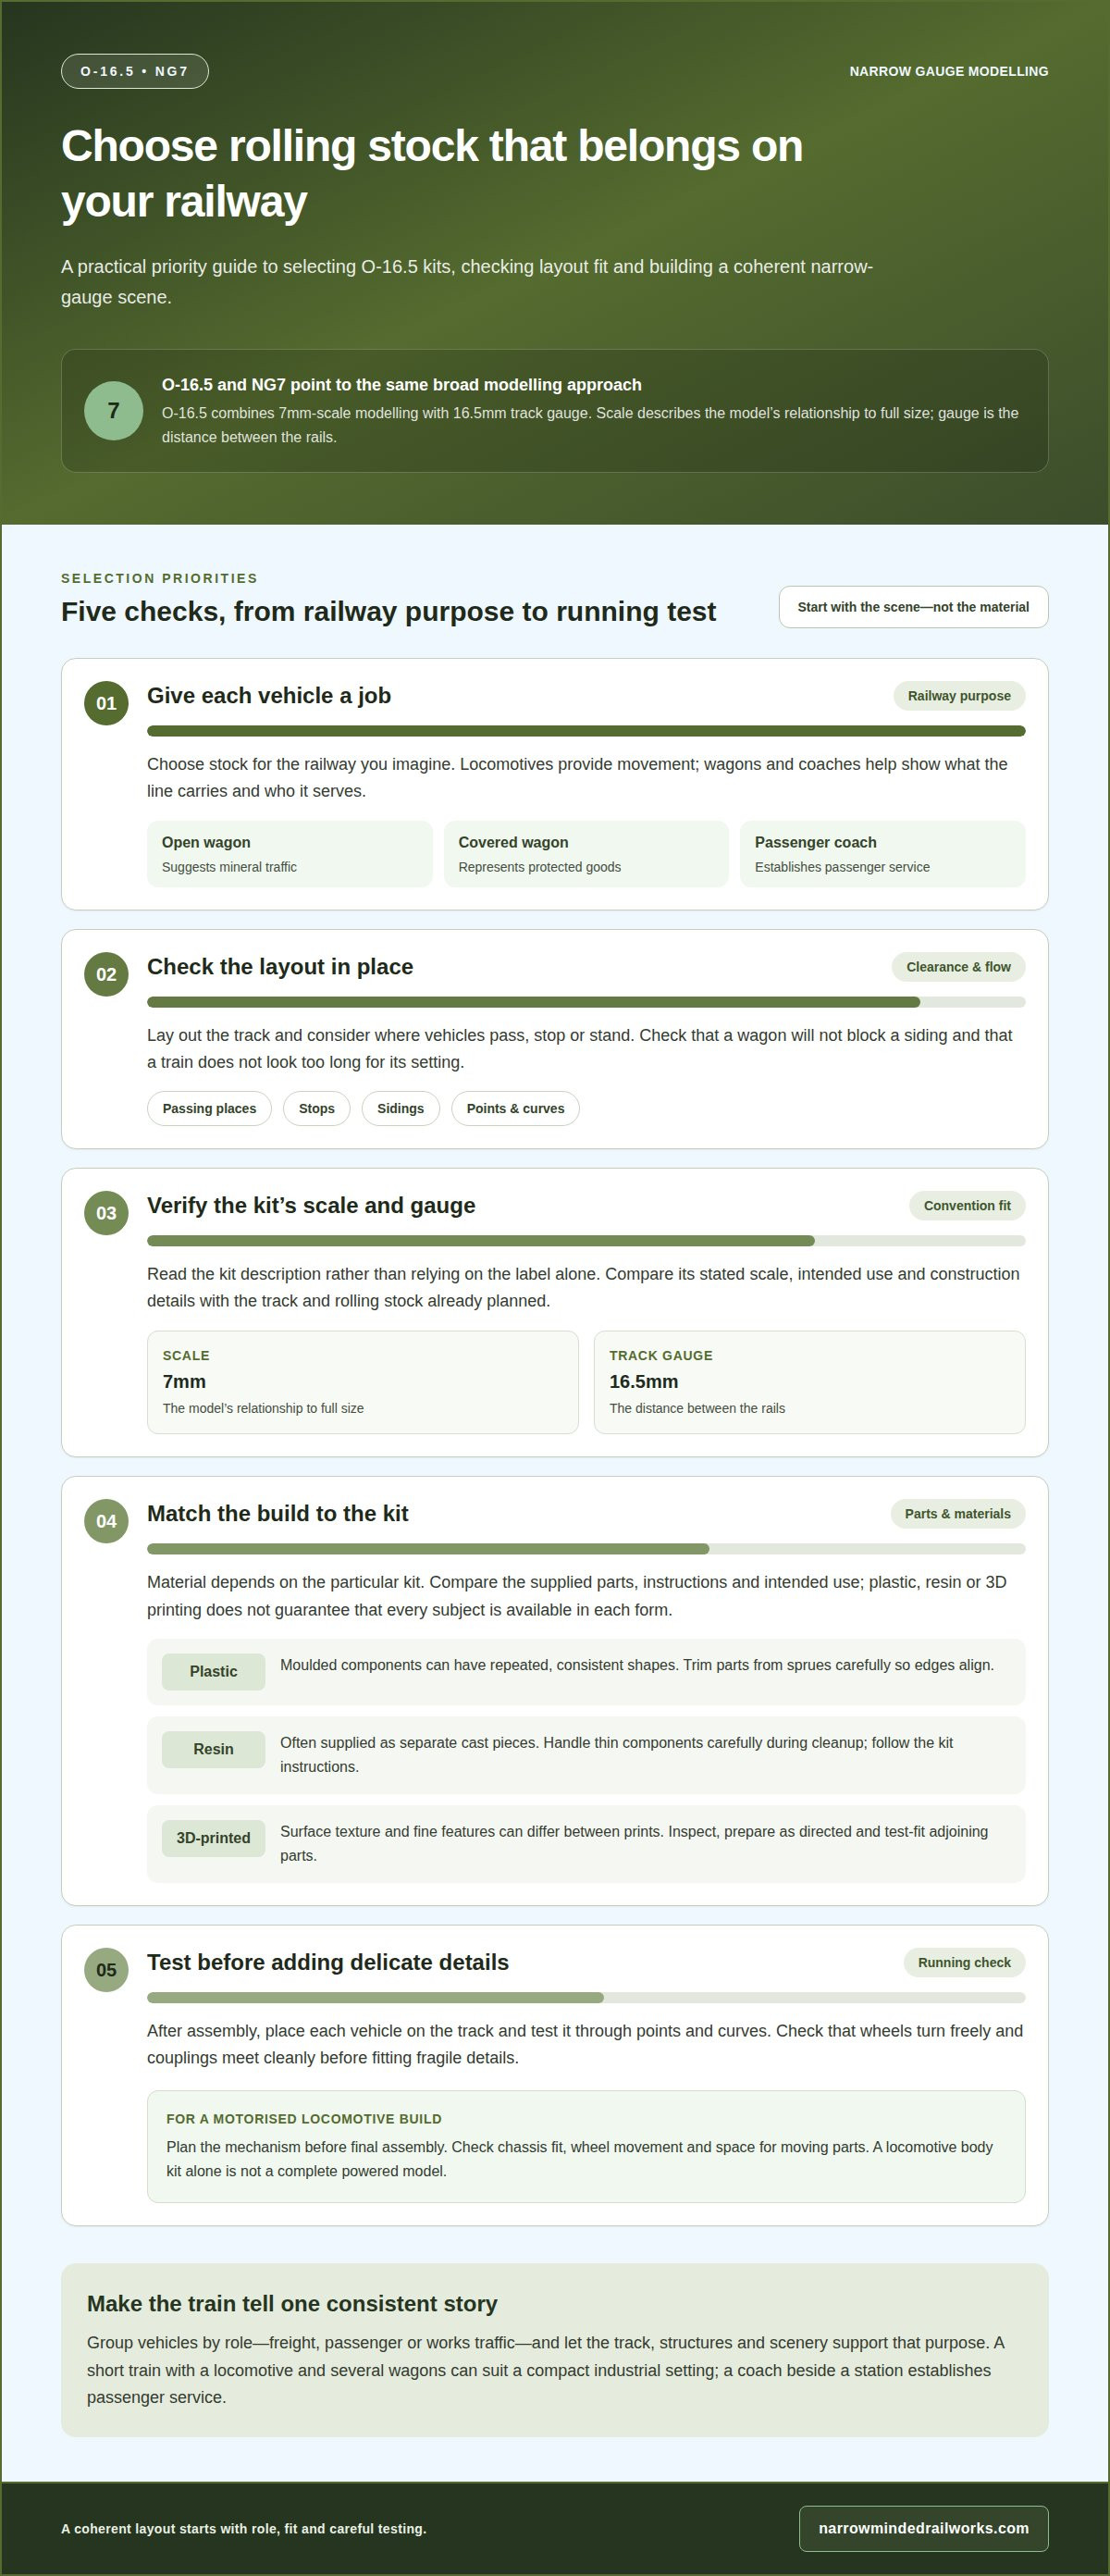
Rolling stock gives a narrow-gauge layout its working character, from freight sidings to passenger stops. Locomotives provide movement, while wagons and coaches show what the railway carries. An open wagon suggests mineral traffic; a covered wagon can represent protected goods. A passenger coach gives the same small railway a different purpose.
Choose each vehicle for its role in the scene, rather than treating every model as a separate display piece. A short train with a locomotive and several wagons can make a compact industrial setting feel purposeful. A coach beside a station establishes passenger service. Matching vehicle types to the imagined railway helps scenery, structures and operations tell one consistent story.
Before building, lay out the track and identify where vehicles need to pass, stop or stand. This reveals whether a wagon blocks a siding or a train looks too long for its setting. Then group rolling stock by role, such as freight, passenger or works traffic. Brickfields’ rural model railway layout has given its builders satisfaction for over ten years, showing how a considered setting can remain rewarding.
Building O-16.5 narrow-gauge kits calls for careful cutting, test-fitting and clean assembly. A craft knife, cutting mat, fine files and tweezers help with small parts; suitable adhesive, primer and paints support assembly and finishing. Follow the kit instructions for joining components, and remove material gradually when adjusting a fit. Patience and steady handling matter more than specialist workshop equipment.
After assembly, check that wheels turn freely and couplings meet cleanly. Place each vehicle on the track and test it through points and curves before adding delicate details. Diorama scenery can frame a wagon siding or station, while leaving enough space to see and reach the rolling stock.
O-16.5 and NG7 modelling
O-16.5 and NG7 are closely connected labels in British narrow-gauge modelling. The Whiteoak Light Railway in Kent is described as both an O-16.5 gauge layout and NG7. The names therefore point modellers towards the same modelling approach, rather than automatically indicating two different layout subjects.
The O-16.5 label combines 7mm-scale modelling with a 16.5mm track gauge. That distinction matters: scale describes the model’s relationship to full size, while gauge describes the distance between the rails. Reading both parts helps you assess whether a locomotive, wagon or track plan fits your intended layout.
NG7 offers a compact way to refer to the same broad scale-and-gauge combination. However, labels alone don’t settle whether every component will suit a particular build. Look at the kit’s stated scale, intended use and construction details, then compare these with the track and rolling stock already planned. A Kent-style railway hub, such as the Whiteoak Light Railway, can provide a useful example of how the modelling convention appears in a complete setting.
Are O-16.5 kits suitable for conversion to motorised models? A locomotive body kit can be used for a motorised build when its shape and internal clearances can accommodate a suitable mechanism. The required chassis, wheel arrangement and space for moving parts determine whether the conversion is practical, so a body kit alone shouldn’t be treated as a complete powered model.
For a conversion, plan the mechanism before final assembly. Check how the chassis will sit beneath the body, whether the wheels can move freely and whether the body needs adjustment. Test the fit before attaching small details, which can be damaged by repeated handling. This helps the body, mechanism and track gauge work together.
Modellers comparing options can browse O-16.5 and 7mm-scale kits alongside their project plans.
The narrow gauge modelling world expanded rapidly over the 18 months preceding the 2023 new model guide, an important context for considering these labels.
Are O-16.5 kits available as plastic, resin, or 3D-printed models?
O-16.5 kits can use different materials, but the material depends on the particular kit. Plastic, resin and 3D-printed parts describe construction methods or materials, not a guarantee that every subject comes in each form. For a specific locomotive or wagon, the kit description identifies what you’ll assemble.
Plastic kits commonly use moulded components, providing repeated parts with consistent shapes. Look for sprues, locating points and moulded details when planning assembly. A wagon body, for example, may need parts removed from a sprue before its sides and ends can be joined. Careful trimming helps keep the edges aligned.
Resin parts are often supplied as separate cast pieces. Before assembly, arrange the body, underframe and small fittings to see how they meet. Resin can capture fine shapes, but thin components need careful handling during cleanup. A fine file and suitable adhesive can help prepare and join parts; follow the kit’s instructions.
Three-dimensional printing builds components from a digital design, allowing shapes such as locomotive bodies or wagon details to be produced as printed parts. Surface texture and fine features can differ between prints. Inspect the piece under good light, remove any visible support material as directed, then test-fit adjoining components before applying adhesive or paint.
Choose based on the work involved, not the material alone. A plastic kit may suit a build with familiar assembly steps; a resin casting may offer a distinctive body shape; a printed component can provide detailed geometry. Compare the supplied parts, instructions and intended use. A locomotive body kit, for instance, is not automatically a complete powered model, whatever its material.
For a clean finish, dry-fit parts first, then assemble in stages. Use primer and paint only after removing dust and checking the joints. On a narrow-gauge wagon, keeping corners square and details unobstructed helps produce a neat result, whether the model is plastic, resin or printed.
How do O-16.5 kits compare with O-14 and On30?
O-16.5, O-14 and On30 are different narrow-gauge modelling conventions. Their labels identify distinct approaches, so a kit’s scale and intended track gauge matter more than the shared “O” prefix. The Whiteoak Light Railway in Kent is described as O-16.5 and NG7, providing a British example of the first convention.
For a practical comparison, start with the track beneath the model. O-16.5 is associated with 7mm-scale modelling and 16.5mm track gauge. Don’t assume an O-14 or On30 vehicle will run on that track because its name also includes “O”. Check the kit’s stated gauge, wheel arrangement and intended use against your layout.
O-14 may suit a project built around its own track convention, while On30 represents another option for narrow-gauge subjects. The labels alone don’t establish that their rolling stock can share rails or operate together. A locomotive designed for one track gauge may need changes before it can run on another. Body scale, wheel spacing and available clearance all affect that decision.
Use this sequence to assess a possible match:
- Identify the track gauge and modelling scale used by your layout.
- Read the kit details for its intended gauge and rolling-stock type.
- Compare wheel spacing and body clearance with your existing track.
- Plan any conversion before assembly, especially for a powered locomotive.
This comparison matters when combining vehicles from different modelling traditions. A wagon may look suitable beside an O-16.5 locomotive, yet still need compatible wheels and couplings to operate as part of the same train. Treat appearance and running compatibility as separate questions, then decide whether the model will be static or run on the layout.
For a project centred on O-16.5, browse O-16.5 and 7mm-scale kits and compare their stated purpose with your track plan.
Narrow Minded Railworks
Narrow Minded Railworks offers model railway kits and scenery for narrow-gauge projects, including O-16.5 / 7mm Scale Kits. If you’re deciding how a kit fits your planned scale, rolling stock or layout, its range gives you relevant categories to explore without confusing kit components with ready-to-run models.
Other options include OO9 Locomotive & Wagon Kits, GN15 Locomotive & Scenery Kits, and Diorama Tools & Scenery. These categories can help you shape a project around the railway you want to build, whether you’re selecting vehicles or developing the setting around them.
For questions about choosing a suitable kit for your modelling plans, contact Narrow Minded Railworks.
Shape your next modelling project
Turn your scale choice into a clear build plan by deciding what the finished model should contribute to your layout. Start with its role: will it be a focal subject, part of an operating scene, or one element in a larger display? That decision can guide your kit choice and help you prioritise details.
Before assembly, map out how the model will sit within the scene and what other components the project needs. This gives your build direction without locking you into unnecessary details too early. Choosing o-16.5 narrow gauge kits is most effective when the subject, intended use and surrounding layout work together.
Explore the O-16.5 and 7mm-scale kits as you plan your next project. A considered first choice can give your modelling a strong starting point, with room to develop the layout as your ideas take shape.
Frequently Asked Questions
What does O-16.5 mean in narrow gauge modelling?
O-16.5 combines 7mm scale with track measuring 16.5mm between the rails. The term used for o-16.5 narrow gauge kits therefore describes both the model scale and track gauge. NG7 is another label associated with this modelling convention. The distinction helps you separate the model’s scale from the rail spacing when planning a layout or selecting compatible track.
What O-16.5 locomotive kits are available?
Narrow Minded Railworks groups relevant products under O-16.5 / 7mm Scale Kits; individual listings identify their subjects. The NG7 / O Gauge 48DS Ruston Crew is a crew figure, not a locomotive. Kits arrive unpainted and unprimed, with supports removed; fine sanding may remove faint marks. They require assembly and painting, and KATO chassis aren’t included. Resin can be quite delicate; avoid dropping parts. The seller isn’t responsible for breakages after arrival.
What track gauge and wheel standards do O-16.5 kits use?
O-16.5 uses 16.5mm track gauge, but that label alone doesn’t define wheel profile or spacing. Those details affect how wheels run on rails, points and existing track. For a particular locomotive or wagon, compare its listing details with the track and running gear you plan to use. Test the fit and movement on the intended track before adding delicate finishing details.