

What if your narrow gauge layout could capture the immense character of G scale without requiring a dedicated garden outbuilding? Many modellers are drawn to the rugged charm of 15-inch gauge prototypes, yet the prospect of building gn15 wagon kits from 3D-printed resin often brings hesitation. You might worry about the fragility of high-definition parts or feel unsure which 16.5mm wheelsets provide the best performance on OO gauge track. It is a common concern that paint might not adhere properly to resin surfaces, leading to a finish that lacks the durability required for regular operation.
We understand that working with modern materials presents unique challenges, but these are easily overcome with the right approach. This guide provides the practical steps needed to master the assembly, finishing, and detailing of your wagon kits. While resin requires specific handling compared to white metal, our proven methods ensure you create sturdy, well-painted models that run smoothly. We will cover everything from surface preparation and chassis selection to the final weathering touches that bring your characterful narrow gauge scene to life.
Key Takeaways
- Learn how the GN15 scale blends 1:22.5 detailing with 16.5mm track to create a high-impact layout within a compact footprint.
- While 3D-printed resin requires different handling than plastic, we identify the specific tools and adhesives needed for a sturdy assembly.
- Master the logical workflow for building gn15 wagon kits, from initial dry-fitting to ensuring large surface areas remain perfectly square.
- Discover the most effective priming and painting techniques for 2026 to ensure your finish adheres permanently to high-definition resin.
- Explore how to customise UK-made kits through creative kit-bashing, allowing you to develop a unique and characterful fleet of narrow gauge wagons.
Why GN15 Wagon Kits are the Heart of Gnineering
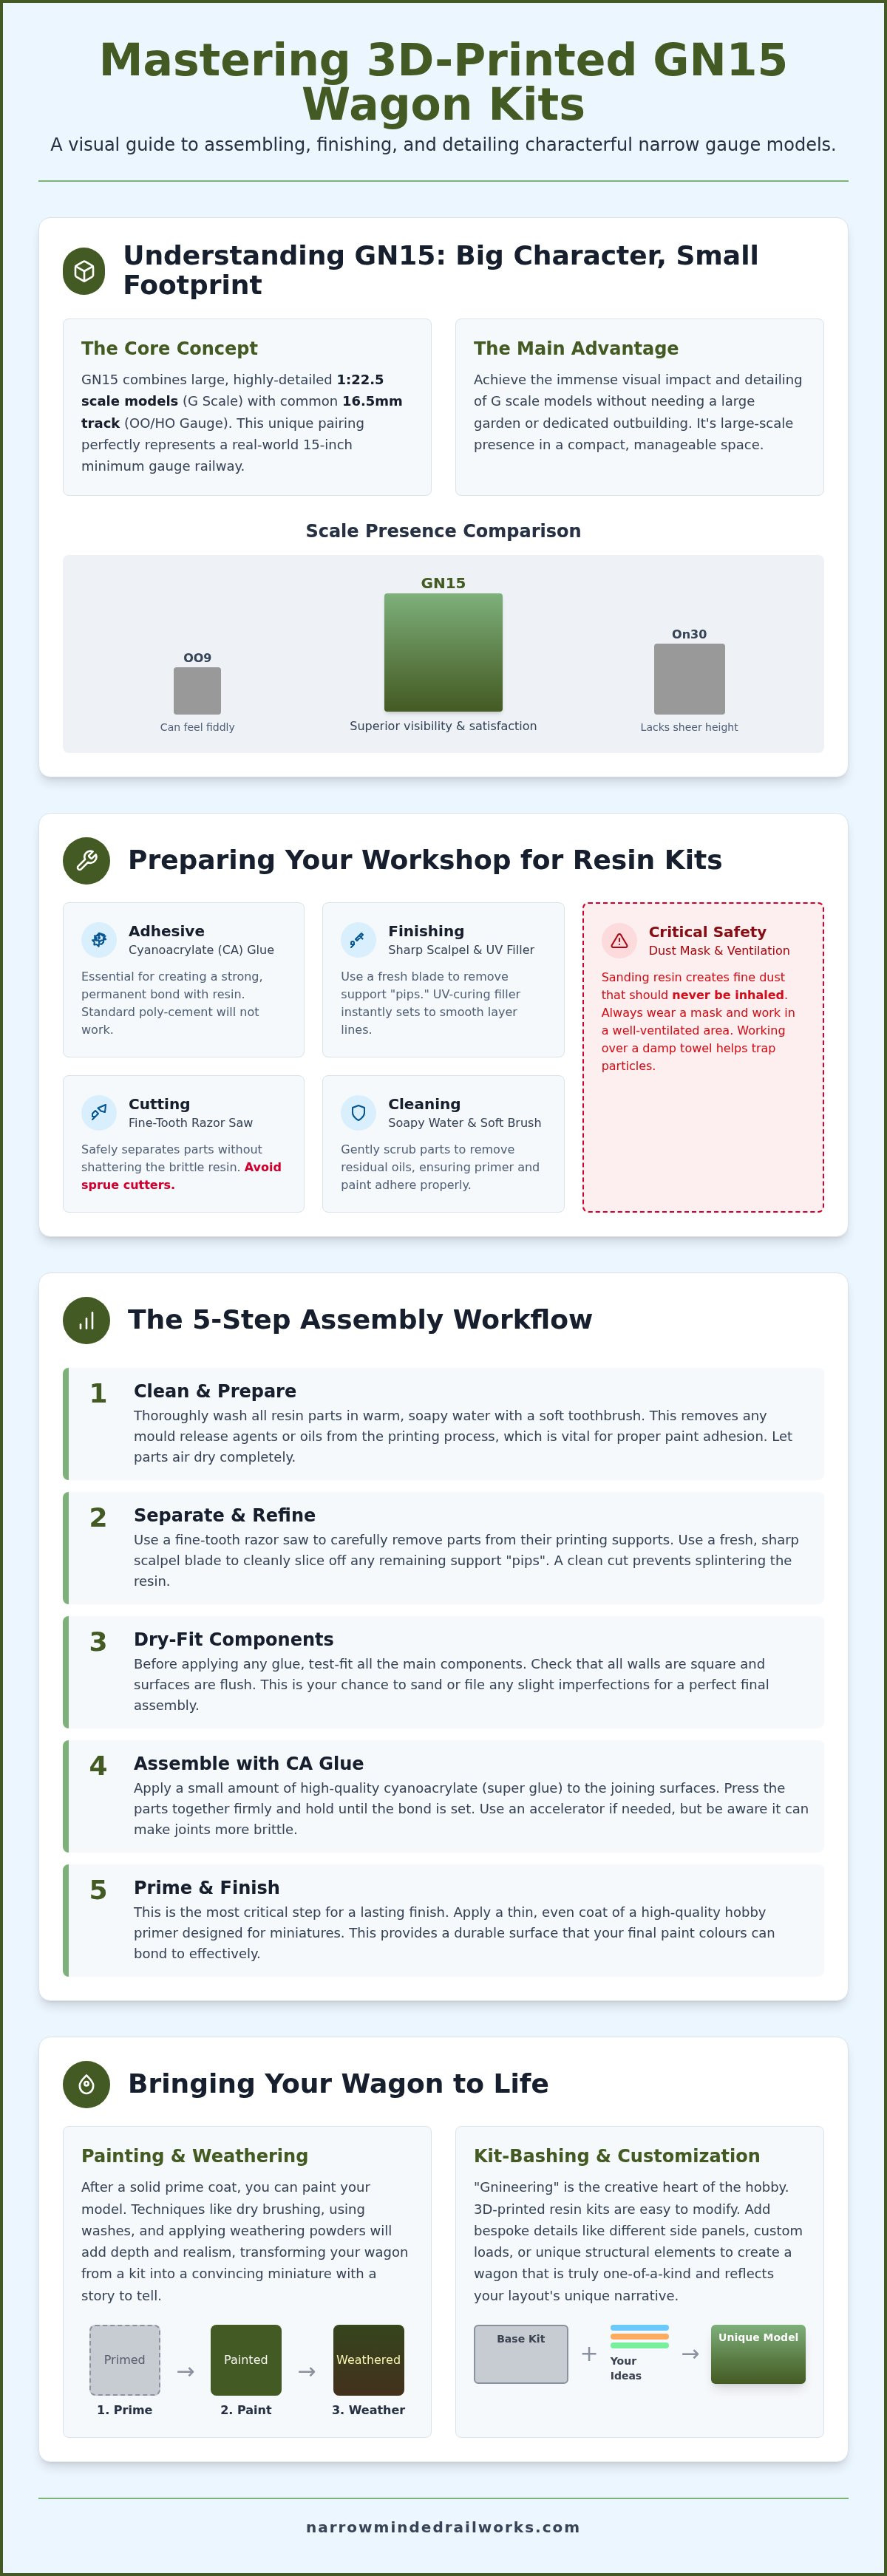
GN15 is a unique niche that prioritises character over conformity. By utilizing the GN15 rail modelling scale, enthusiasts place large 1:22.5 scale models on standard 16.5mm track. This specific combination represents a 15-inch minimum gauge railway, allowing for the immense detail of G scale within the footprint of a traditional OO or HO gauge layout. While the scale might seem unconventional, it provides a practical solution for those who want the presence of large-scale models without the requirement of a dedicated garden building.
The term "Gnineering" describes the creative philosophy at the core of this hobby. It focuses on kit-bashing and customisation, where no two models ever look quite the same. Building gn15 wagon kits serves as the perfect introduction to this mindset. Wagons are the workhorses of any industrial scene, moving beyond simple rolling stock to become storytelling devices. Whether you are modelling a weathered peat bog railway or a pristine estate line, the wagon is where your layout's narrative begins.
Understanding the 1:22.5 Scale on 16.5mm Track
The choice of 16.5mm track is a deliberate, pragmatic decision. It is the most common track gauge in the world, which means reliable points and flexible track are always available at your local model shop. When you place a 1:22.5 scale body on this track, the proportions immediately evoke the cramped, heavy-duty feel of a real 15-inch gauge line. Compared to OO9, which can feel fiddly, or On30, which lacks the sheer height of G scale figures, GN15 offers superior visibility and tactile satisfaction. You get all the benefits of standard track with the oversized, high-detail presence of a much larger model.
The Appeal of Industrial Narrow Gauge
Industrial prototypes provide endless inspiration for the GN15 modeller. You might find yourself drawn to quirky mine tubs, timber bolsters, or the rugged ore tippers found in British quarries. If you are interested in the real-world machinery used in these environments, you can discover Novawinch and their range of industrial recovery equipment. Because these prototypes were often "home-grown" or heavily modified by their owners, building gn15 wagon kits allows for significant creative freedom. Our 3D-printed resin bodies are specifically designed to be easier to modify than traditional white metal, giving you the confidence to add your own bespoke details.
If you are new to the scale, starting with a wagon fleet is a sensible way to build your skills before attempting a locomotive. You can find more advice on planning your first industrial train in our Getting Started in GN15 Scale guide. This approach ensures you develop a feel for the materials while creating a characterful addition to your layout.
Preparing Your Workshop for 3D-Printed GN15 Kits
Transitioning from traditional plastic or white metal to 3D-printed resin requires a shift in your workshop habits. Unlike injection-moulded kits, resin does not react to standard poly-cement. You will need high-quality cyanoacrylate (CA) glue to achieve a permanent bond. Resin is also significantly more brittle than styrene, which means traditional sprue cutters can cause the material to shatter. Using a fine-tooth razor saw or a piercing saw is a much safer alternative for separating parts without risk of damage.
Safety is a critical consideration when building gn15 wagon kits. Sanding resin creates a very fine, pervasive dust that should not be inhaled. Always wear a suitable dust mask and ensure your workspace is well-ventilated. Working over a damp paper towel can help trap particles before they become airborne. For 2026, the recommended cleaning standard involves a soak in warm, soapy water followed by a gentle scrub with a soft toothbrush. This process removes residual oils and ensures your primer bonds effectively to the surface.
Working with High-Detail Resin Parts
High-definition resin allows for incredible detail, but it often arrives with small "pips" where the printing supports were attached. Removing these requires patience to avoid scarring the wagon body. Always use a fresh, sharp scalpel blade when removing resin support pips to prevent the material from splintering. If you encounter minor 3D-printing artifacts or faint layer lines, modern UV-curing hobby fillers provide an excellent solution. These fillers set instantly under a UV light, allowing you to sand the surface smooth within seconds and keep your build moving forward.
Sourcing Chassis and Wheelsets
Most GN15 kits are designed to fit standard 16.5mm wheelsets, but you must choose between internal and external frames. Because resin is naturally lightweight, your wagons may struggle with tracking if they aren't properly weighted. We recommend adding lead shot or steel weights into the floor cavity to improve stability during shunting. For 2026 compatibility, UK modellers generally prefer Romford or Alan Gibson 16.5mm wheelsets for their consistent quality and smooth running. If you are still deciding on your first project, you can explore our range of GN15 locomotive and scenery kits to see how these components integrate into a complete model.
Once your components are cleaned and your tools are ready, you can begin the assembly process. Taking the time to prepare your parts properly at this stage prevents frustrating fitment issues later in the build. With a clean surface and the correct adhesives, building gn15 wagon kits becomes a straightforward and rewarding experience for any narrow gauge enthusiast.
Step-by-Step: Assembling Your First GN15 Wagon Kit
Successful assembly starts with patience. While it is tempting to apply glue immediately, building gn15 wagon kits requires a disciplined sequence to ensure the final model is both square and functional. Resin parts are produced with high precision, but they lack the flexibility of injection-moulded plastic. If a joint is misaligned by even a fraction of a millimetre, the error will compound as you add more components, resulting in a wagon that sits unevenly on the track. By following a structured workflow, you can identify these issues before they become permanent.
The Assembly Framework
Establishing a solid foundation is the most important part of the build. Use these four steps to guide your assembly:
- Step 1: Dry-fit all major components. Check for alignment between the wagon floor and the side panels. Ensure there is enough clearance for your chosen 16.5mm wheelsets to rotate freely without rubbing against the frames.
- Step 2: Clean all joints with Isopropyl Alcohol (IPA). 3D-printed parts can retain a microscopic film that prevents adhesives from bonding. Wiping the contact points with IPA ensures the CA glue creates a permanent, structural weld.
- Step 3: Assemble the sub-frame. Focus on the axle boxes and guards. If the chassis is not perfectly parallel, the wagon will crab along the track or derail frequently. Test the rolling qualities on a flat piece of glass or a spirit level before proceeding.
- Step 4: Secure the body to the frame. Use a small machinist's square or a Lego brick jig to ensure the sides are perfectly vertical. Because resin sets quickly with CA glue, you have limited time to adjust the position once the surfaces touch.
Couplings and Buffers in GN15
The choice of couplings defines how your layout operates. For an authentic industrial appearance, many modellers choose link-and-pin or chopper couplings. If you prioritise operational reliability, standard OO gauge tension-lock couplings are a practical alternative. Regardless of the style, the "Golden Rule" is to maintain a consistent coupling height across your entire fleet. This prevents frustrating "un-couplings" during shunting manoeuvres on uneven trackwork.
Because GN15 wagons are larger and heavier than their OO9 counterparts, couplings face significant stress. We recommend drilling a small pilot hole into the buffer beam and pinning the coupler in place with a brass rod. This mechanical reinforcement prevents the coupler from snapping off under the weight of a long train. Taking these extra steps during the process of building gn15 wagon kits ensures your rolling stock is as durable as it is detailed.
Finishing Techniques: Painting and Weathering Large-Scale Wagons
GN15 models are large enough that viewers will notice every brush stroke and rivet. When building gn15 wagon kits, the finishing stage is what transforms a grey resin assembly into a convincing piece of industrial history. Smaller scales like OO9 allow for a certain amount of visual shorthand, but the 1:22.5 scale requires a more nuanced approach to colour and texture. Because these wagons represent heavy industrial equipment, the goal is to build up layers of history rather than applying a single, flat coat of paint.
We recognise that painting resin can be intimidating due to concerns about surface adhesion. Acknowledging this constraint, the solution lies in thorough preparation and the use of specialized primers. For 2026, UK modellers have found great success with automotive plastic primers or dedicated hobby brands like Tamiya and Mr. Hobby. These provide a robust "bite" into the resin surface, ensuring that subsequent layers of acrylic or oil paint don't flake off during handling or operation.
Priming and Base Coating
The high-definition rivets on our kits are a standout feature, but they are easily obscured by heavy-handed spraying. We recommend applying several mist coats rather than one thick layer; this preserves the crispness of the 3D-printed detail while providing full coverage. If you are modelling a wagon with both wood and metal components, masking off sections to apply different base tones can create a more realistic, multi-tonal appearance. For a detailed breakdown of which products work best on our materials, refer to our Painting 3D Printed Models guide.
Weathering for Realism
The extra surface area available when building gn15 wagon kits allows you to experiment with advanced weathering techniques. Start by applying a dark enamel wash to the recessed areas, which will naturally highlight the wood grain and panel gaps. For metal parts like hinges and strapping, use burnt sienna and orange pigments to simulate "working" rust that hasn't yet turned to structural decay. Dab a small piece of torn sponge into dark grey or brown acrylic paint to create realistic chipping effects on the edges of metal strapping and high-wear areas. These small touches ground the model in reality, making it look like a piece of equipment that has spent years in a British quarry or mine.
Ready to start your next project? Browse our GN15 wagon kits to find the perfect addition to your narrow gauge fleet.
Expanding Your Fleet: The Narrow Minded Railworks GN15 Range
Developing a diverse fleet can feel overwhelming for a newcomer to the scale. Acknowledging this challenge, we provide a logical progression from simple flat wagons to complex tippers, ensuring you build confidence with every project. Our range of UK-made kits is specifically designed to meet the needs of the narrow gauge enthusiast, offering high-definition resin parts that capture every bolt and wood grain texture. Because these kits are developed by modellers for modellers, they prioritise ease of assembly without sacrificing the intricate detail expected in 1:22.5 scale.
We recognise that many hobbyists enjoy creating unique prototypes that reflect a specific industrial history. While traditional white metal kits can be difficult to modify, our resin bodies are remarkably easy to cut, sand, and drill. This flexibility is the cornerstone of the Gnineering philosophy, encouraging you to "bash" our standard kits into bespoke vehicles. Building gn15 wagon kits becomes a creative exercise where you can add custom cages, tanks, or toolboxes to suit your layout's specific narrative.
Spotlight on Popular GN15 Kits
The foundation of any industrial line is the versatile flat wagon. These kits serve as a perfect "blank canvas" for various loads, from timber bolsters to heavy machinery crates. For those modelling more specialised operations, we offer tipper and hopper kits that represent the rugged stock found in quarries and mines. If your layout features an estate railway, our personnel carriers provide a characterful way to move figures across your scene. This "start small, think big" approach mirrors the advice in our guide on Your First OO9 Loco Kit, where mastering a simple wagon build paves the way for more ambitious projects.
Next Steps for the GN15 Modeller
Once you have mastered building gn15 wagon kits, the natural progression is to move toward locomotive kits. Our wagon bodies are designed to be compatible with our upcoming locomotive range, ensuring your entire fleet maintains a consistent level of detail and scale. To ensure your rolling stock meets exhibition standards, use this final checklist:
- Weight: Ensure the wagon has enough internal ballast for reliable tracking.
- Couplings: Verify that all couplers are set to a consistent height across the fleet.
- Finish: Check that weathering is consistent with the industrial environment of your layout.
- Running: Test the wagon through points and tight curves to ensure the 16.5mm wheelsets move freely.
Bringing Your Narrow Gauge Vision to Life
Building a characterful narrow gauge layout begins with the rolling stock that populates your sidings. We understand that transitioning to modern 3D-printed materials can feel like a steep learning curve; however, we provide the expert UK-based design and support necessary to ensure your assembly is a success. By mastering the specific handling of resin, you move beyond basic construction to create a unique industrial fleet that possesses immense detail and presence.
The process of building gn15 wagon kits offers the ideal balance between large-scale aesthetics and the spatial convenience of standard 16.5mm track. Whether you are dry-fitting your first chassis or applying the final layers of weathered grime, each step is a rewarding move toward a more immersive layout. Our kits are specifically designed for 16.5mm gauge compatibility, ensuring your high-definition models run as reliably as they look.
We invite you to Explore our full range of characterful GN15 Wagon Kits and begin your next project today. With a few basic tools and a creative approach to finishing, you can transform your railway into a truly unique industrial scene.
Frequently Asked Questions
What track does GN15 run on?
GN15 runs on standard 16.5mm gauge track, which is the same width as OO or HO gauge. This represents a 15-inch gauge railway in 1:22.5 scale. Using standard track allows you to utilise reliable, off-the-shelf points and flexible track from your local model shop. It is a practical way to achieve large-scale detail without the space requirements of traditional G scale track systems.
Do I need special glue for 3D-printed resin wagon kits?
You must use cyanoacrylate (CA) glue, commonly known as super glue, because 3D-printed resin does not react to standard plastic solvent. Poly-cement will not create a bond on these surfaces. When building gn15 wagon kits, we recommend using a medium-viscosity CA for general assembly and a thin CA for capillary action on tight joints. Always ensure the surfaces are clean before applying any adhesive.
Can I use standard OO/HO wheelsets for GN15 wagons?
Standard 16.5mm wheelsets from OO or HO gauge are perfectly compatible with GN15 wagons. For 2026, we recommend using high-quality metal wheelsets from brands like Romford or Alan Gibson to ensure smooth running. Metal wheels provide a lower centre of gravity than plastic alternatives, which helps with tracking on uneven narrow gauge industrial trackwork. Check that the axle length matches the width of the wagon frames before fitting.
How do I clean 3D-printed parts before painting?
The most effective way to clean 3D-printed parts is to soak them in warm, soapy water and scrub gently with a soft toothbrush. This removes any residual release agents or oils that might interfere with paint adhesion. After cleaning, rinse the parts thoroughly in fresh water and allow them to air dry completely. For joint preparation, a quick wipe with Isopropyl Alcohol (IPA) ensures a strong bond for your adhesive.
What is the best way to weight a GN15 wagon for better running?
Adding weight is best achieved by securing lead shot or steel weights into the hidden cavities of the wagon floor. Because 3D-printed resin is relatively light, unweighted wagons can be prone to derailments during shunting manoeuvres. Aim for a consistent weight across your fleet to ensure reliable operation. You can seal the weights in place using PVA glue or a small amount of epoxy resin to prevent them from rattling.
Are GN15 kits suitable for outdoor garden railways?
GN15 kits are primarily designed for indoor use and aren't recommended for permanent outdoor garden railways. While the resin is durable, it can become brittle under prolonged exposure to UV light and extreme temperature fluctuations. If you do choose to run them outdoors, you must apply a high-quality UV-resistant clear coat. However, for long-term durability, these models are best suited for an indoor layout environment.
How do I fix a warped resin part in a wagon kit?
You can fix a warped resin part by carefully immersing it in hot water until the material becomes pliable. Once the part is soft, gently bend it back into the correct shape and immediately plunge it into cold water to set the new position. It's a simple, proactive solution for minor distortions. Always handle the part gently during this process to avoid snapping the resin while it is in a softened state.
Which scale figures should I use with GN15 wagons?
You should use 1:22.5 (G scale) or 1:24 scale figures to match the proportions of your rolling stock. These larger figures are essential for conveying the correct sense of scale when building gn15 wagon kits on 16.5mm track. Using smaller OO or O scale figures will make the wagons look unnaturally large and break the industrial narrative of your layout. High-quality figures help ground the model in its environment.