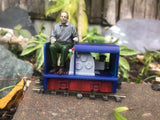
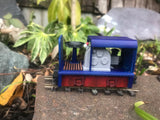
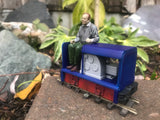
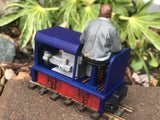
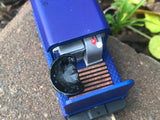
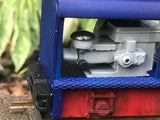
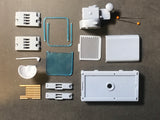
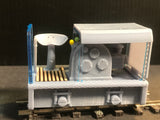
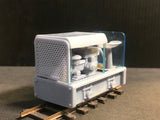
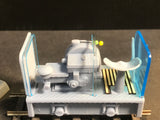
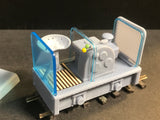
The unpainted kit is printed using high detail resin in the UK and the sale is for the chassis, body and sundry dress up items only. It comes unpainted and supplied without the tenshodo chassis which is shown here for information only. In addition to the plastic parts, there is also a real wood duckboard insert for the footwell and the bonnet supports and back plate are laser cut in 1.5mm clear acrylic. This aids in strength on these thin parts and is super easy to paint with standard primers, we use grey car primer for ours with great success.
The first few pictures shows the kit painted so you can see how good the finish is. The driver is not included, as he has a job here in the factory and has to stay.
2 pins for hand levers
Acrylic end plate
2 x Acrylic Bonnet supports
GN15 Spoorijzer Diesel Loco Kit – Frequently Asked Questions
What exactly is this GN15 diesel loco kit?
This is an unpainted, high-detail resin kit of a small industrial diesel locomotive for GN15 layouts, workyards and industrial estates. It is inspired by the Dutch Spoorijzer “critter” used on many small railways. The kit provides the loco body, chassis (for mounting a suitable motor bogie), and detailing parts for you to assemble, prime and paint yourself.
What scale and track gauge is this kit designed for?
The kit is designed for GN15, which is narrow-gauge G-scale: 1:22.5 scale running on 16.5 mm gauge track (the same gauge as standard OO/HO track). It is intended to represent a compact industrial loco in that scale.
What parts are included in the kit?
Your order includes 14 pieces in total:
- Spoorijzer chassis suitable for a Tenshodo Spud / Hanazono motor unit
- Bonnet
- Front grille
- Engine block
- 2 pins for hand levers
- Seat
- Hand brake
- Wooden footboard (real wood duckboard insert for the footwell)
- Acrylic end plate (back plate)
- 2 x acrylic bonnet supports
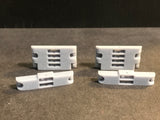
- 4 x coupling blocks (choice of thin or thick versions)
All parts are supplied unassembled (where applicable), unprimed and unpainted, with supports removed.
What is not included with the kit?
The powered motor chassis is not included. The Tenshodo Spud / Hanazono unit shown in photos is for illustration only. The driver figure is also not included. You will need to provide your own motor bogie, adhesives, primer, paint and any figures or extra detailing parts you wish to add.
What materials are the parts made from?
The main body components are printed in high-detail resin in the UK. The footwell duckboard is real wood, and the bonnet supports and back plate are laser-cut from 1.5 mm clear acrylic for strength and ease of painting. All parts are cleaned and cured by hand before packing.
How is the kit packaged and shipped?
The kit is dispatched by Royal Mail in eco-friendly packaging. The outer packaging is made in part from recycled materials and is fully recyclable, while the internal packing materials are acid-free and made from approximately 99% recycled pulp fibres.
How delicate are the resin parts?
Resin offers very fine detail but can be more brittle than injection-moulded plastic. The parts will stand normal handling for assembly and painting, but they do not enjoy being dropped or crushed. Handle with care, especially the thinner details, and avoid excessive force when dry-fitting or clamping.
What should I do if something arrives broken?
If a part has been damaged in the post, please take clear photos of the damage and the packaging as soon as you notice it. Contact the seller with these images so they can assess the situation and see what can be done to help. Breakages after safe delivery (for example, due to accidental drops during assembly) are not covered.
Do I need any special tools to build this kit?
No specialist tools are required. A basic modelling toolkit is sufficient: a sharp hobby knife, small files or sanding sticks, tweezers, and a fine brush for applying superglue. A small square or simple straight edge can help keep parts aligned when gluing.
Which motor unit works with this chassis?
The chassis is designed to be suitable for a Tenshodo Spud or Hanazono motor unit. The maker’s preferred option is a unit with a 31 mm wheelbase and 10.5 mm diameter wheels. You will need to source this separately from your usual model railway supplier.
What glue should I use for assembly?
Standard cyanoacrylate (superglue) works well for all the components supplied, including the resin, wood and acrylic parts. Use small amounts, applied with a fine tip or toothpick, and allow each joint to set before moving on to the next.
Do I need to wash or clean the parts before priming?
The parts are cleaned and cured by hand, and supports are removed before dispatch. However, for best paint adhesion many modellers like to give resin parts a quick rinse in warm (not hot) soapy water, then gently scrub with a soft brush and let them dry completely. This is optional but can be helpful if you are in a humid or dusty environment.
How should I prime the resin and acrylic parts?
Both the resin and the acrylic parts take standard primers well. The maker recommends a grey car primer, which gives excellent coverage and grip. Apply light, misted coats rather than one heavy coat, allowing each layer to dry before the next. The clear acrylic will turn opaque under primer, ready for painting like any other part.
Do I need to sand the parts before painting?
The parts are supplied with support marks removed, but some fine sanding may still be required in places. Use fine-grit sanding sticks or paper (e.g. 600–1000 grit) to smooth any remaining marks or print lines. Always sand gently, checking your progress often so as not to remove detail.
How can I get a smooth, realistic finish on the bonnet and body?
After a light sanding and priming, inspect the surfaces under good light. If you see any small imperfections, spot-fill with a fine model filler or thick primer, sand again once dry, and re-prime. Multiple thin coats of paint work better than one thick one. For a work-worn industrial look, you can finish with subtle dry-brushing and weathering powders after the main colour has fully cured.
What type of paint should I use?
Most hobby acrylic or enamel paints formulated for plastic models will work well over a good primer. Choose paints you are comfortable using and follow the manufacturer’s instructions. If you mix paint types, ensure they are compatible (for example, acrylic over fully cured enamel, not the other way round) and always test on a hidden area first.
How do I paint the real wood duckboard and keep the texture visible?
To keep the grain and plank detail visible, avoid thick paint. A thin stain or heavily thinned acrylic wash works nicely: apply, let it soak in, then wipe back gently to reveal the texture. Once dry, you can add a light dry-brush of a lighter wood tone or dusty grey to suggest wear and grime.
Any tips for painting the clear acrylic bonnet supports and back plate?
Lightly scuff the surfaces with very fine abrasive (e.g. 1000 grit) to give the primer a key, then clean off any dust. Apply a light coat of grey car primer and let it dry thoroughly. After that, treat them like any other part: base coat, then weathering or detail painting as desired.
How can I avoid glue marks on visible painted surfaces?
Whenever possible, do most of your structural gluing before final painting, especially on joints that will be visible. For parts that must be glued after painting, lightly scrape paint from the contact areas so the glue bonds to bare material, and apply superglue with a fine tip only to the hidden joint. Keep a cotton bud or tissue handy to catch any stray glue before it fogs the paint.
My parts don’t seem to fit the motor unit perfectly. What should I check?
First, confirm that your motor unit matches the suggested type (such as a Tenshodo Spud / Hanazono with a 31 mm wheelbase and 10.5 mm wheels). Then check for any small printing nubs or sanding residue inside the chassis that might prevent a snug fit. Carefully remove any obstructions with a file or knife, test-fitting as you go. Do not force the motor unit into place; take off a little material at a time.
The resin feels slightly rough in places. Is that normal?
A slight texture or faint support marks can occur with high-detail resin printing. This is normal and is easily dealt with using fine sanding and a good primer. Focus on the most visible areas, such as the bonnet sides and cab area, and keep your sanding light so you do not lose crisp details.
My primer is not adhering well in some spots. How can I fix this?
If primer beads or flakes, it usually means there is a trace of release residue, skin oils or dust. Gently wash the affected parts in warm soapy water, rinse thoroughly and let them dry completely. Lightly scuff the surface with very fine abrasive, then re-apply the primer in thin coats. Ensure you are using a primer suitable for plastic and resin, such as a car or model-specific primer.
A thin part has snapped during assembly. Can it be repaired?
In many cases, yes. Align the broken edges carefully and apply a tiny amount of superglue, holding the part in position until it sets. For extra strength on hidden areas, you can reinforce the joint with a sliver of plastic or wire glued behind it. If the break is severe or you are unsure how to repair it, contact the seller with photos to discuss possible options.
The acrylic parts look cloudy after sanding. Is that a problem?
No, that is expected. Once you apply primer and paint, the cloudiness disappears and the acrylic will look like any other solid part. The light sanding actually helps the primer adhere better, so it is a useful step rather than an issue.


