

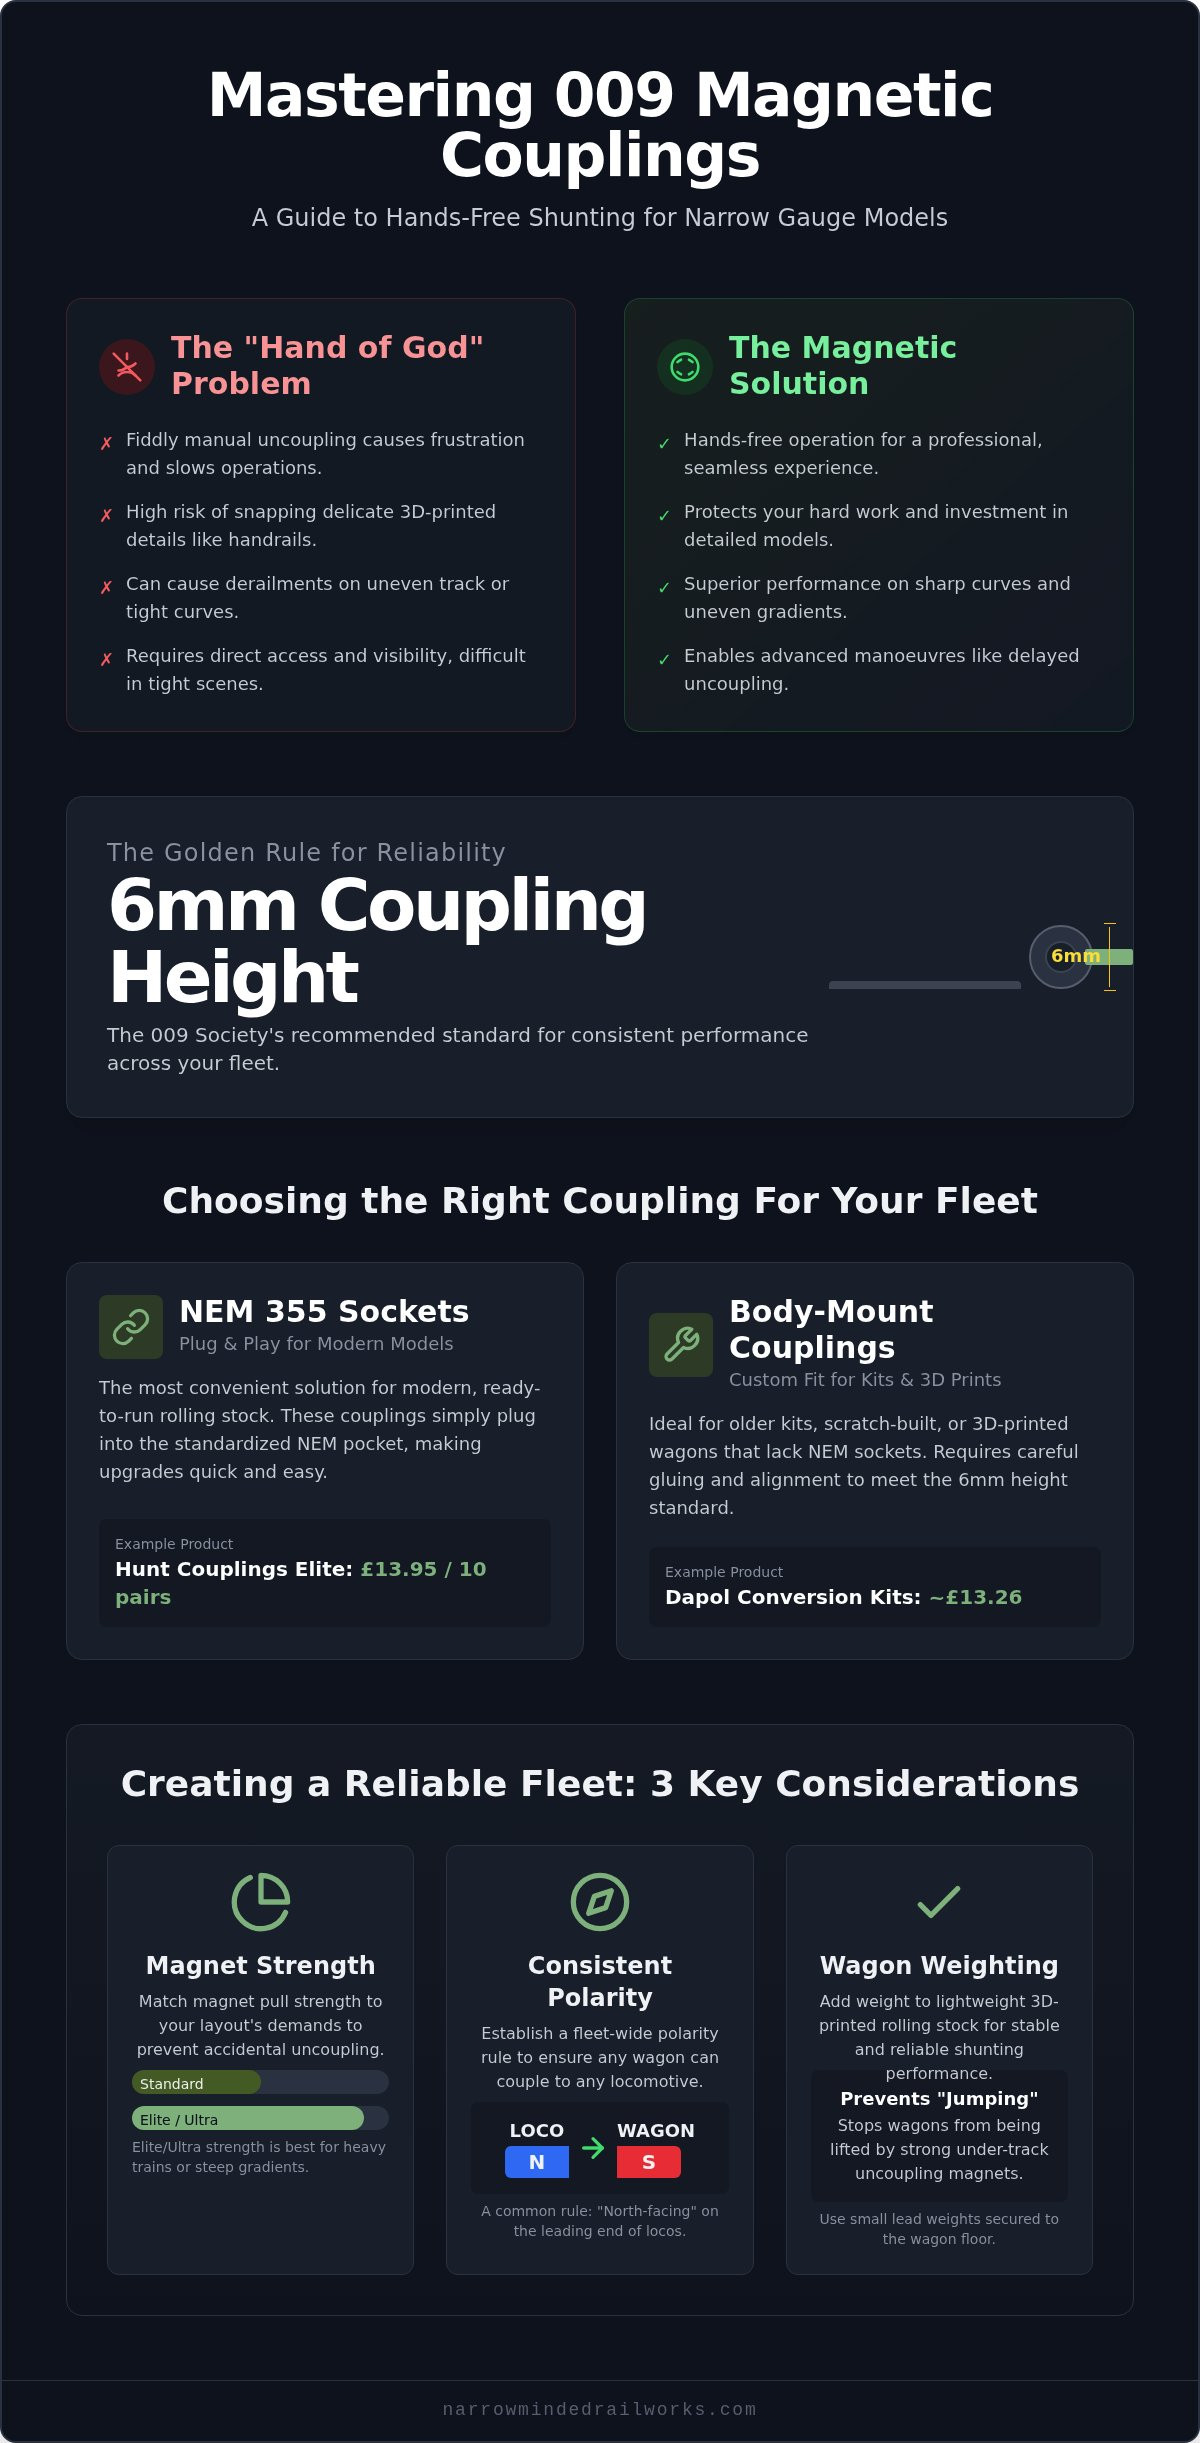
Why does the "hand of God" always seem to descend just as you're reaching the most delicate part of your 3D-printed wagon? We understand that manual uncoupling is a common frustration for narrow gauge modellers, often leading to snapped handrails or derailments on uneven gradients. Integrating 009 magnetic couplings into your rolling stock offers a proactive solution to these shunting headaches. It's the most effective way to move away from fiddly manual hooks and towards a professional, hands-free operation that protects your hard work.
You'll discover how to transform your layout's performance by choosing the correct magnet strength and mastering precise mounting geometry. While many 3D-printed kits lack standard NEM 355 sockets, we'll explain how to adapt your fleet to maintain the 009 Society's recommended 6mm coupling height. This guide provides a clear look at polarity alignment and step-by-step fitting techniques for a diverse range of kits. You'll gain the confidence to create a consistent, reliable shunting experience across your entire narrow gauge fleet.
Key Takeaways
- Learn how automatic uncoupling prevents damage to delicate 3D-printed details on narrow gauge locomotives and rolling stock.
- Identify the differences between NEM and body-mount 009 magnetic couplings to ensure compatibility across your entire fleet.
- Master the essential tools and surface preparation techniques required to retrofit magnetic systems to resin or filament wagon bodies.
- Discover the most effective placement for uncoupling magnets to improve shunting reliability and reduce derailments in narrow gauge yards.
- Understand why 3D-printed wagon kits offer a versatile, lightweight foundation for customizing coupling heights and mounting positions.
The Benefits of 009 Magnetic Couplings for Narrow Gauge
Traditional loop and hook couplings often struggle with the delicate nature of OO9 narrow-gauge modelling. While these mechanical links are standard, they require physical contact to uncouple. This often results in the "hand of God" descending upon the layout, which risks snapping fine 3D-printed handrails or damaging intricate rivet details. By switching to 009 magnetic couplings, you eliminate the need for manual intervention. This hands-free approach is particularly beneficial for shunting in tight quarry scenes or micro-layouts where space is at a premium and visibility is limited.
Beyond protecting your models, magnetic systems offer superior performance on sharp curves. Narrow gauge layouts frequently feature tight radii that can cause rigid mechanical links to bind or derail. Magnetic couplings provide a degree of lateral flexibility that accommodates these sharp turns without sacrificing a secure connection. This makes them an ideal choice for the winding, non-standard trackwork often found in industrial narrow gauge settings. They allow for smooth transitions through points and across uneven track, which is where traditional systems usually fail.
Operational Reliability vs. Visual Realism
Modellers often face a trade-off between the bulky appearance of a coupling and its reliability during an exhibition. While some magnetic options are larger than a prototypical "chopper" coupling, the operational gain usually outweighs the visual compromise. Delayed uncoupling is a functional feature that allows a locomotive to push a wagon over a magnet and then leave it at a specific spot on the siding without the couplings re-engaging. This functionality adds a layer of professionalism to your shunting operations that mechanical loops simply cannot match.
009 Scale Specific Challenges
Transitioning to magnetic systems isn't without its hurdles, especially with lightweight 3D-printed rolling stock. Because resin and filament wagons are significantly lighter than die-cast alternatives, they can occasionally "jump" toward a strong under-track magnet if not properly weighted. We acknowledge that the lack of standardized mounting heights across different kit manufacturers can be frustrating. However, by adhering to the 009 Society's recommended 6mm height and adding small lead weights to your wagon floors, you can achieve a stable and reliable shunting experience. Short-wheelbase locomotives also benefit from the reduced friction of 009 magnetic couplings, ensuring smoother starts and stops during low-speed manoeuvres.
Choosing the Right Magnetic Coupling for Your Fleet
Selecting the appropriate 009 magnetic couplings for your layout depends largely on the age and origin of your rolling stock. While modern ready-to-run models often feature the standard NEM 355 socket, many older kits or 3D-printed designs do not. We recognize that this lack of standardization can be confusing. However, by identifying your mounting requirements early, you can create a seamless shunting experience across your entire fleet. It's often more efficient to commit to a single system rather than managing multiple incompatible types.
NEM 355 vs. Custom Mounts
NEM sockets are a convenient 'plug-and-play' solution for newer models. Brands like Hunt Couplings offer Elite varieties for NEM 355 sockets at £13.95 for ten pairs, making them a straightforward upgrade. If you are working with OO9 wagon kits that lack these sockets, you'll need to consider body-mount solutions. Dapol offers conversion kits for approximately £13.26 that help bridge this gap. These custom mounts provide a robust connection but require careful alignment to ensure they meet the 6mm height standard recommended by the 009 Society. Permanent mounts offer stability, while removable heads allow for easier maintenance if a magnet becomes damaged or loses its pull.
Strength and Polarity Standards
Strength ratings are a critical factor for narrow gauge operations. Standard magnets work well for short trains on level track. If your layout features steep gradients or heavy trains, 'Elite' or 'Ultra-close' pull strengths are necessary to prevent accidental uncoupling. Consistency is the foundation of reliable shunting. The National Model Railroad Association (NMRA) provides excellent guidance on maintaining standards across diverse fleets, which is vital when mixing kit-built and modified stock.
Establishing a fleet-wide polarity rule is essential. Most modellers adopt a 'North-facing' rule for the leading end of all locomotives to ensure they always attract the wagon's coupling. We suggest using a simple polarity jig to test every new kit before it enters service. This prevents the frustration of a locomotive pushing a wagon away instead of coupling to it. Our lightweight 3D-printed wagon kits provide an ideal, easily modifiable base for testing these magnetic setups. You can easily drill or file the resin bodies to accommodate different 009 magnetic couplings without compromising the model's structural integrity.
Step-by-Step: Fitting Magnetic Couplings to OO9 Kits
Retrofitting 009 magnetic couplings to 3D-printed kits requires a more hands-on approach than the plug-and-play NEM sockets found on ready-to-run stock. We recognize that resin and filament surfaces can be unforgiving if not prepared correctly. To achieve a professional finish, you'll need a set of needle files, high-quality cyanoacrylate (CA) glue, and a dedicated height gauge. Smoothing the mounting area with a fine file is essential to ensure a flush, secure bond for your adhesive. This preparation prevents the coupling from shifting during heavy shunting operations.
Consistency is the foundation of a reliable fleet, so we recommend using a modern Peco or Bachmann model as a physical reference for alignment. Place your reference model and your kit on a flat piece of track to visually inspect the coupling centers. It's also important to test for "magnetic slack," which is the slight movement between coupled magnets. While some movement is normal, excessive slack causes wagons to surge or "bunch" when the locomotive starts or stops. Proper tensioning ensures your train moves as a single, cohesive unit rather than a series of jerking wagons.
Mounting on 3D-Printed Locomotive Bodies
When you are building OO9 locomotive kits, the mounting strategy often depends on the chassis you've selected. While 3D-printed resin can be brittle, using a sharp hand-drill at low speeds allows you to create custom mounting holes without cracking the body. You must ensure the magnet has enough lateral "swing" to clear the buffer beam, especially if your layout features tight industrial curves. If the buffer beam is too deep, use a needle file to create a small recess. This modification allows the coupling to pivot freely, preventing derailments on sharp radii.
Troubleshooting Common Fitting Issues
One frequent challenge is "droop," where the coupling head sags toward the track. We understand that a sagging coupling can cause accidental uncoupling over magnets, but you can correct this by reinforcing the pivot point with a tiny drop of CA glue. If you encounter height mismatches, the magnets won't align correctly under load. To verify your work, slide a height gauge, such as the £2.00 Greenwich gauge, along the track and ensure the coupling head rests perfectly within the designated notch. This simple check confirms that your 009 magnetic couplings are positioned for maximum reliability before they reach the layout.
Optimizing Your Layout for Magnetic Shunting
A layout's performance relies as much on the trackside infrastructure as it does on the rolling stock. We understand that installing uncoupling magnets can feel like a permanent commitment that risks ruining your ballasting. By choosing the right magnet type and placement early, you can avoid unsightly track modifications later. For most 009 layouts, you must choose between magnets placed between the rails or those hidden beneath the sleepers. While between-rail magnets are easier to install, they are more difficult to disguise. Under-track magnets offer a cleaner look but require a stronger magnetic pull to actuate 009 magnetic couplings through the baseboard material.
Strategic placement in a narrow gauge yard is vital. You should avoid placing uncouplers on main running lines to prevent "false uncoupling" during through-train movements. Instead, focus on the entrances to sidings or specific loading docks. You can effectively hide these magnets using diorama tools and scenery, such as scattered coal, ash pits, or discarded sleepers. For those using surface-mounted solutions, Tramfabriek offers 5x2 mm magnets for approximately £6.50, which are small enough to be tucked between sleepers with minimal disruption.
Magnet Placement Strategies
Finding the "sweet spot" for your magnets ensures that wagons stop exactly where the shunter can reach them. If you run variable-length trains, consider installing a sequence of magnets to accommodate different rake sizes. To help operators, mark these zones with subtle lineside details. A shunting pole or a specific trackside sign provides a visual cue without breaking the immersion of your scene. This prevents the operator from having to guess where the magnetic field begins, reducing the need for repetitive "back and forth" movements.
Managing Magnetic Interference
Strong magnets can occasionally interact with steel axles or internal weights, causing lightweight wagons to stutter. We recognize that this interference is a common issue with 3D-printed kits. You can solve this by replacing steel axles with brass equivalents or repositioning weights further from the coupling. Testing the "push-past" feature is also essential. This allows you to propel a rake over a magnet and uncouple only when you change direction, which is the hallmark of sophisticated shunting. If you are planning a new yard, explore our range of OO9 wagon kits to build a consistent fleet for your magnetic shunting experiments.
Building a Reliable Fleet with Narrow Minded Railworks
Our 3D-printed kits provide a versatile platform for modellers looking to move beyond standard mechanical links. While 3D-printed resin can be less forgiving than plastic when subjected to blunt force, a light touch with a needle file creates a professional-grade recess for magnetic mounts. We design our wagon and locomotive bodies to be lightweight yet robust, providing the ideal foundation for 009 magnetic couplings. This material choice allows you to easily drill, sand, or modify the under-body area to accommodate various magnet brands without the need for heavy power tools.
Integrating these systems is most effective when done during the initial kit-building process. By planning your coupling mounts before applying primer or paint, you ensure a stronger bond between the adhesive and the resin surface. We recognize that modellers often work with a mix of kit-built and modified stock. To maintain consistency, we recommend customizing the wagon floors early in the build to ensure the magnets sit flush with the buffer beam, preventing unsightly gaps or operational snags.
Wagon Kit Customization
Adapting our range of 3D-printed wagons for magnetic operation requires minimal effort but significant precision. We suggest sanding the coupling pockets with a fine-grit file to ensure a flush fit for your chosen brand. While some kits have fixed mounting points, the inherent flexibility of 3D printing technology enables us to design models with bespoke coupling heights that suit non-standard mounting requirements. This customization is vital for achieving the 6mm standard across a diverse fleet. Once the pocket is prepared, a small amount of gap-filling cyanoacrylate will secure the coupling firmly against the chassis.
Locomotive Integration
Matching our locomotive bodies with your chosen chassis requires careful consideration of the buffer beam aesthetics. While some chassis may have pre-existing mounts, our bodies can be modified to allow 009 magnetic couplings to swing freely without hitting the detailed front-end rivets or pipework. We understand that maintaining a prototypical look is important. Therefore, we suggest painting the coupling heads in a matte black or dark grey finish to help them blend into the shadows of the locomotive's underframe. Before your model enters regular service, follow this final checklist:
- Verify the coupling height against a known reference model.
- Check that the magnet has enough lateral movement for your tightest layout curves.
- Ensure the polarity matches the rest of your fleet using a polarity jig.
- Test the shunting action on a piece of track with an uncoupling magnet to confirm smooth operation.
The future of narrow gauge modelling lies in this level of customization. As 3D printing continues to evolve, the ability to integrate sophisticated magnetic systems into even the smallest industrial wagons will become the standard for reliable shunting.
Transform Your Shunting Operations
Moving away from manual uncoupling can feel like a complex technical hurdle for many modellers. However, adopting 009 magnetic couplings provides a proactive solution that safeguards your delicate 3D-printed details while enhancing operational realism. By mastering the 6mm height standard and establishing a consistent polarity rule across your rolling stock, you can eliminate the frustrations of accidental uncoupling and the need for manual intervention on your layout.
We understand that retrofitting kits requires precision, but the flexibility of resin-based models makes this transition straightforward. Narrow Minded Railworks offers specialist 3D-printed designs that serve as the ideal lightweight foundation for your magnetic experiments. With our helpful guides for kit building and worldwide shipping for all narrow gauge modellers, you have everything needed to upgrade your fleet. Explore our range of OO9 kits and start your magnetic conversion today. Your narrow gauge yard will soon benefit from the smooth, automatic performance that these modern standards provide.
Frequently Asked Questions
Do 009 magnetic couplings work with Peco track?
Yes, 009 magnetic couplings are fully compatible with Peco track, including both Mainline and Crazy Track varieties. The uncoupling magnets are designed to sit either between the sleepers or directly under the baseboard. Since Peco track uses standard 9mm gauge spacing, these magnetic systems integrate seamlessly without requiring structural track modifications. You simply need to ensure the magnet doesn't sit higher than the rail head to avoid catching low-hanging locomotive parts.
Can I mix magnetic couplings with standard loop couplings?
You cannot directly mix magnetic and standard loop couplings because they use entirely different mechanical principles. A magnetic head won't latch onto a traditional loop. If you have a mixed fleet, we suggest using "barrier wagons" equipped with a magnetic coupling at one end and a loop at the other. This proactive solution allows you to transition your fleet gradually without losing the ability to run your existing older rolling stock.
What is the best glue for attaching magnets to 3D-printed kits?
High-quality cyanoacrylate (CA) glue, often called super glue, is the most effective choice for attaching magnets to our 3D-printed resin or filament kits. For a more robust bond, use a medium-viscosity CA that allows a few seconds for precise alignment before it sets. We recommend lightly sanding the 3D-printed surface first to remove any residual resin or printing artifacts. This preparation creates a superior mounting surface for the adhesive to grip.
How many magnets do I need for a small narrow gauge layout?
The number of track magnets required depends on the complexity of your shunting operations rather than the layout's physical size. Generally, you need one magnet for every location where you intend to leave a wagon, such as a factory siding, coal staithe, or engine shed. For a typical small narrow gauge layout with three sidings, three strategically placed magnets are sufficient to handle most hands-free shunting movements without cluttering the track.
Do magnetic couplings affect DCC locomotives?
Magnetic couplings don't typically interfere with the operation of DCC locomotives, provided they are mounted correctly. However, extremely strong neodymium magnets placed directly under the track can occasionally affect sensitive reed switches or unshielded decoders in very small locos. We suggest testing your locomotives at slow speeds over your uncoupling points. If you encounter stuttering, reposition the track magnet slightly deeper under the baseboard to reduce the magnetic field's intensity.
Are magnetic couplings strong enough for steep narrow gauge gradients?
Yes, magnetic couplings are capable of handling steep narrow gauge gradients if you select the appropriate pull strength. For layouts with significant inclines, we recommend using "Elite" or high-strength variants of 009 magnetic couplings. These provide a more secure connection that prevents heavy wagon rakes from breaking away mid-climb. Always ensure your wagon weights are balanced, as uneven loads can put unnecessary strain on the magnetic bond during a steep ascent.
How do I ensure all my couplings are the same height?
Maintaining a consistent height is vital for reliable shunting, and the 009 Society recommends a standard height of 6mm above the rail head. We advise using a dedicated height gauge, such as the Greenwich gauge priced at £2.00, to check every kit during the assembly process. By testing each wagon against this fixed reference point, you ensure that every vehicle in your fleet will couple and uncouple reliably across all track magnets.
Can I use N gauge magnetic couplings for OO9 stock?
You can use N gauge magnetic couplings for OO9 stock because they both utilize the NEM 355 socket standard. Many narrow gauge modellers use N gauge components because they are widely available and match the 9mm track width perfectly. However, keep in mind that N gauge couplings may have different "overhang" lengths. Always check that the coupling head extends far enough past the buffer beam to allow for free movement on tight curves.