

A miniature world should never feel restricted by the size of its baseboard. While many modellers struggle with layouts that look flat or toy-like, the most immersive landscapes often emerge from the tightest constraints. If you find yourself overwhelmed by the detail required for small scales or lack the room for traditional techniques, you aren't alone. This common hurdle is why exploring specialized scenery ideas for small model railway layouts is the key to unlocking a professional finish. By shifting your focus from horizontal sprawl to vertical depth, you can create a scene that feels vast and authentic.
In this guide, you will discover how to transform compact spaces into immersive miniature landscapes using clever verticality and forced perspective. We provide practical techniques for building realistic narrow gauge scenery that prioritizes high-fidelity detail over sheer size. You'll learn how to use specialized diorama mindsets to ensure your layout looks deep and realistic despite a small footprint. From rocky outcrops to dense foliage, we cover the specific methods that turn a simple shelf into a living, breathing world.
Key Takeaways
- Learn how to adopt a diorama mindset to prioritize high-detail storytelling over track mileage in restricted spaces.
- Discover effective scenery ideas for small model railway layouts that utilize retaining walls and embankments to add vertical depth to narrow baseboards.
- Explore how narrow gauge scales like OO9 and GN15 enable the creation of character-driven industrial themes like quarries or mines in small footprints.
- Identify the strategic placement of 3D-printed micro-details to convince the eye and maximize the visual impact of your miniature world.
- Master a structured execution process, starting with cardboard mock-ups to verify sightlines before applying permanent landscape layers.
The Diorama Mindset: Why Small Layouts Demand High-Detail Scenery
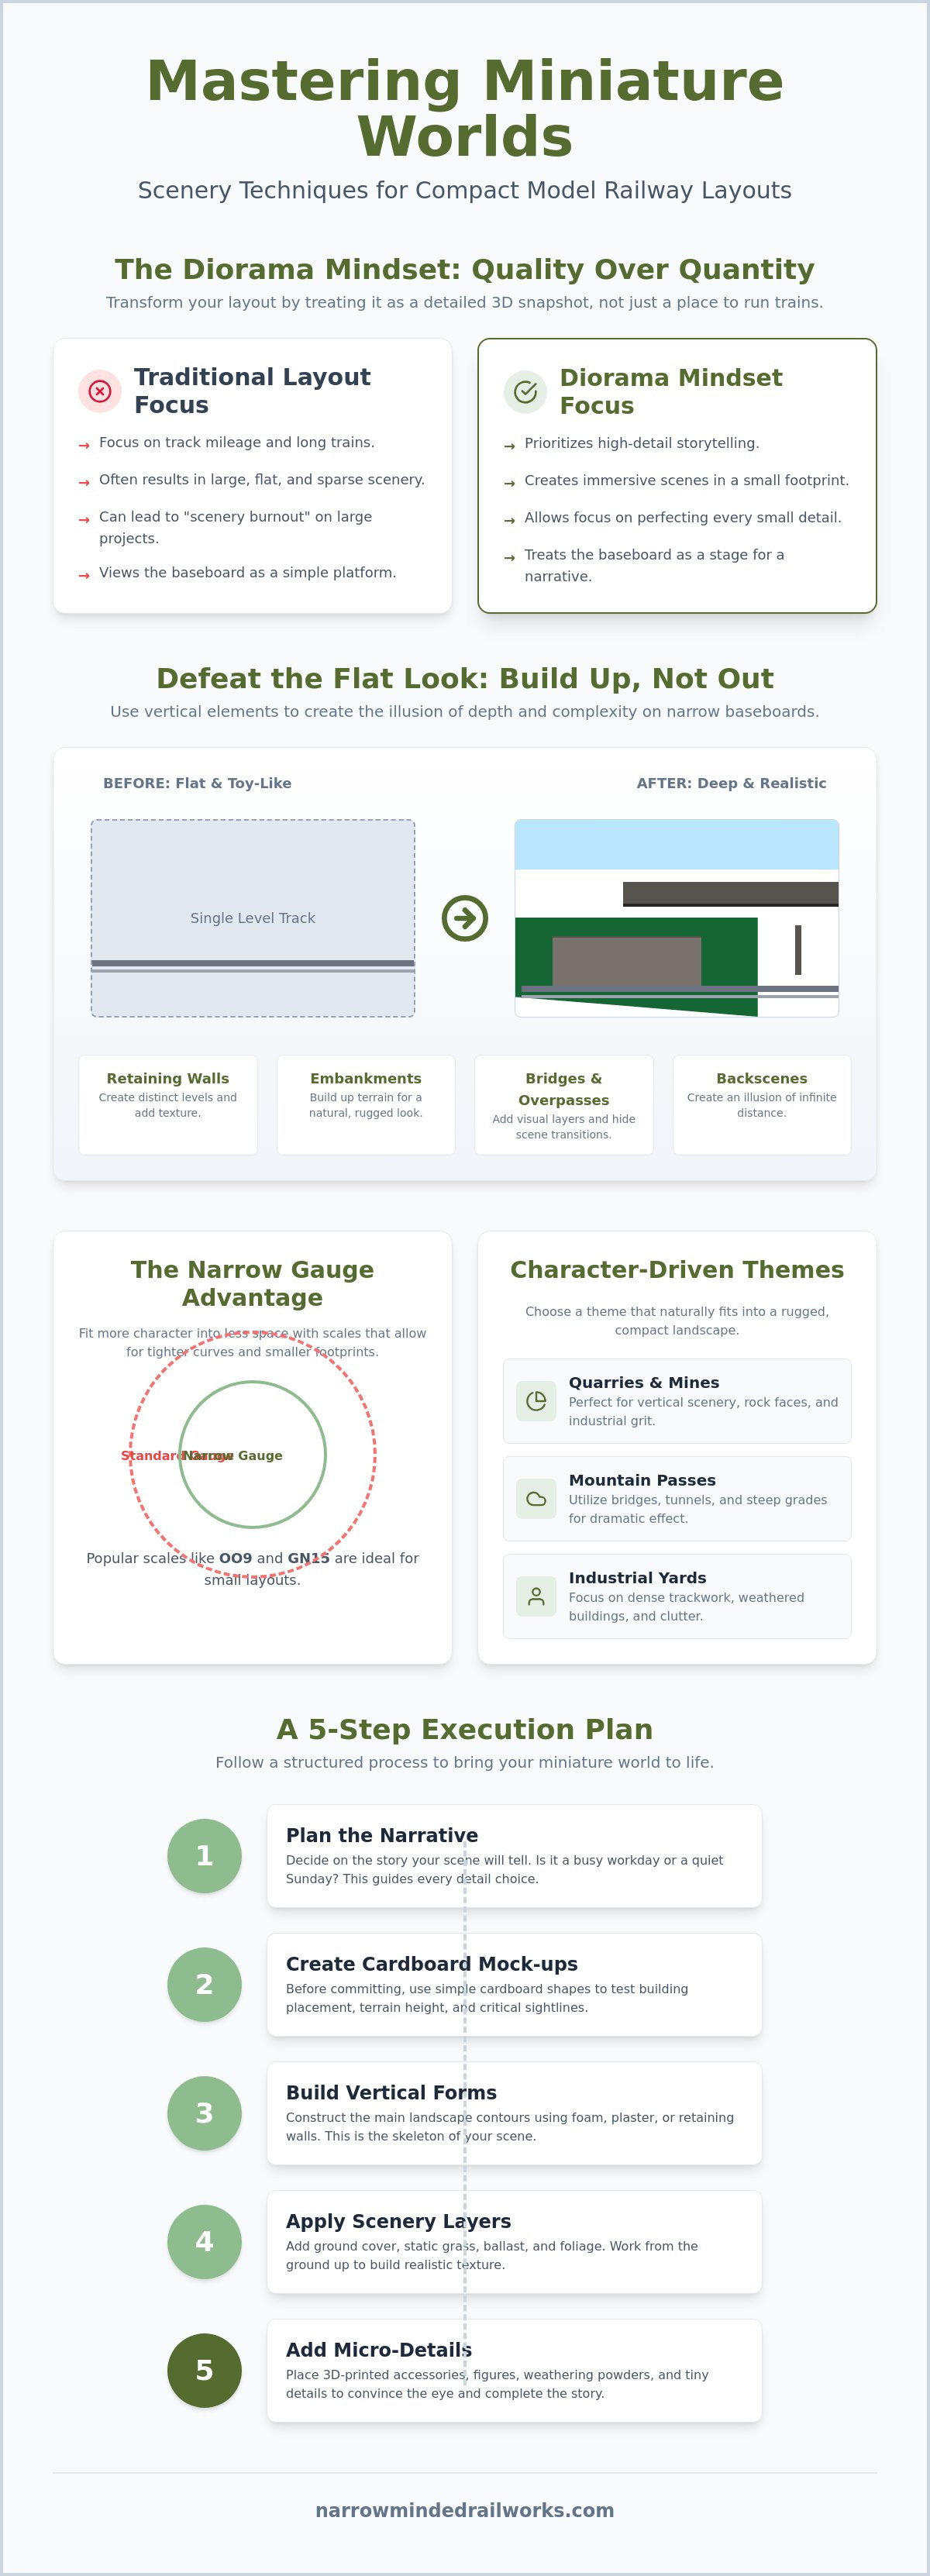
Designing a layout in a small space often feels like a series of compromises; however, it is actually an invitation to focus on quality over quantity. While a large club layout might prioritize long trains and sprawling yards, a micro-layout allows you to obsess over every weed, rust patch, and weathered stone. Implementing clever scenery ideas for small model railway layouts starts with this shift in perspective. Instead of viewing the baseboard as a place to run trains, you should treat it as a stage for a specific narrative. To understand this shift, it helps to look at what is a diorama and how that philosophy applies to rail modelling. By treating your layout as a 3D snapshot, you can achieve a level of realism that is often lost on larger projects.
Small layouts are the perfect canvas for super-detailing because they prevent the "scenery burnout" that often plagues bigger builds. You don't have to cover acres of land with static grass; instead, you can spend an evening perfecting a single corner. This focused approach ensures that every inch of the model stands up to close inspection. Finding the right scenery ideas for small model railway layouts often means looking at the world through a lens of compression, where every detail serves a purpose in the story you're telling.
To better understand how scenery materials work together in a small space, watch this helpful video:
Narrow Gauge as a Space-Saver
Space is the primary constraint for many modellers, but narrow gauge railways offer a proactive solution. These lines naturally fit into rugged, tight landscapes like mountain passes or industrial yards. Scales such as OO9 and GN15 allow for much tighter curves and smaller footprints than standard gauge. This means you can fit more scenery per square inch. While a standard gauge scene might require a wide sweep of track, a narrow gauge quarry can wind through a boxfile, leaving more room for high-detail rock faces and structures.
Framing Your Miniature World
A narrow baseboard can look exposed and unrealistic without proper boundaries. You can solve this by using "theatre wings" or proscenium arches to focus the viewer's eye. These structures act like a picture frame, hiding the edges of the world and creating the illusion of depth. Integrating the layout into bookshelves or alcoves provides a natural frame that makes the miniature world feel like a permanent part of the room. A high-quality backscene is essential here; it provides the "infinite" horizon that a 12-inch deep layout lacks, effectively doubling the perceived space of your scene.
Defeating the Flat Look: Vertical Scenery Ideas for Compact Spaces
A flat baseboard often results in a "toy-like" appearance that lacks the realism of a full-sized landscape. While you might lack the square footage for rolling hills, you can solve this by building "up" instead of "out." Utilizing verticality is one of the most effective scenery ideas for small model railway layouts. By incorporating retaining walls and steep embankments, you create distinct levels that trick the eye into seeing more complexity than actually exists. Bridges and overpasses serve a dual purpose here. They add visual layers of interest and act as "view blockers" to hide the ends of your line or the entrance to a fiddle yard. These blockers are essential for maintaining the theatre wing effect, as they prevent the viewer from seeing where the miniature world stops and the room begins.
If you are just starting your landscape build, consulting a scenery guide for beginners can provide the foundational knowledge needed to handle terrain materials effectively. Once you have the basics down, you can start experimenting with more advanced spatial tricks that maximize every square inch of your baseboard.
Techniques for Forced Perspective
Executing forced perspective in a space as shallow as six inches requires a disciplined approach. You can't rely on physical distance, so you must manipulate scale instead. Implementing forced perspective is among the best scenery ideas for small model railway layouts when you need to simulate miles of distance in just a few inches. Try placing N gauge figures or smaller trees toward the back of an OO9 layout to suggest they are much further away. Another proactive solution involves atmospheric perspective. By fading the colours of your background scenery and using cooler, desaturated tones for distant elements, you mimic the way the atmosphere blurs real-world horizons. This technique is particularly useful when you want to make a shelf layout feel like a vast valley.
Creating Depth in Shallow Spaces
When space is at a premium, low-relief buildings are essential. These half-buildings sit flush against your backscene, providing the architectural detail of a full structure without consuming valuable track space. You should also consider "negative space" by cutting into the baseboard. Adding a small stream or a drainage ditch below the track level creates an immediate sense of height. This downward expansion is often easier than building upward on a shelf. For those looking to double their visual space instantly, a strategically placed mirror at the end of a siding can create the illusion of a much longer line. To help bring these scenes to life, you might consider using professional diorama tools and scenery to ensure your micro-details remain sharp and realistic. This proactive approach ensures your layout remains a convincing world, regardless of its physical footprint.
Narrow Gauge Themes: Character-Driven Scenery That Fits Anywhere
Narrow gauge railways don't just save space; they provide a distinct character that standard gauge often lacks. While small baseboards limit track length, choosing a narrow gauge theme provides a proactive solution by allowing for tighter, more detailed scenes. These lines were historically built for specific tasks, such as hauling slate from a mountain or moving grain across a farm. This task-oriented nature makes them the perfect subject for specialized scenery ideas for small model railway layouts. You can build an entire world around a single industry, such as a quarry or a small coastal port, without needing the massive footprint of a mainline station.
Industrial grit works exceptionally well in micro-layouts. You can create a convincing mine scene inside a boxfile by focusing on verticality. Use steep rock faces and heavy weathering to suggest a harsh, working environment. If you prefer a softer aesthetic, rural charm offers the chance to model overgrown estate railways or quiet village branch lines. These themes rely on dense foliage and "slow" scenery to set the mood. For those who enjoy dramatic landscapes, coastal narrow gauge layouts use sea walls and jagged cliffs to provide natural scenic breaks and hide track exits.
Theme Comparison for Small Footprints
Selecting a theme depends on your available space and the specific atmosphere you want to create. You should choose a theme that aligns with your small layout plan to ensure the track and scenery work in harmony.
| Theme | Space Needs | Key Features | Anchor Scenic Item |
|---|---|---|---|
| Quarry | Minimal (Vertical) | Exposed rock, heavy dust | Winding engine or crusher |
| Rural | Moderate (Depth) | Dense grass, hedges | Overgrown timber siding |
| Industrial | High (Density) | Brickwork, pipes, grime | Large factory doorway |
The "Lived-in" Look
The secret to a convincing micro-layout lies in the signs of life you leave behind. Small spaces demand that every item tells a story. While limited footprints can feel empty, adding micro-details like weeds growing through the ballast or patches of rust on a corrugated iron shed provides a proactive solution to the "toy-like" look. According to NMRA's guide to scenery basics, these layers of ground cover and detail are what separate a professional model from a basic toy.
In narrow gauge modelling, your rolling stock often acts as "static" scenery. A weathered wagon kit parked on a dead-end siding adds as much character as a building. You can further enhance this by using 3D printed figures to create specific vignettes. A single figure of a worker leaning against a wall or a station master waiting for a train provides a focal point that draws the viewer into the scene. These micro-details are affordable additions; for example, 3D printed accessories can range from £2.50 for a bus shelter to around £15 for more complex structures like engine sheds.
The Art of the Micro-Detail: Using 3D Printed Accessories Effectively
In a micro-layout, the viewer's eye is naturally drawn to the foreground, where every imperfection is magnified. While large layouts can rely on volume to create an impression, small spaces require high-fidelity detail to maintain the illusion of reality. Incorporating 3D printed accessories is one of the most effective scenery ideas for small model railway layouts because these items provide a level of intricacy that traditional plastic moulding often lacks. By using high-detail kits, you can solve the problem of a "toy-like" finish without spending weeks on scratch-building. Strategic placement is essential here; you should position your most detailed items, such as intricate machinery or fine wrought ironwork, at the front of the scene where they can be fully appreciated. For modellers seeking to replicate industrial excellence, the precision found in real-world metal fabrication by Donewright Stainless serves as a perfect reference for structural realism.
To create a convincing focal point, you can apply the "Rule of Three." Instead of scattering small details randomly across the board, group them into narrative clusters. For example, a single barrel looks lonely, but a cluster containing a barrel, a weathered crate, and a discarded pallet suggests a story of recent activity. This grouping technique draws the eye to specific "scenes within a scene," making the overall landscape feel much denser and more purposeful than its physical dimensions suggest.
Essential 3D Detail Parts
The impact of small items on a layout's atmosphere is significant. Adding a red phone box, a set of vintage petrol pumps, or detailed station furniture can instantly ground a scene in a specific era. Figures are equally important for adding life. A single 3D printed figure posed in a natural way, such as a worker leaning on a shovel, creates a proactive solution to a static landscape. Because 3D resin can be quite smooth, you should follow a specific painting 3D printed models guide to ensure your colours adhere correctly and highlight the fine details. Small accessories like these are affordable, with many 3D printed parts costing between £1 and £15 depending on complexity.
Integrating Kits into the Landscape
One common mistake is simply "placing" a finished model on top of the grass. To avoid this, you must blend the base of your 3D printed buildings and accessories into the surrounding ground cover. Use fine soil, static grass, or weathering powders to hide the seam where the model meets the baseboard. Weathering your prints is also vital; if a building looks brand new while the track is rusty, the scene won't feel cohesive. 3D printed accessories bridge the gap between kit-building and landscaping by providing pre-formed, intricate focal points that anchor loose scenic materials. To start building your own immersive world, you can browse our range of diorama tools and scenery to find the perfect additions for your next project.
Planning and Executing Your Small Layout Scene
Rushing the construction phase often leads to awkward sightlines that break the immersion of a miniature world. A proactive solution is to implement a "Cardboard Mock-up" phase before any permanent gluing occurs. By using temporary card shapes to represent buildings and hills, you can test how the scene looks from different viewing angles. This step is vital when applying scenery ideas for small model railway layouts, as it ensures that your vertical elements don't accidentally block the view of your trains. Once you're satisfied with the composition, you can move forward with the permanent landscape layers.
Lighting is another factor that modellers often overlook until the build is complete. Small layouts frequently sit in bookshelves or alcoves where ambient light is insufficient. Installing integrated LED strips provides a consistent light source that enhances the perception of depth and brings out the texture of your scenery. This controlled lighting setup allows you to simulate specific times of day, further strengthening the narrative of your scene. For the digital planning phase, tools like SCARM version 2.0.1, released in March 2026, or the web-based TrackPlanner.app are excellent for visualizing your track and structure placement before you cut a single piece of foam.
Step-by-Step Scenic Execution
Building a realistic landscape requires a structured approach to layering. While the process may seem daunting, following a logical sequence ensures a professional finish.
- Step 1: Establishing the landform. Use foam blocks or card formers to create the basic topography. This provides the "skeleton" of your scene.
- Step 2: Applying base texture. Cover the landform with a layer of plaster or sculptamold, then paint it with matte "earth" colours to provide a foundation for ground cover.
- Step 3: Placing structures. Position your 3D printed buildings and large scenic items. This allows you to blend their bases into the landscape in the next step.
- Step 4: Layering vegetation. Apply static grass, bushes, and micro-details. This final pass hides seams and adds the "lived-in" character discussed in previous sections.
Maintaining Your Miniature World
Small layouts are prone to dust accumulation that can dull the vibrant colours of your scenery. A proactive solution is to use a soft makeup brush, which can be purchased in packs for approximately $7, to gently dust delicate 3D printed accessories without causing damage. You might also consider protecting your work with an acrylic case. While these cases prevent dust, they can cause reflections; however, they are a worthwhile investment for preserving high-detail dioramas. When you're ready to start, browse our range of 3D printed scenery and figures to bring your small layout to life with professional-grade details.
Elevate Your Miniature World Today
The most successful scenery ideas for small model railway layouts rely on high-fidelity accessories that draw the viewer into the scene. Whether you're modelling a gritty industrial quarry or a quiet rural branch line, the quality of your components defines the final result. We offer UK-designed 3D printed kits and specialist narrow gauge expertise to help you achieve these goals. With worldwide shipping available for all our scenery accessories, we support modellers in transforming any small footprint into an immersive masterpiece.
Explore our range of 3D printed scenery and diorama tools to start your next build with the right materials. Your small-scale vision is entirely within reach when you combine clever planning with professional-grade details.
Frequently Asked Questions
How do I make a small layout look bigger?
You can make a small layout look bigger by building upward and using forced perspective. While shallow baseboards limit physical distance, placing smaller scale items toward the back creates an illusion of depth. A high-quality backscene also provides an artificial horizon that doubles the perceived space of your miniature world.
What is the best scale for a small model railway layout?
Narrow gauge scales like OO9 or GN15 are the most effective choices for compact spaces. These scales allow for much tighter curves and smaller footprints than standard gauge. By selecting a narrow gauge theme, you can fit more scenery ideas for small model railway layouts into a shelf or boxfile without sacrificing realism.
Can I use forced perspective in a shelf layout?
You can definitely use forced perspective on a shelf layout even if it's only a few inches deep. Modellers solve the lack of physical depth by scaling down buildings and figures as they move toward the backscene. Fading the colors of background elements to cooler, desaturated tones also mimics atmospheric perspective, making distant hills feel miles away.
What are the best materials for small layout scenery?
High-density foam is the best foundation for small landscapes because it allows you to carve "down" into the baseboard for streams or ditches. For the top layers, 3D printed resin accessories provide the sharp detail necessary for close-up viewing. These materials are lightweight and easy to integrate into micro-layouts where every millimeter counts.
How do I hide the ends of the track on a micro-layout?
You should use scenic "view blockers" to hide where the track exits the scene. Bridges, tall buildings, or dense clumps of trees act as theatre wings that prevent the viewer from seeing the edge of the layout. This proactive solution maintains the immersion by suggesting the railway continues into a larger world beyond the frame.
Are 3D printed scenery items better than traditional kits?
3D printed scenery items are often superior for small layouts because they offer finer detail than mass-produced plastic kits. While traditional kits are robust, 3D resin captures intricate textures like wood grain or stonework at a much higher fidelity. You should ensure they're properly cleaned and primed to achieve the best possible finish.
How much detail is too much for a small layout?
Detail is rarely "too much" on a micro-layout as long as it remains focused on specific narrative clusters. While overwhelming a scene with random objects can look cluttered, using the "Rule of Three" to group items creates natural focal points. This approach ensures your scenery ideas for small model railway layouts look intentional and realistic.
What lighting is best for a small display layout?
Integrated LED strips are the best choice for small display layouts. These lights provide a consistent, shadow-free glow that emphasizes the textures of your scenery. You can choose strips with adjustable color temperatures to simulate morning or evening light, which adds a professional, gallery-like quality to your finished miniature world.