

What if the secret to a realistic narrow gauge layout isn't a neat, symmetrical trackbed, but a carefully controlled mess? Many enthusiasts spend weeks building intricate OO9 or GN15 scenes, only to find that learning how to ballast model railway track becomes a source of frustration. It's common to see fine stone clumping together or floating away the moment glue is applied, which often results in an uneven surface that ruins the scale effect.
We recognize that applying adhesive near delicate point blades presents a risk of seizing your turnouts, but utilizing precise diorama tools and a structured application method provides a reliable solution. This guide will help you master the art of ballasting to achieve a stable, industrial look that stays true to the prototype while ensuring your small locos run smoothly. You'll learn how to select the correct stone size for narrow gauge scales and follow a step by step process to secure your trackbed with confidence.
Key Takeaways
- While commercial track often appears artificial, selecting ballast based on real-world stone sizes rather than track gauge provides a grounded, realistic foundation for your layout.
- Applying adhesives near turnouts is difficult, but learning how to ballast model railway track with the dropper method ensures your point work remains fully functional.
- Master the "dry pour" technique and the use of soft-bristle brushes to create natural shoulders and clear sleeper tops before any liquid touches your scenery.
- Achieve an authentic industrial aesthetic by layering weathering effects like coal dust, oil spills, and static grass over your secured trackbed.
- Utilize professional diorama tools for precise material placement to ensure your small-scale locos maintain smooth electrical contact and consistent running.
Why Ballasting is Essential for Realistic Narrow Gauge Layouts
In its most basic form, ballast is the layer of crushed stone that sits beneath and around railway sleepers. Its primary purpose in the physical world is to provide structural support, distribute the weight of passing trains, and facilitate drainage to prevent track shifts. When you translate these concepts to a layout, understanding the role of real-world track ballast helps you recreate the physics of a working railway in miniature. Learning how to ballast model railway track is the definitive step that transitions a collection of components into a believable landscape.
To achieve the highest level of prototype accuracy, many modelers study official maps and surveying data; in the real world, this data is often collected by professionals using an RTK network subscription BC to ensure centimeter-level precision in their geographic measurements.
To better understand this concept, watch this helpful video:
Commercial track often suffers from a "plastic" appearance that can break the immersion of an otherwise detailed diorama. While plastic sleepers provide a convenient base for manufacturing, they lack the texture and weight of weathered timber. Ballasting grounds the trackbed by hiding these artificial surfaces and blending the rails into the surrounding scenery. Beyond aesthetics, the stone and adhesive mix provides essential stability. Narrow gauge track sections are often lightweight; a solid ballast bed adds enough mass to prevent track warping and ensures a smooth run for your small-scale locomotives.
The "Neglected" Aesthetic of Narrow Gauge
Narrow gauge lines rarely feature the pristine, high-shoulder ballast profiles found on modern mainlines. On an OO9 or GN15 layout, the track often looks "lived-in" or even neglected. Sleepers might be partially buried under dirt, sand, or cinders. Unlike the well-manicured look of standard gauge lines, narrow gauge ballasting often involves an uneven, overgrown appearance. Using finer materials like industrial silt or dark ash helps replicate the grittier environment of a slate quarry or a remote timber line.
Preparing Your Workspace
The ballasting process is inherently messy, but preparing your environment ahead of time prevents permanent damage to your equipment. We recommend covering your floor with a drop cloth and removing all rolling stock from the vicinity before you begin. If you are new to these scales, you might want to read our guide on What is a Narrow Gauge Railway? to understand the specific environments you are trying to replicate. Set realistic expectations for your project timeline; the adhesive typically requires 24 to 48 hours to cure fully before you can safely run trains or resume scenery work.
Choosing the Right Ballast Scale and Materials
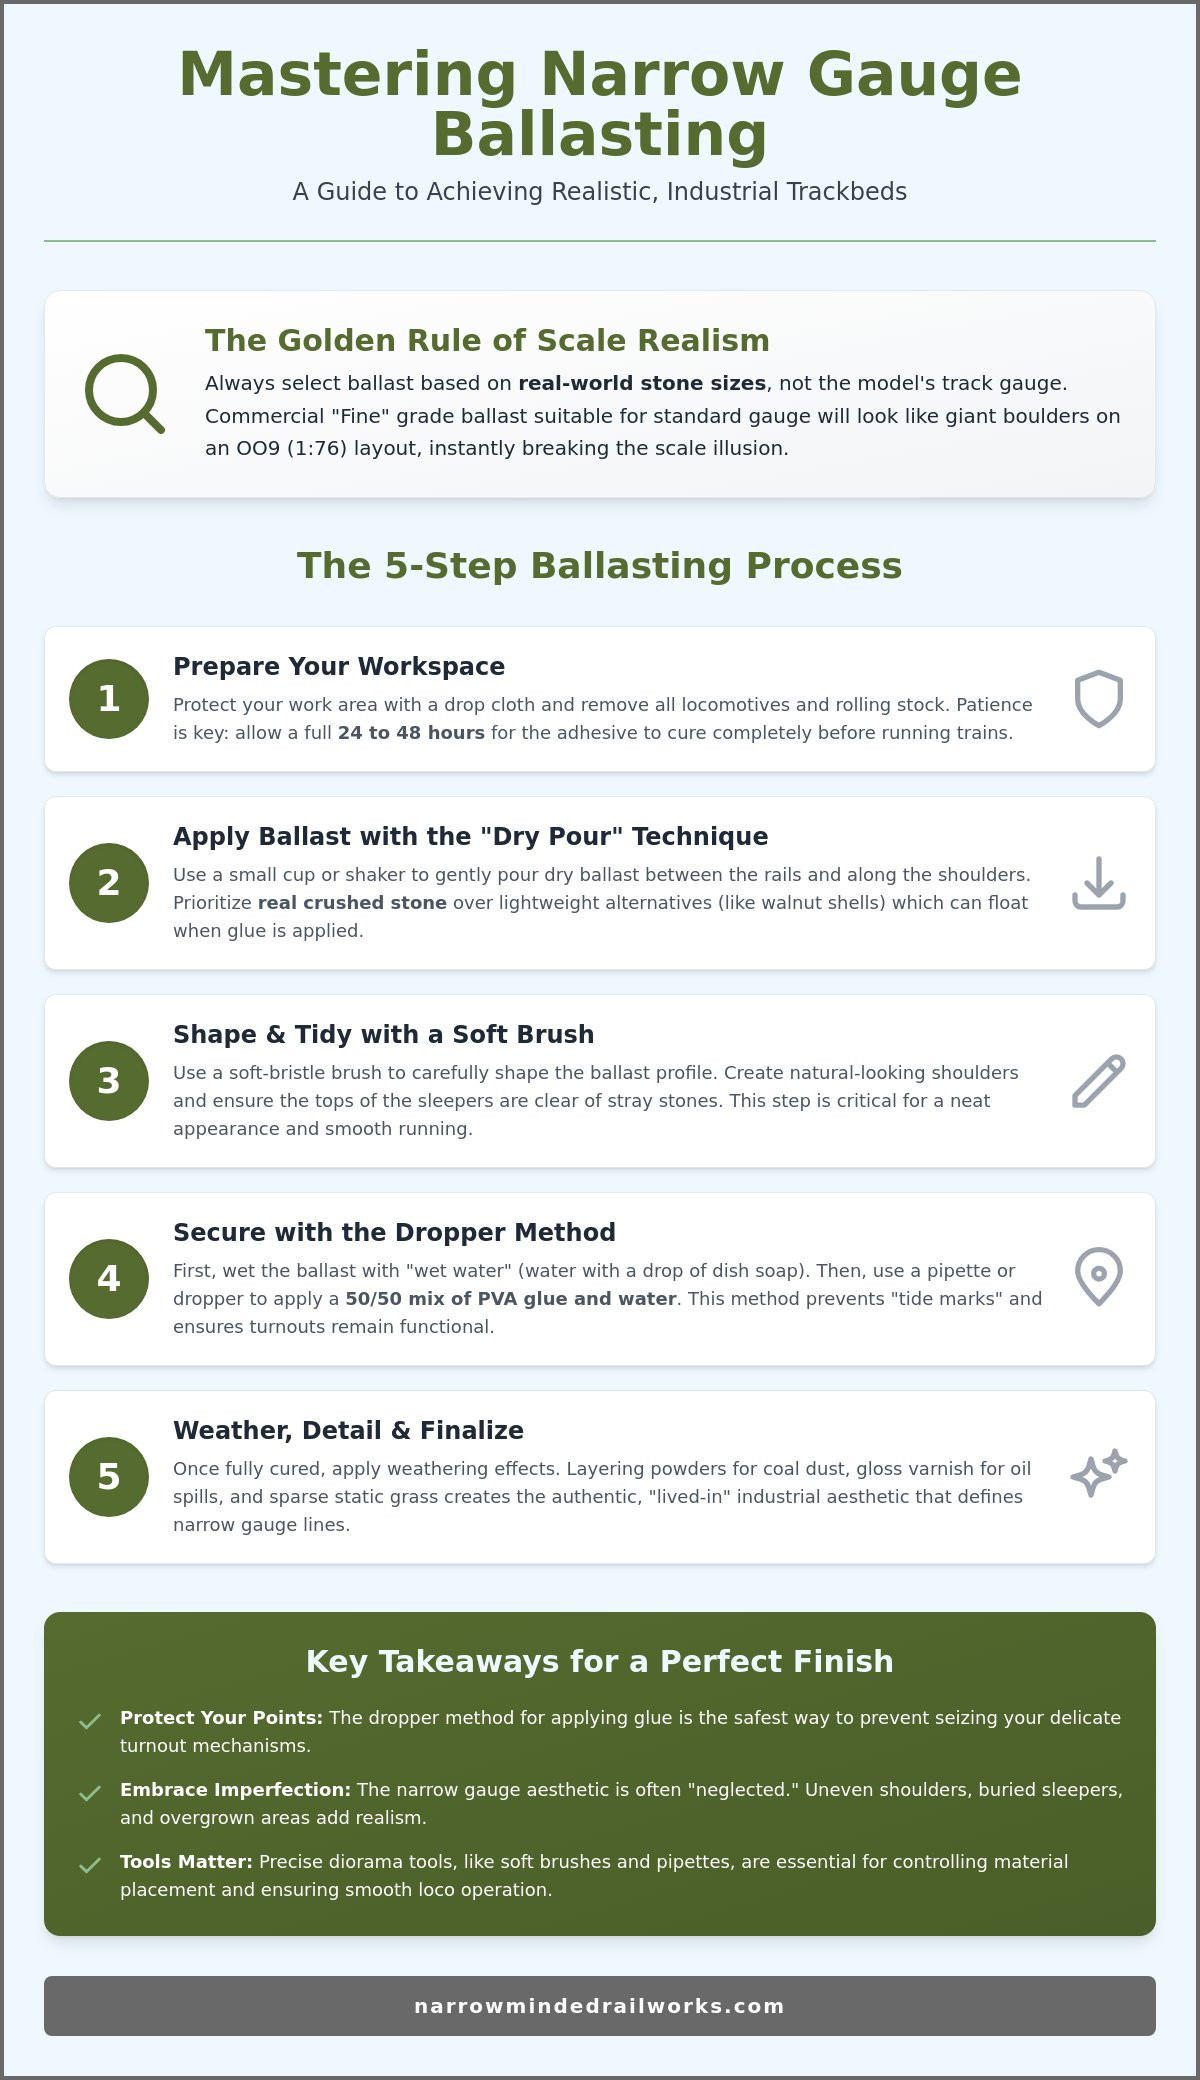
The golden rule of selecting materials is to match the ballast to the real-world stone size rather than the physical distance between your rails. While OO9 track shares the same gauge as N scale, the scale of the sleepers and surrounding environment is 1:76. Using standard gauge "Fine" ballast often looks like giant boulders in this context. Selecting the right grade is the first hurdle in mastering how to ballast model railway track with professional results.
Materials vary significantly in their behavior during application. Real crushed stone, such as those from Arizona Rock & Mineral, is heavy and settles well. In contrast, lighter alternatives like crushed walnut shells often float when you apply liquid adhesive. This floating effect leads to "clumping" that ruins the trackbed texture. We recommend using real mineral ballast for its weight and natural matte finish. For narrow gauge, avoid the temptation of uniform grey. Industrial lines often used whatever local stone was available. This means tans, browns, and dark cinders provide a much more authentic look than pristine granite.
For a small diorama, quantity is often overestimated. A single 10-ounce bag of mineral ballast typically covers several feet of narrow gauge trackbed. If you are working with our bespoke diorama tools and scenery items, you will find that a small shaker of fine stone is usually sufficient for the entire scene. It is always better to have a small amount left over for repairs than to run out mid-pour.
Scale Matching Guide for Narrow Gauge
OO9 Scale (1:76) requires the finest grades available, often marketed as "N gauge" or "Extra Fine." Because the prototype stone was often smaller on rural lines, anything larger looks out of scale. For GN15 (1:24), the larger scale allows you to use "Medium" or OO-gauge ballast. If you are modeling in O-16.5 (7mm), coarser stones are appropriate to represent the heavy-duty nature of industrial mineral lines.
Adhesives: PVA vs. Specialist Ballast Glue
Standard PVA glue presents a specific constraint because its high surface tension causes the liquid to bead on top of the stone rather than soaking in. This often displaces the ballast you have carefully positioned. To solve this, we suggest using specialist matte ballast adhesives or adding a "wetting agent" like dish soap to your mix. Specialist glues are formulated to flow into the gaps between stones without disturbing them. Alternatively, dry-mix adhesives allow you to position the stone and mist it with water. This eliminates the risk of stone movement but requires a very fine mist to avoid creating craters in your trackbed.
Step-by-Step: How to Apply and Shape Your Ballast
Once you have selected your materials, the physical application begins with a dry pour. It is a common mistake to apply adhesive first; however, this makes positioning the stone nearly impossible. Instead, pour your chosen ballast directly onto the center of the track. You should aim for a small mound that runs along the sleepers, which you will then distribute outward. This method allows you to control the volume of material before any permanent bonding occurs.
Precision is vital when learning how to ballast model railway track, so use a soft-bristle brush to level the stone. Gently sweep the ballast from the center toward the edges to create a natural shoulder. If stones sit on top of the sleepers, a light tapping on the rail with a screwdriver handle often settles them into the gaps. A critical step that many modelers overlook is clearing the "chairs", which are the small clips that hold the rail to the sleeper. Any stone left in this area can cause persistent derailments for small OO9 or GN15 wheels.
The Secret Weapon: The Wetting Agent
Modelers often find that liquid glue sits on top of dry ballast like a bubble due to surface tension. This constraint prevents the adhesive from reaching the bottom layers, leading to a brittle trackbed. To solve this, prepare a wetting agent by mixing water with a small amount of Isopropyl Alcohol (IPA) and a single drop of washing-up liquid. Spray this mist from a distance of at least 30 centimeters. This breaks the surface tension and allows the subsequent glue application to flow deeply into the stone without moving a single grain.
Working Around Points and Turnouts
Applying ballast near turnouts presents the risk of glue entering the moving parts and seizing the mechanism. We suggest identifying "no-go" zones, such as the tie-bars and the area where the point blades meet the stock rails. A proactive solution is to apply a tiny amount of grease or light oil to these moving faces before you begin. This prevents stray adhesive from bonding the metal surfaces together. For these complex areas, avoid pouring stone directly. Instead, use a small spoon or tweezers to hand-place individual stones, ensuring the mechanism remains completely clear.
Gluing and Securing for a Permanent Finish
Applying the adhesive is the moment of commitment in the ballasting process. While you might be tempted to use full-strength glue for a faster bond, the high viscosity will simply sit on top of your stone and create an artificial, lumpy texture. We suggest a proactive mixture of 50% PVA glue and 50% water, supplemented with a single drop of liquid soap. This "thin" glue is the standard for anyone learning how to ballast model railway track because it flows effortlessly into the microscopic gaps between the stones.
Utilize a pipette or a small dropper to apply the mixture. Instead of dropping the glue directly onto the center of the track, apply it slowly to the shoulder or the side of the trackbed. If you have applied your wetting agent correctly as described in the previous section, you will witness a "wicking" action where the glue is instantly pulled into the ballast. Continue this process until the stone looks saturated but not flooded. Once the glue is applied, you must adhere to the 24-hour rule. Even if the surface appears dry after a few hours, the core of the trackbed remains soft. Touching or running trains too early will cause the track to shift or the ballast to flake away.
Managing the "White Bloom" Effect
Certain brands of PVA can dry with an unattractive white, chalky residue known as "white bloom". This constraint often occurs when the glue is applied too thickly or in humid conditions. You can resolve this by applying a very thin wash of diluted black or brown acrylic paint once the ballast is completely dry. This not only hides the residue but also begins the weathering process. For more advanced tips on finishing, you may find our guide on Painting 3D Printed Models helpful for achieving a professional look across your entire layout.
Cleaning the Rail Tops
Electrical conductivity is your primary priority once the adhesive has cured. Even a tiny amount of dried glue on the rail head will cause your small OO9 or GN15 locomotives to stall. Conduct a "fingernail test" by running your nail along the top of the rail; if you feel any snags, there is glue present. Use a track rubber or a small piece of hard wood to polish the rail heads until they shine. Avoid using heavy abrasives that might scratch the metal. If you need precision equipment to help with this final stage, consider browsing our range of diorama tools and scenery to ensure your trackwork remains in peak condition.
Perfecting the Industrial Look for Narrow Gauge
The final stage of learning how to ballast model railway track involves moving beyond structural stability to achieve artistic realism. While mainline railways often maintain clean, uniform stone, narrow gauge environments are defined by their "lived-in" character. Pristine ballast can look out of place on a rural or industrial layout, so applying weathering effects is the proactive solution to ground your scene. You can replicate years of heavy use by applying a thin wash of oily black paint around engine sheds or sprinkling real coal dust near coaling stages. Rust streaks from the rails often bleed into the stone, which you can simulate with burnt sienna pigments applied with a dry brush.
Industrial lines frequently feature "infilled" track where the sleepers have sunk into the earth over decades. To achieve this look, apply a layer of very fine sand or sifted garden soil over your secured ballast. This creates the appearance of a trackbed that has been reclaimed by its environment. Integrating greenery is another essential step. You can use static grass and small tufts of weeds placed directly between the sleepers to suggest a line that sees infrequent traffic. This contrast between the hard stone and soft vegetation is what gives OO9 and GN15 layouts their distinct charm.
Integrating 3D Printed Scenery
Placing scenery items like phone boxes, petrol pumps, or trackside huts directly on top of finished ballast can sometimes make them appear to be "floating" on the surface. We acknowledge this constraint can ruin the perspective of your diorama. To solve this, you should bed-in your 3D printed items by clearing a small footprint in the dry stone before gluing or by using fine silt to fill the gaps around the base of the model. Utilizing a set of Essential Diorama Tools allows for the precise placement of these details without disturbing the surrounding trackwork.
Final Quality Check
Before you consider the project complete, a rigorous mechanical check is necessary to ensure smooth running. We recommend running a "test wagon", perhaps one from our OO9 wagon kits, through every point and turnout on the layout. You should listen carefully for any "clicks" or resistance. These sounds often indicate a stray stone hitting the wagon's chassis or a grain of ballast wedged in the rail chair. If you find an obstruction, use a small chisel or a sharp hobby knife to remove the offending stone. Industrial weathering is the process of applying pigments, washes, and textures to a model railway trackbed to replicate the gritty, unkempt environment of working narrow gauge railways. Once the track is clear and the aesthetics are settled, your layout is ready for its first locomotive.
Bringing Your Narrow Gauge Scene to Life
Mastering how to ballast model railway track is more than a simple scenery task; it's the definitive step that grounds your layout in reality. By selecting scale-appropriate stone and utilizing the wetting agent method, you ensure that your trackbed is both stable and visually authentic. We recognize that applying adhesive near complex turnouts can feel risky, but utilizing precise diorama tools and grease guards provides a reliable way to maintain smooth operation. Once your ballast is bone dry and weathered to an industrial finish, the character of your line will truly begin to shine.
We're dedicated to helping you achieve this level of detail through our specialist OO9 and GN15 designs. These kits are 3D printed for high detail and are available with worldwide shipping to support your modeling journey wherever you're located. Browse our range of Diorama Tools and Narrow Gauge Kits to discover the perfect components for your next project. Your hard work has laid the foundation for a stunning railway, and we look forward to seeing the industrial world you create.
Frequently Asked Questions
What is the best scale ballast for OO9 layouts?
N gauge or "Fine" grade ballast is the most appropriate choice for OO9 layouts. Although the scale is 1:76, the narrow track gauge and smaller prototype stone sizes on rural lines require a finer material to look realistic. Using standard OO ballast often appears like giant boulders. If you find the stone looks too large, switching to an "extra-fine" grade provides a more authentic, to-scale appearance for your narrow gauge scenes.
How do I prevent ballast from sticking to my point blades?
You can prevent adhesive from seizing your point work by applying a small amount of light oil or grease to the moving blades before you begin. This constraint often occurs when liquid glue wicks into the mechanism during the application process. A proactive solution is to hand-place individual stones around the tie-bar using tweezers rather than pouring. This ensures the moving parts remain clear of both stone and glue.
Can I use real sand for model railway ballast?
Real sand is an excellent material for simulating the "infilled" or sandy look common on industrial narrow gauge lines. However, raw sand can contain organic matter or metallic particles that might damage your locomotives. To solve this, you should bake the sand in an oven to sterilize it and use a fine sieve to remove oversized grains. This ensures a clean, safe material that integrates perfectly with your 3D printed scenery.
Why does my ballast turn green or white after gluing?
A white residue is usually "white bloom" caused by applying PVA glue too thickly or in cold, damp conditions. A green tint can occur if the minerals in certain real-stone ballasts react with the acidity in the glue. You can resolve these issues by applying a thin wash of diluted acrylic paint once the trackbed is dry. This covers the discoloration and provides an initial layer of realistic weathering for your industrial layout.
How long does it take for model railway ballast glue to dry?
Most ballast adhesives require a full 24 hours to cure completely. While the surface may feel dry to the touch after a few hours, the core of the trackbed often remains soft and vulnerable to shifting. If you are working in a humid environment, we recommend waiting 48 hours before running trains. Adhering to this timeframe prevents the stone from flaking away and ensures a permanent, stable foundation for your track.
Is it better to ballast track before or after painting the rails?
It is more effective to paint and weather your rails before you begin learning how to ballast model railway track. Painting the rail sides first allows you to reach all the metal surfaces without getting paint on your clean stone. Once the rails are dry, the ballast application will naturally cover the bottom of the rail web. This sequence creates a much cleaner finish and prevents the "messy" look of stray paint on your ballast shoulders.
How do I remove ballast if I make a mistake?
If you need to remove secured ballast, you can soften the PVA-based adhesive by applying warm water or Isopropyl Alcohol (IPA) to the area. Let the liquid soak in for several minutes until the bond begins to fail. You can then gently scrape the ballast away with a small chisel or screwdriver. This process allows you to correct errors or replace track sections without causing permanent damage to the baseboard or surrounding scenery.
Do I need to ballast my track if I am using a temporary layout?
Ballasting is generally a permanent process that makes track removal difficult, so it isn't recommended for temporary setups. If you want a realistic look for a short-term layout, you can use foam or rubber track beds that mimic the appearance of stone. This provides the aesthetic benefit of a raised trackbed without the commitment of glue. For permanent dioramas, however, mastering how to ballast model railway track is the best method for securing rails.